≠
The social media landscape is forever changing and people are constantly on the lookout for eye-catching content.
Yes, of course you can still create awesome images, but why not take it a step further by bringing those images to life with a bit of animation. Not only are you more likely to increase your engagement, you’ll be setting yourself apart from your follow creators who haven’t quite caught on yet.
There’s more than one way to go about it, but in these next few steps I’ll show you how to animate your images with the help of Photoshop.
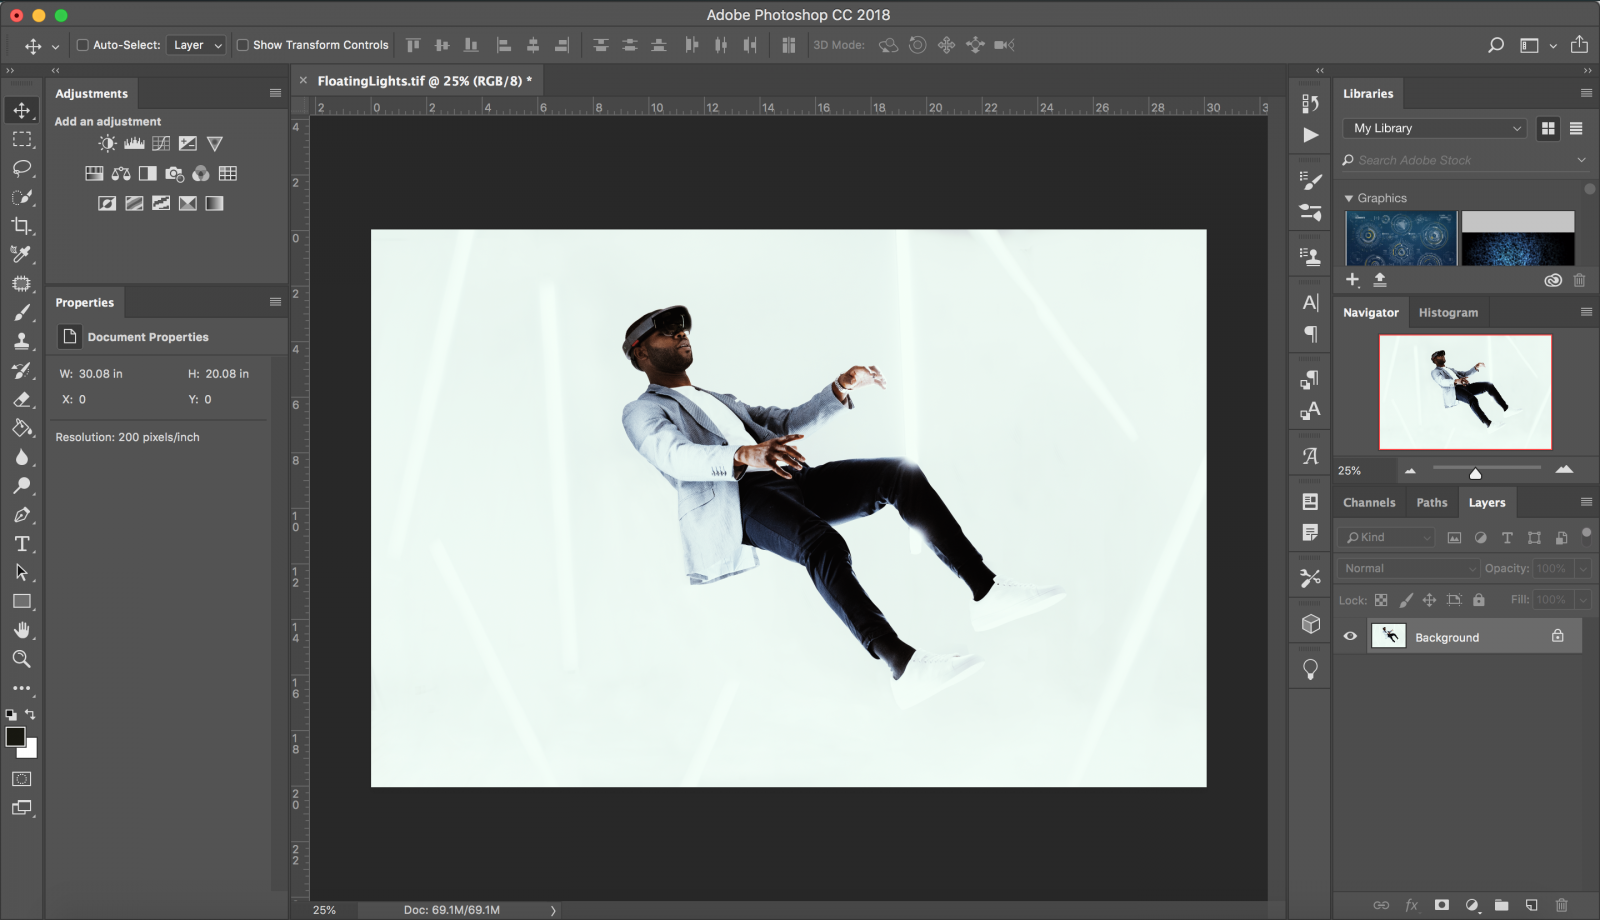
Step 1: Select Your Image
This will be the easiest of all the steps. Select an image of your choosing and open it up into photoshop. If you’re new to photoshop try to go for an image that’s not too complex because from here we’ll be separating the parts of the image we want to animate from the background.
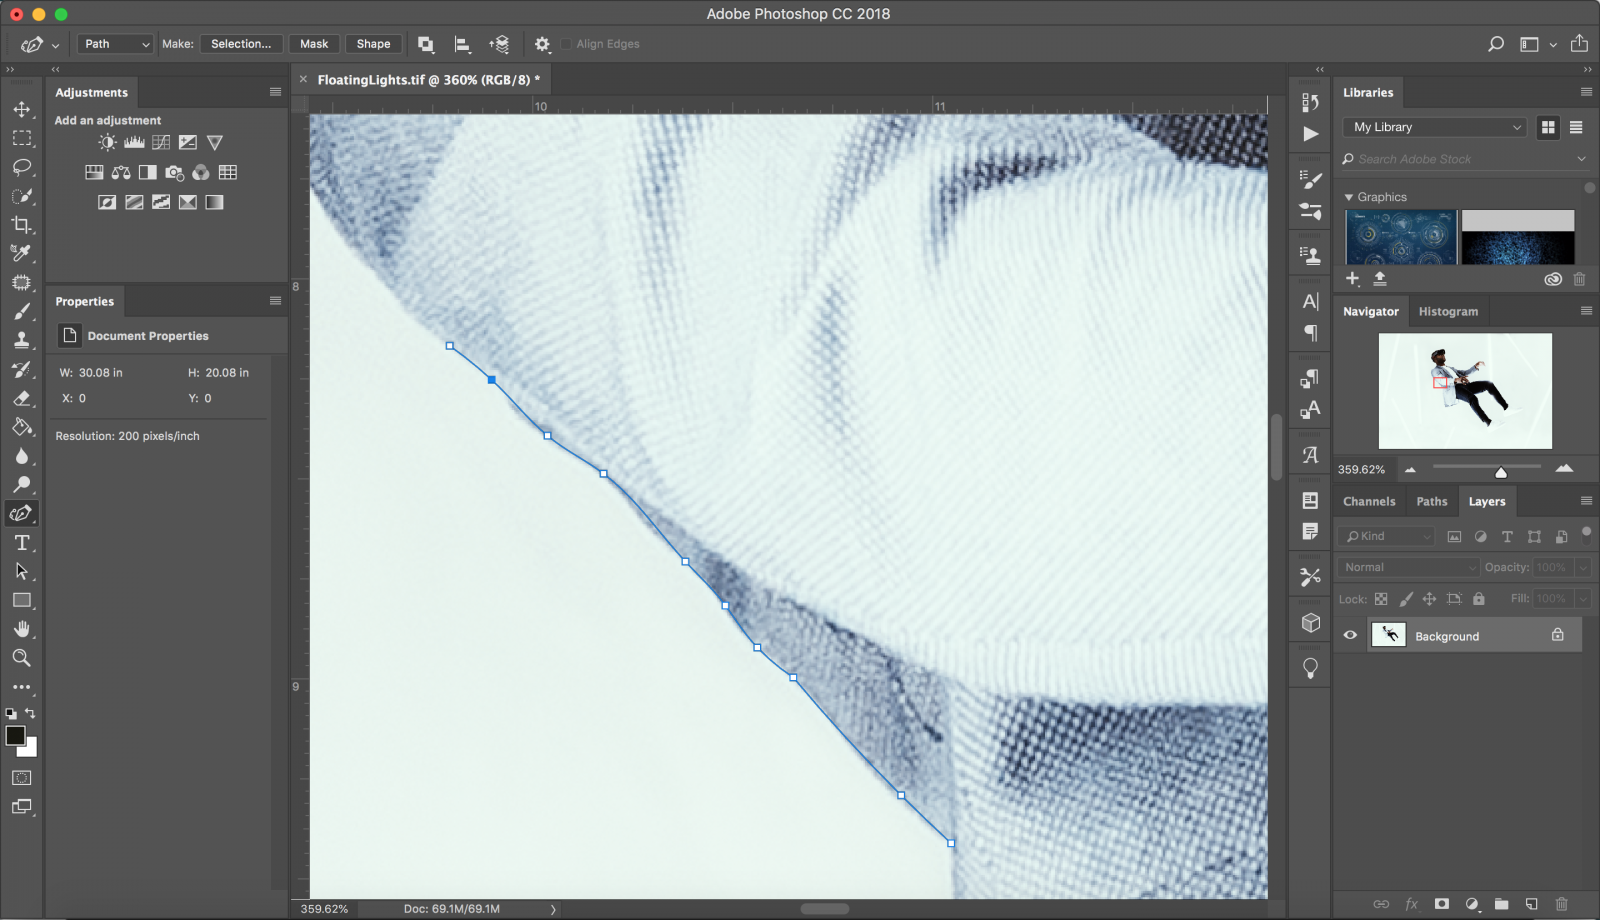
Step 2: Separate Moving Parts From Background
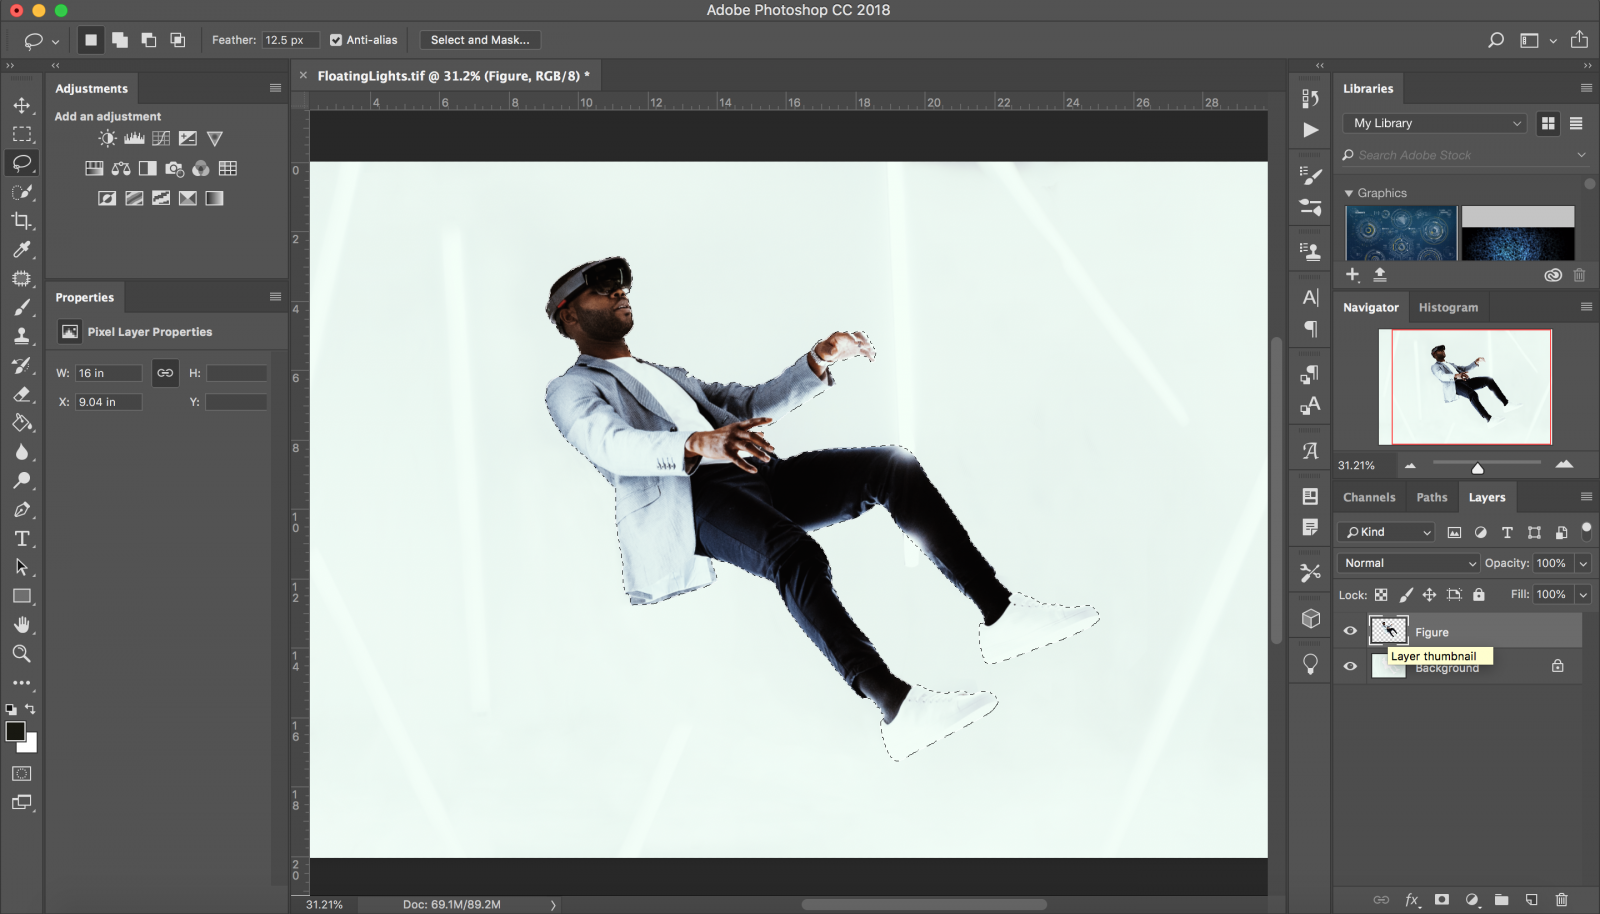
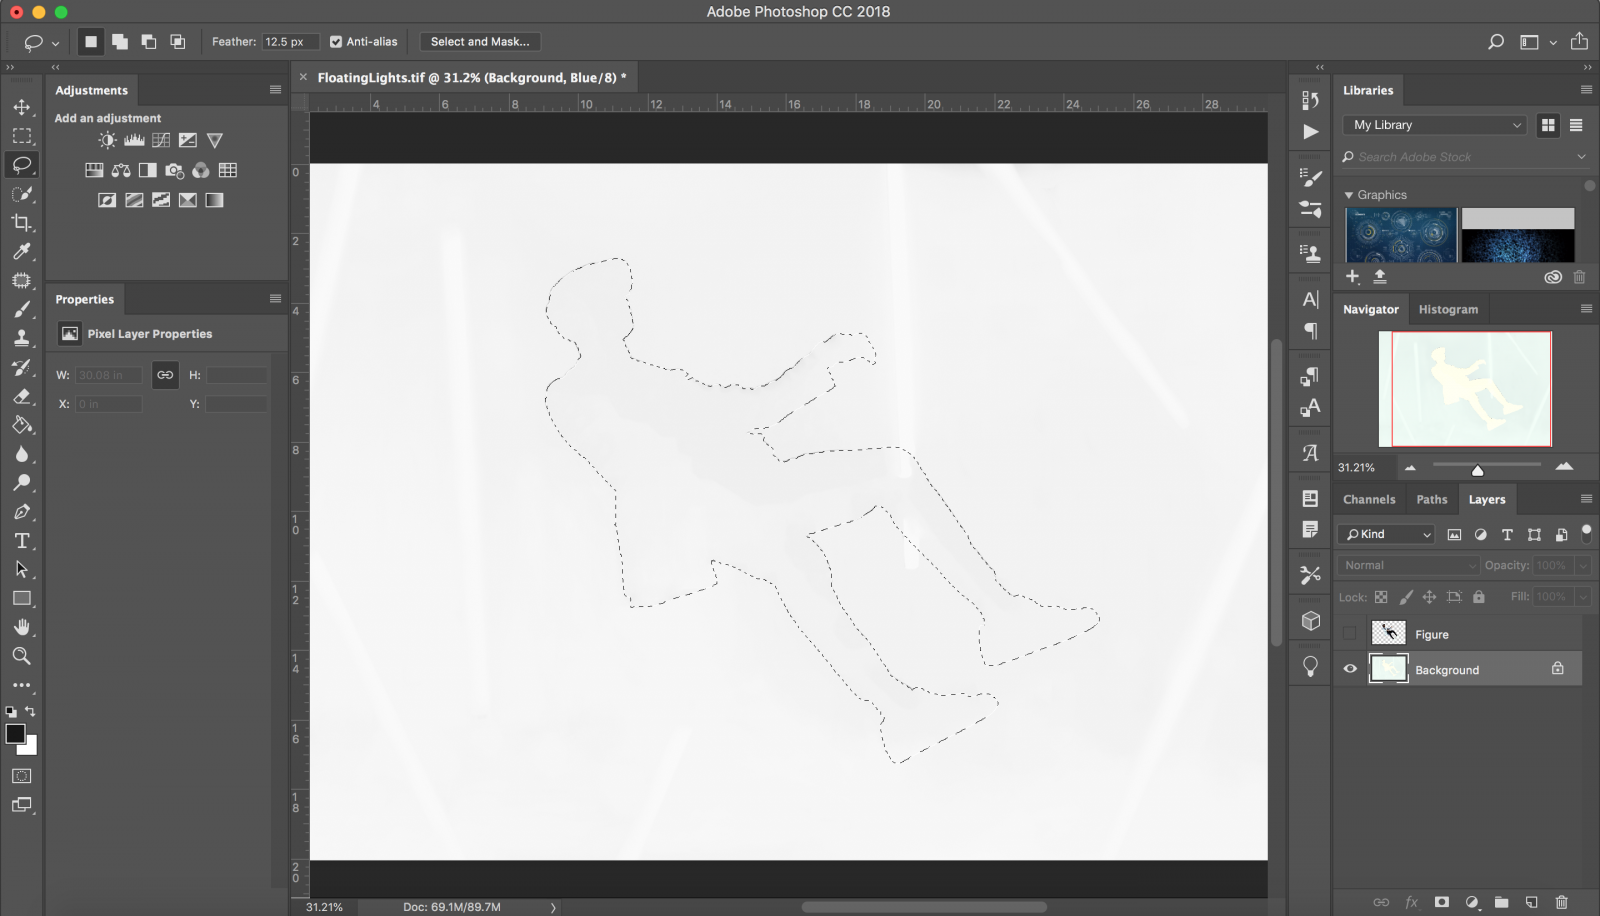
This part can get a bit tedious depending on what image you chose to animate. While you can use any selection tool you’re most comfortable with, I recommend using the pen tool to get the most accurate selection. The better your selections are the cleaner your final animation will look. I will be separating the figure from the background to have him float between the lights.

Once you have your image traced with the pin tool, you will right click, then choose “make selection” from the dialogue box.
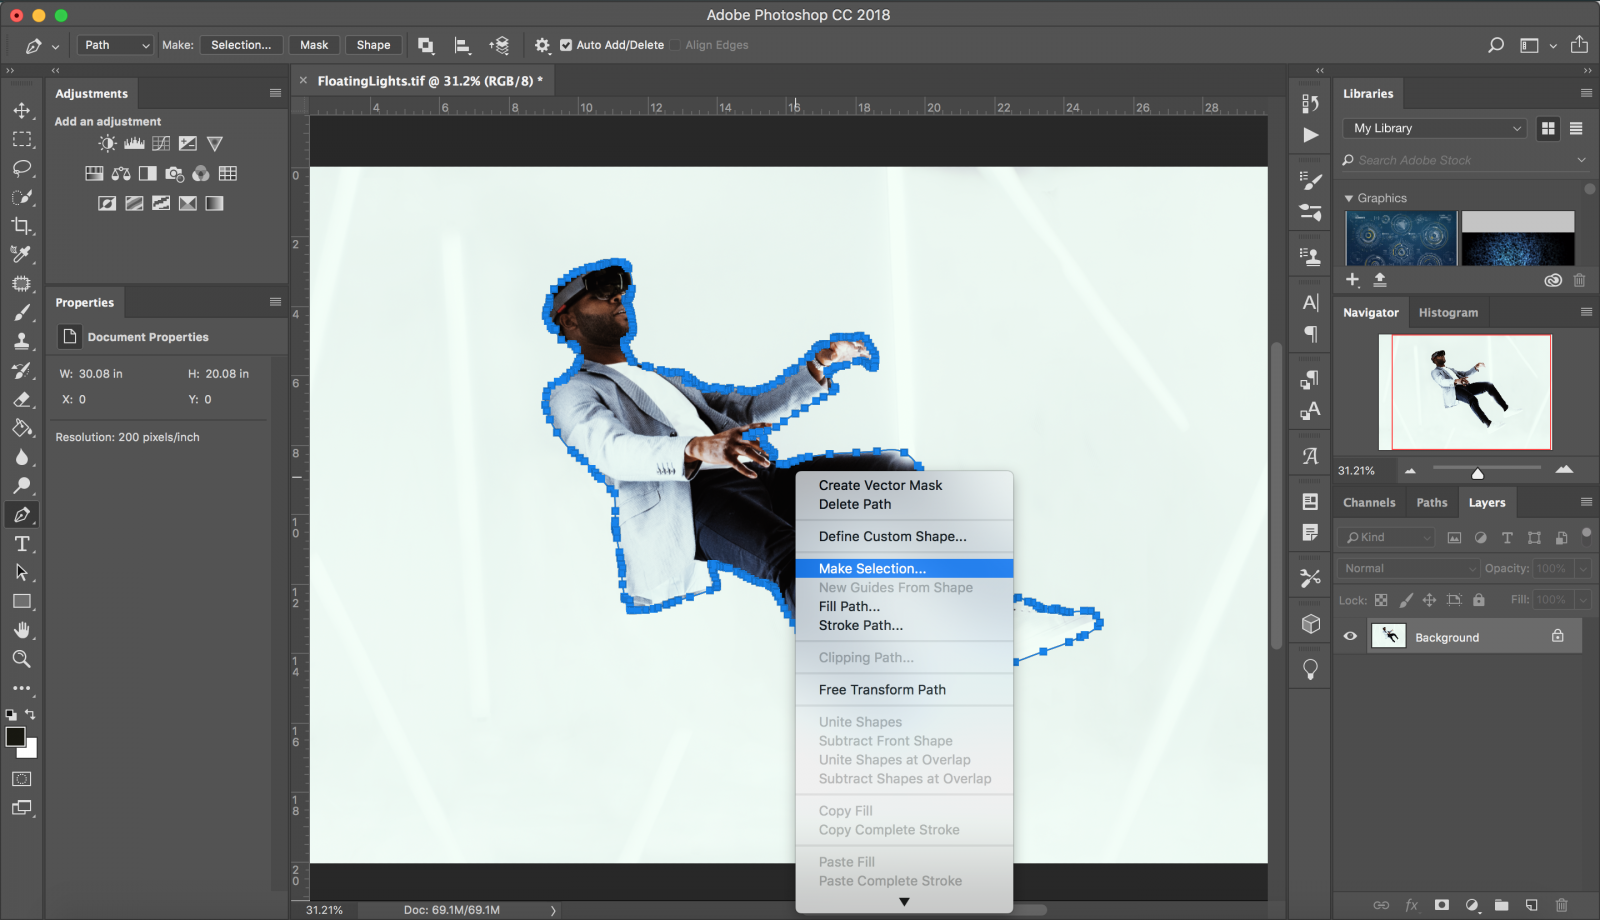
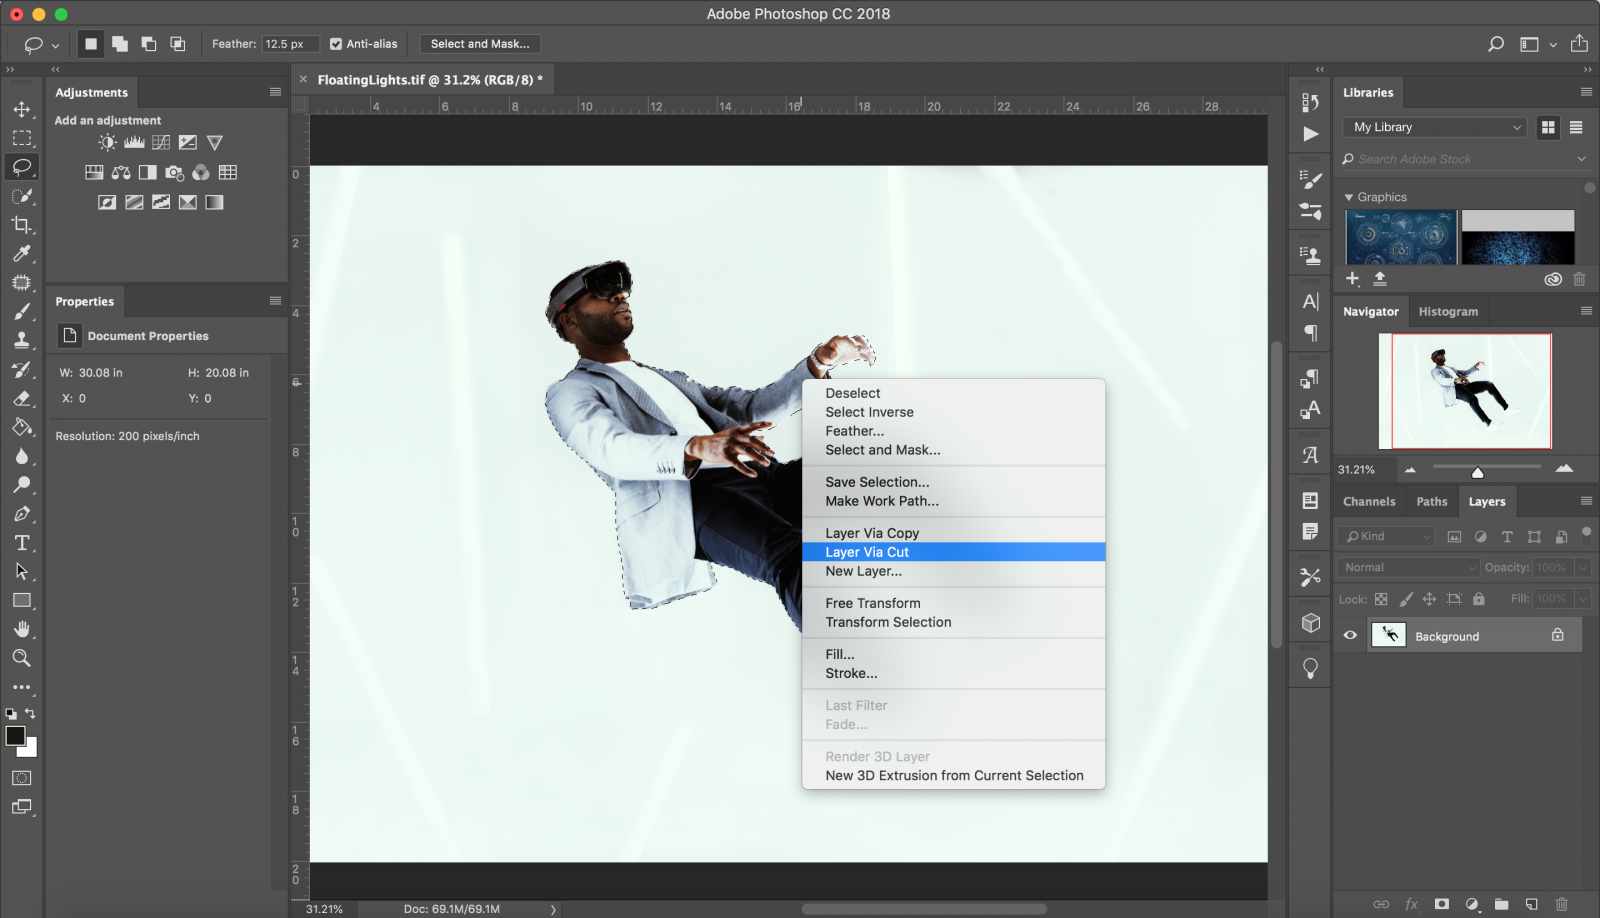
From there, go ahead and choose any other selection tool, for instance the Lasso tool (keyboard shortcut “L”). You will right click again and choose “Layer Via Cut”, this will separate your image that will be animated from the background.
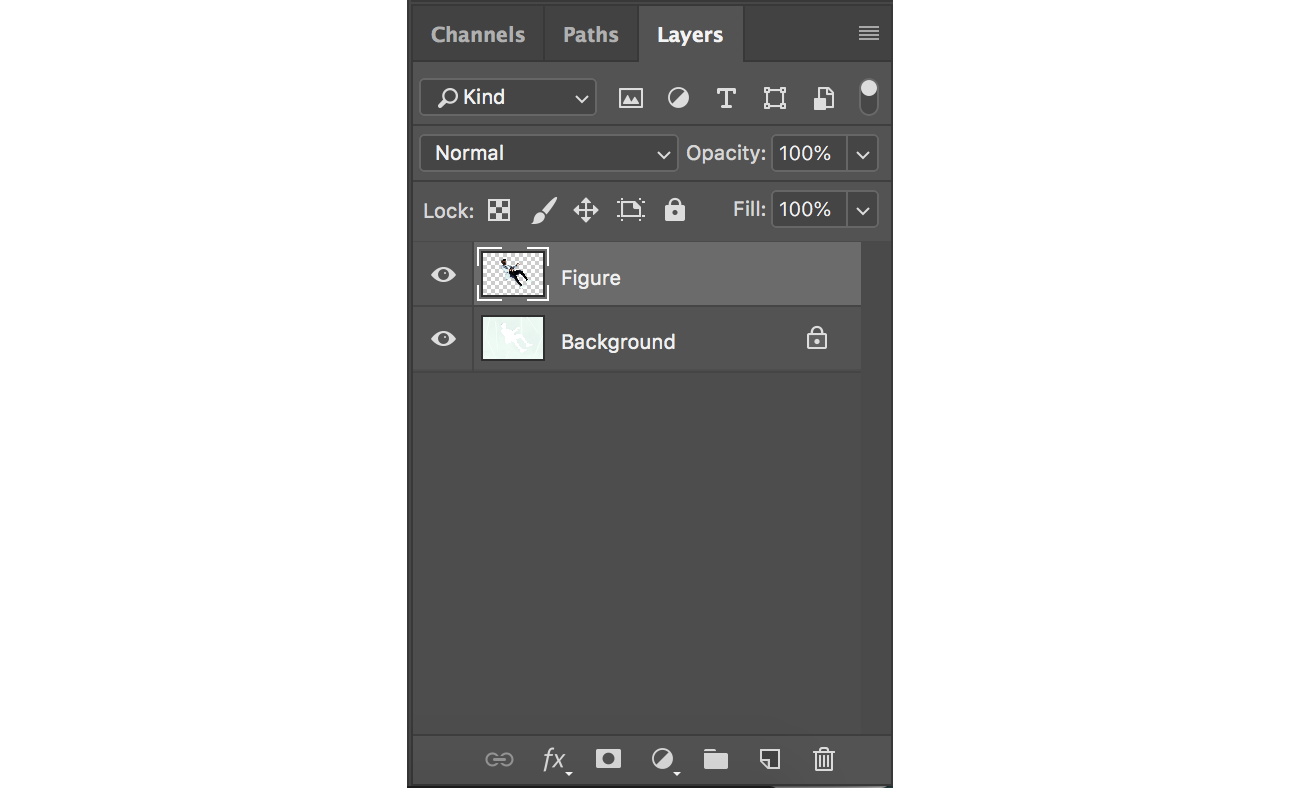
Step 3: Fill In + Clean Up Background
You will now have two layers in your layers panel – the background, and your selection. You can rename this layer anything you like but I will name mine “Figure” for this tutorial.
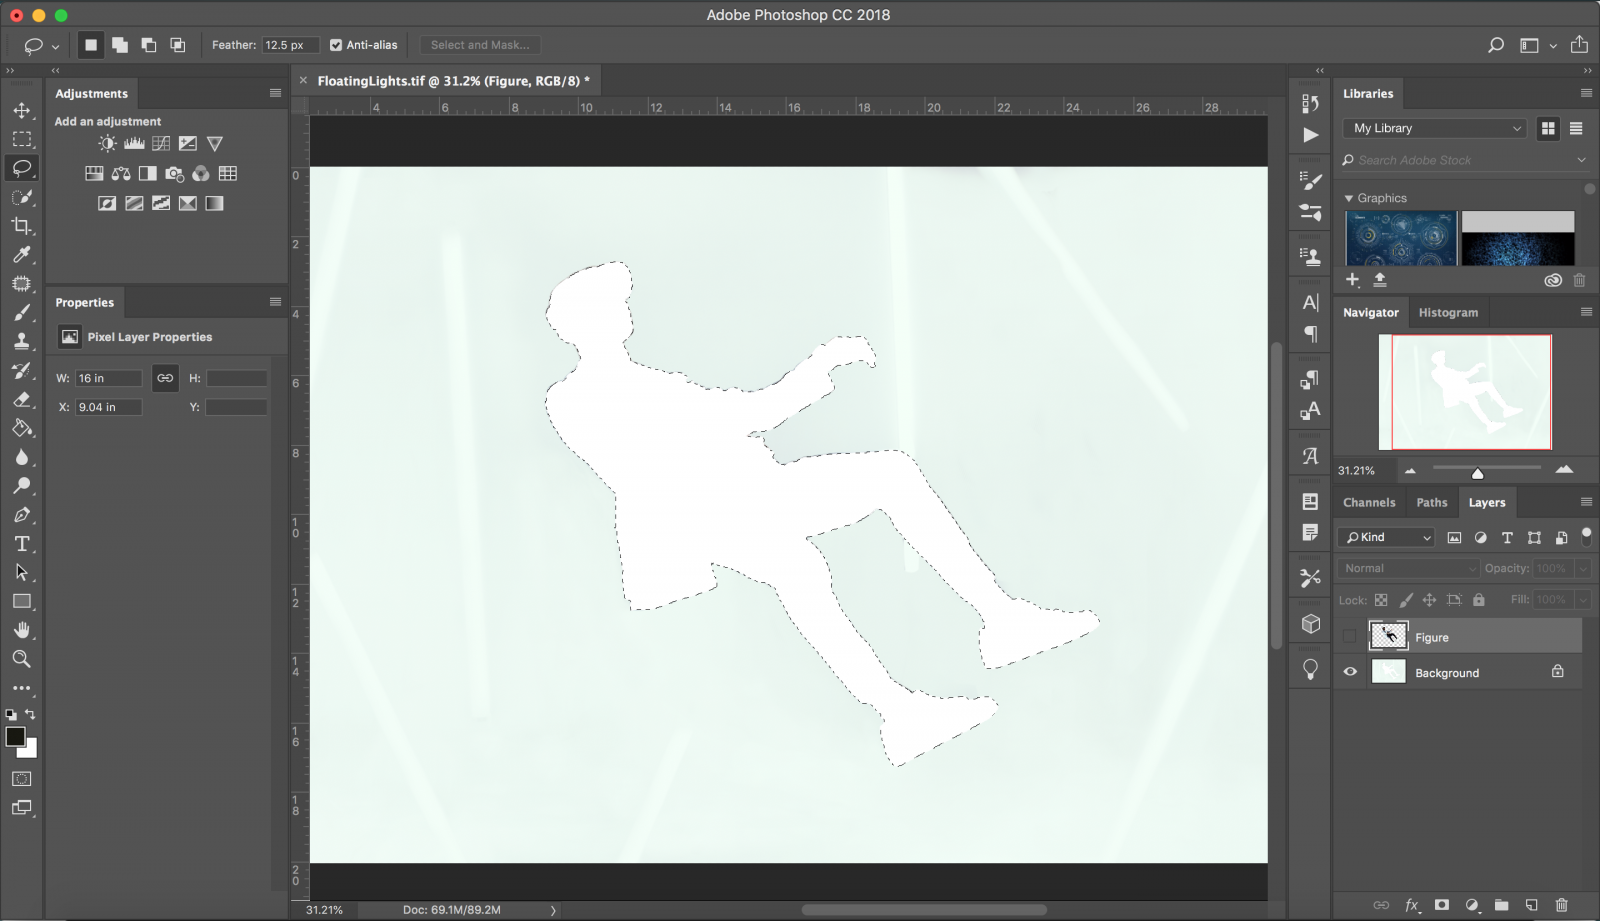
After you rename your layer, hover your cursor over the image thumbnail of your cut-out in the layers panel. While doing so, hold down “command” on your keyboard until a small marquee box appears. Then click on the image thumbnail to select it.
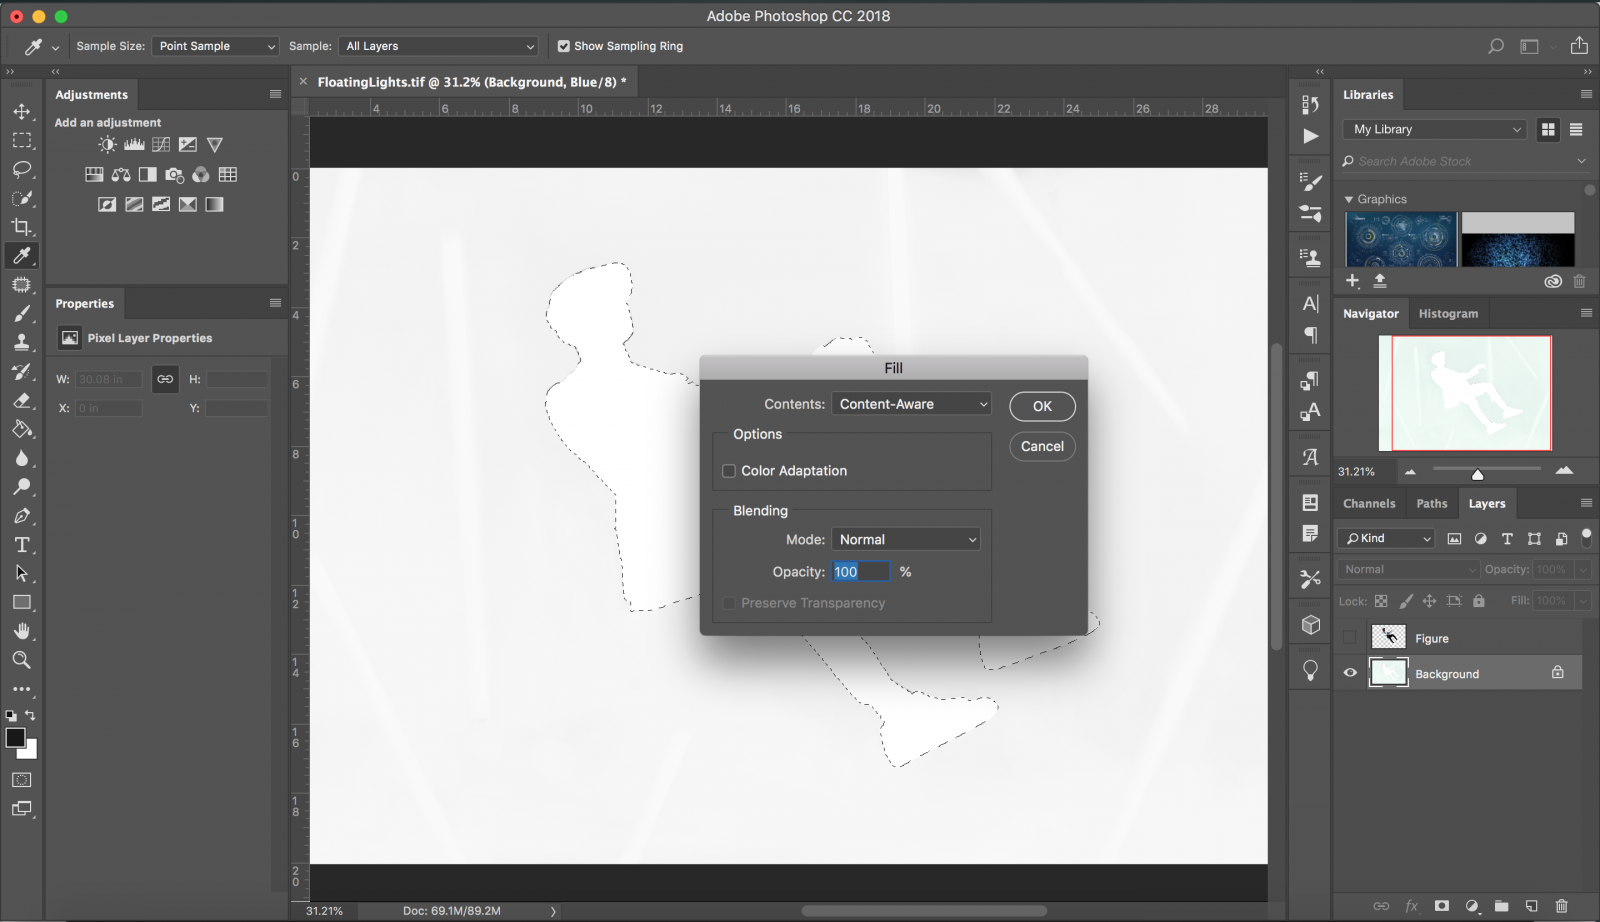
Once selected, hide the layer of your cut-out with the “eye” icon to the left of the layer, then select your background layer to make it active.
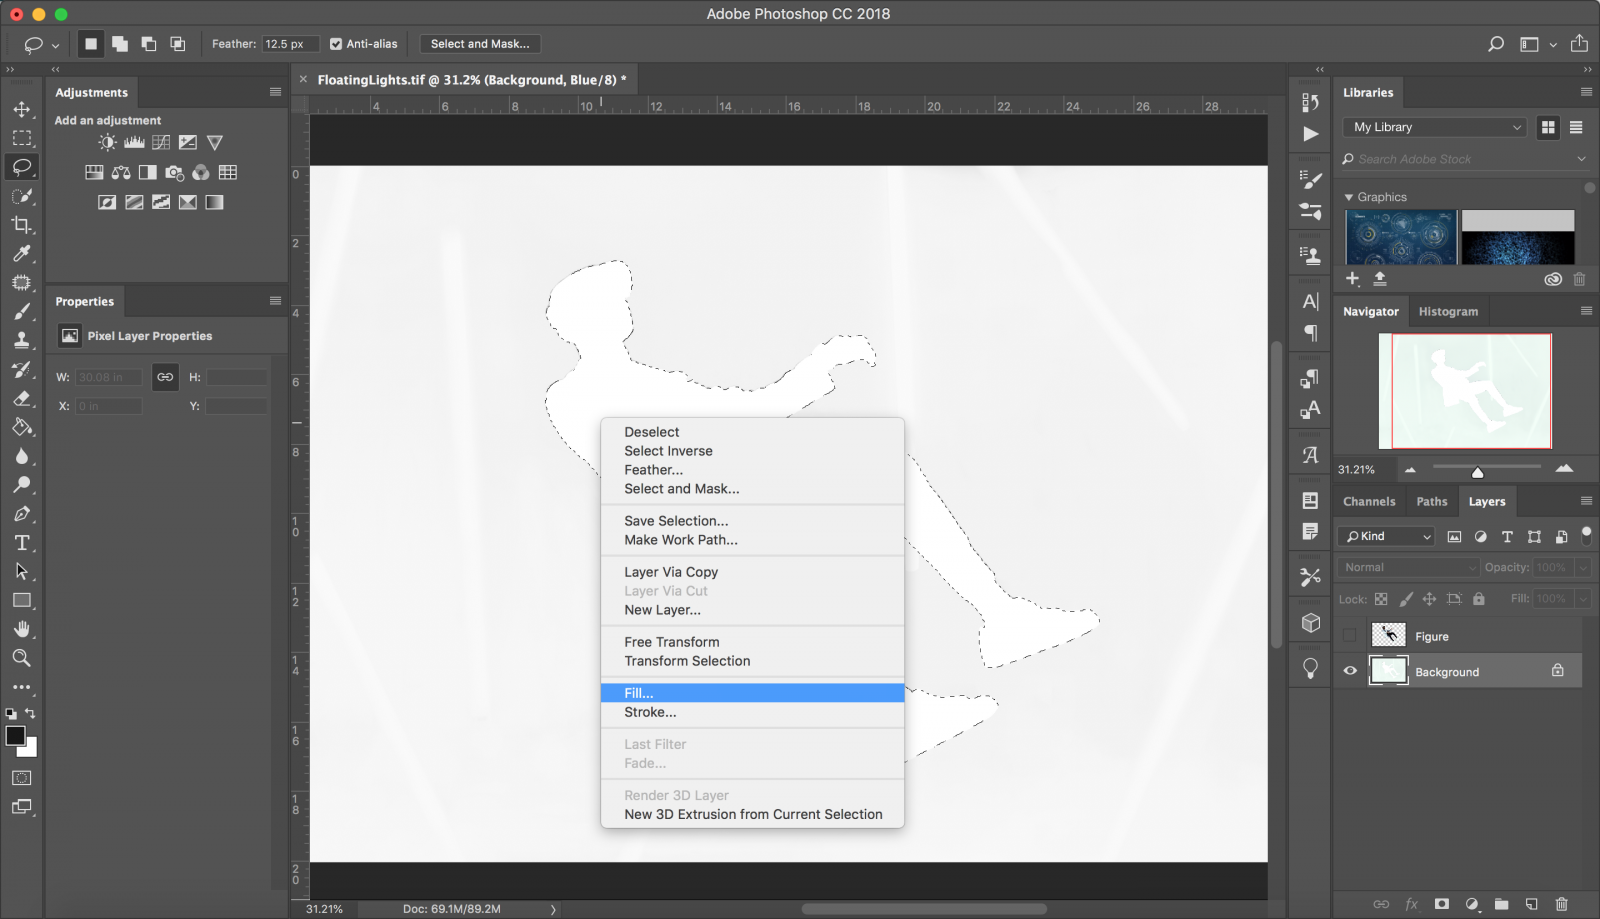
Now right click inside the empty space where your cut-out should be with the lasso tool still selected and choose “fill”. Another dialogue box will appear and you will see an option that says “contents”, now choose “content-aware” from the list. Photoshop will do its best to fill in the missing parts of your background. If some of the background is not to your liking, you can fix it with another round of content aware, clone stamp tool, or healing brush tool.
Step 4: Animation
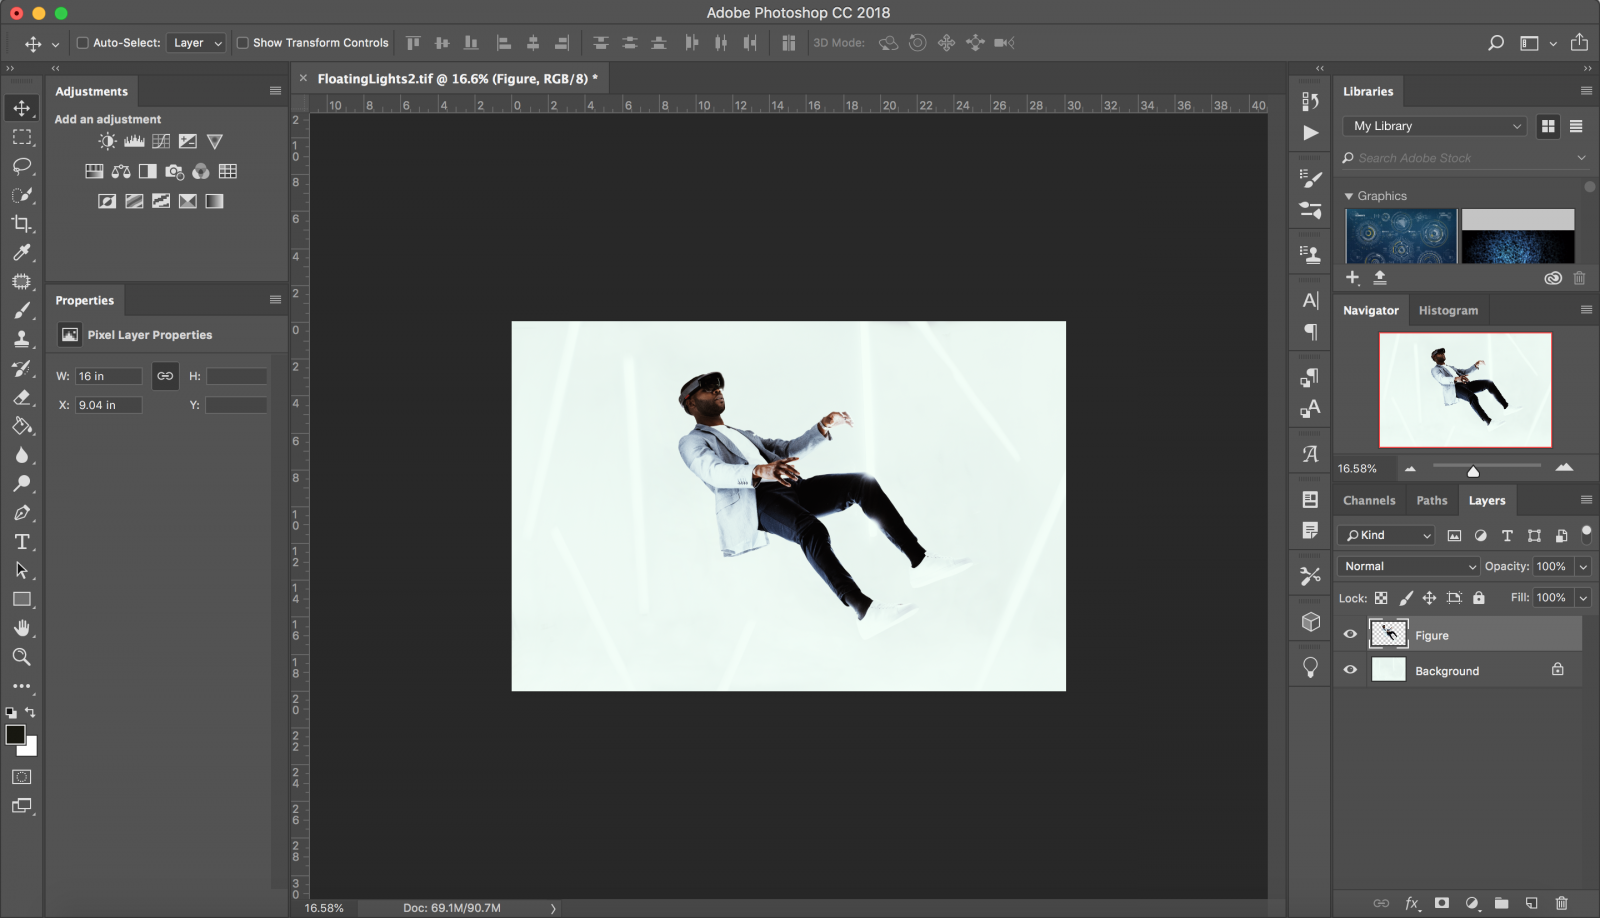
Now that we have the image we want to animate separate from the background, we can add motion to it. First, make your cut-out layer visible by clicking on the box next to the layer where you clicked on the “eye” icon.
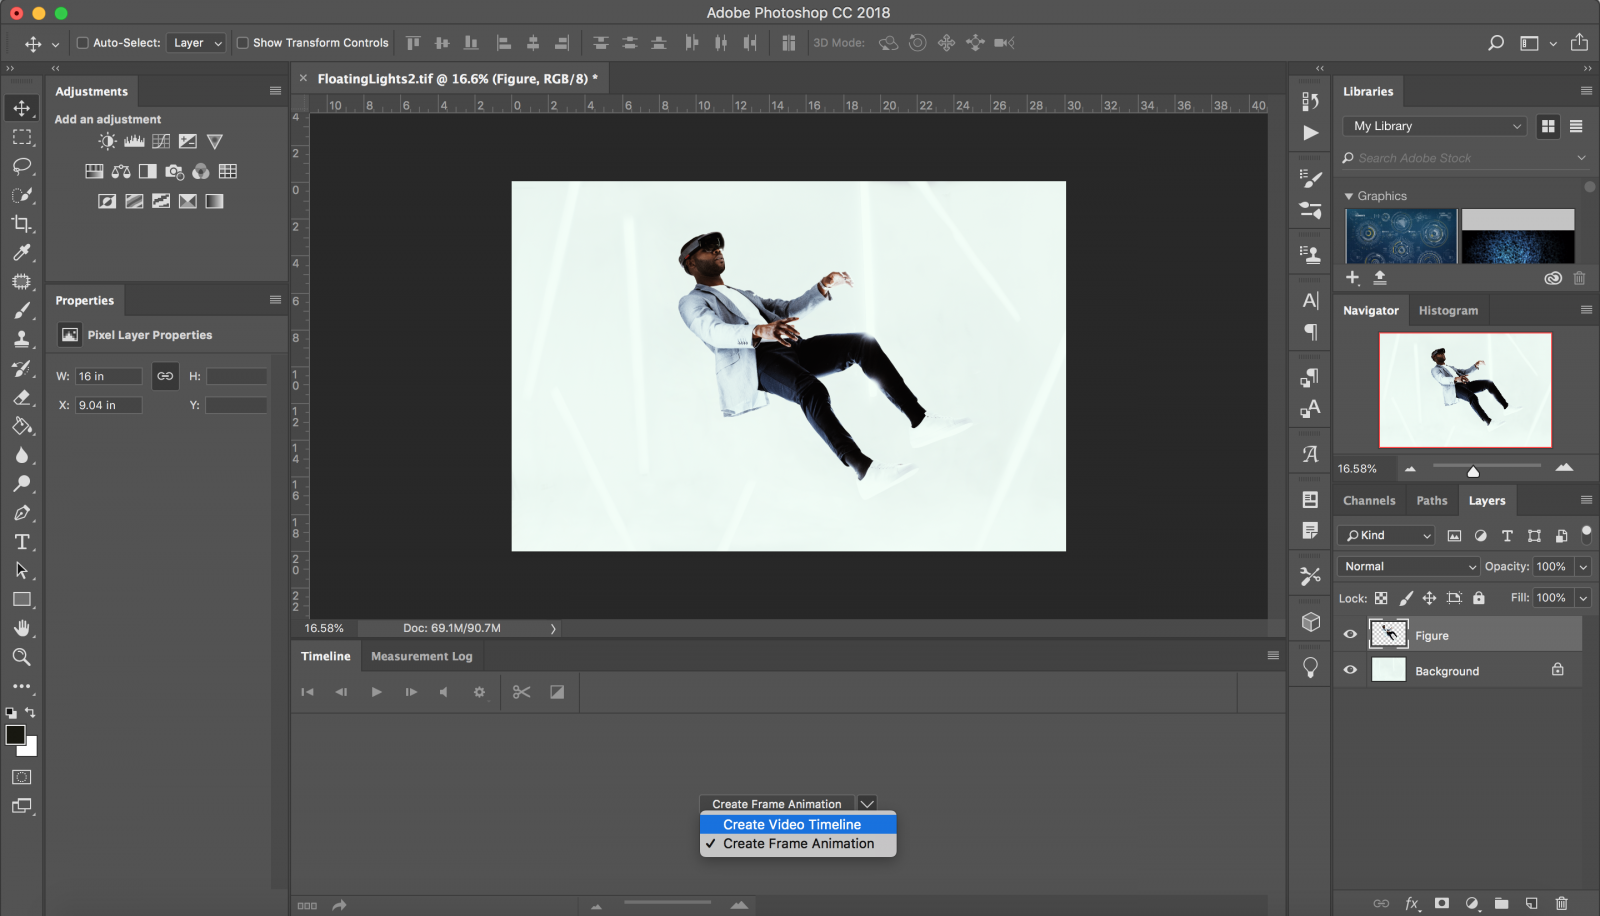
With both layers visible, select the “Window” tab at the top of your screen and click on “Timeline”. This will open another tab group in photoshop.
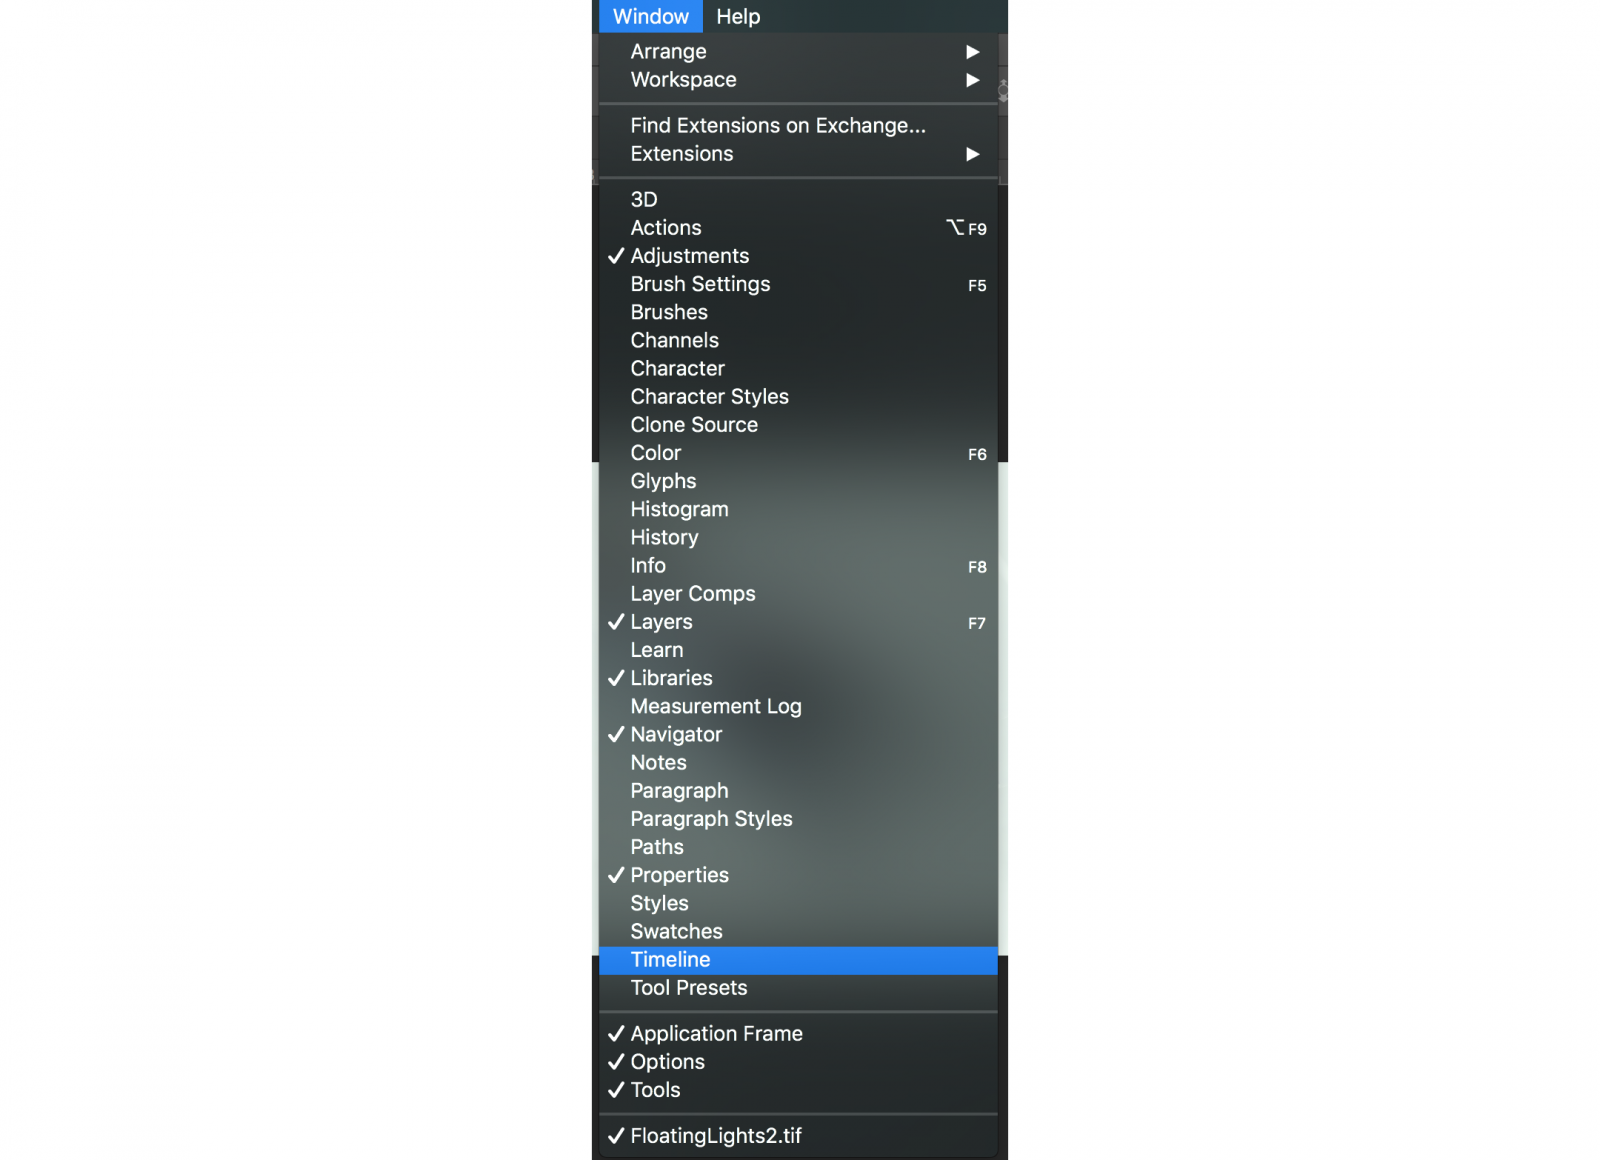

Click on the downward arrow and select “Create Video Timeline”. As it implies, this will create a video timeline for your image, this will be key for animating your image.

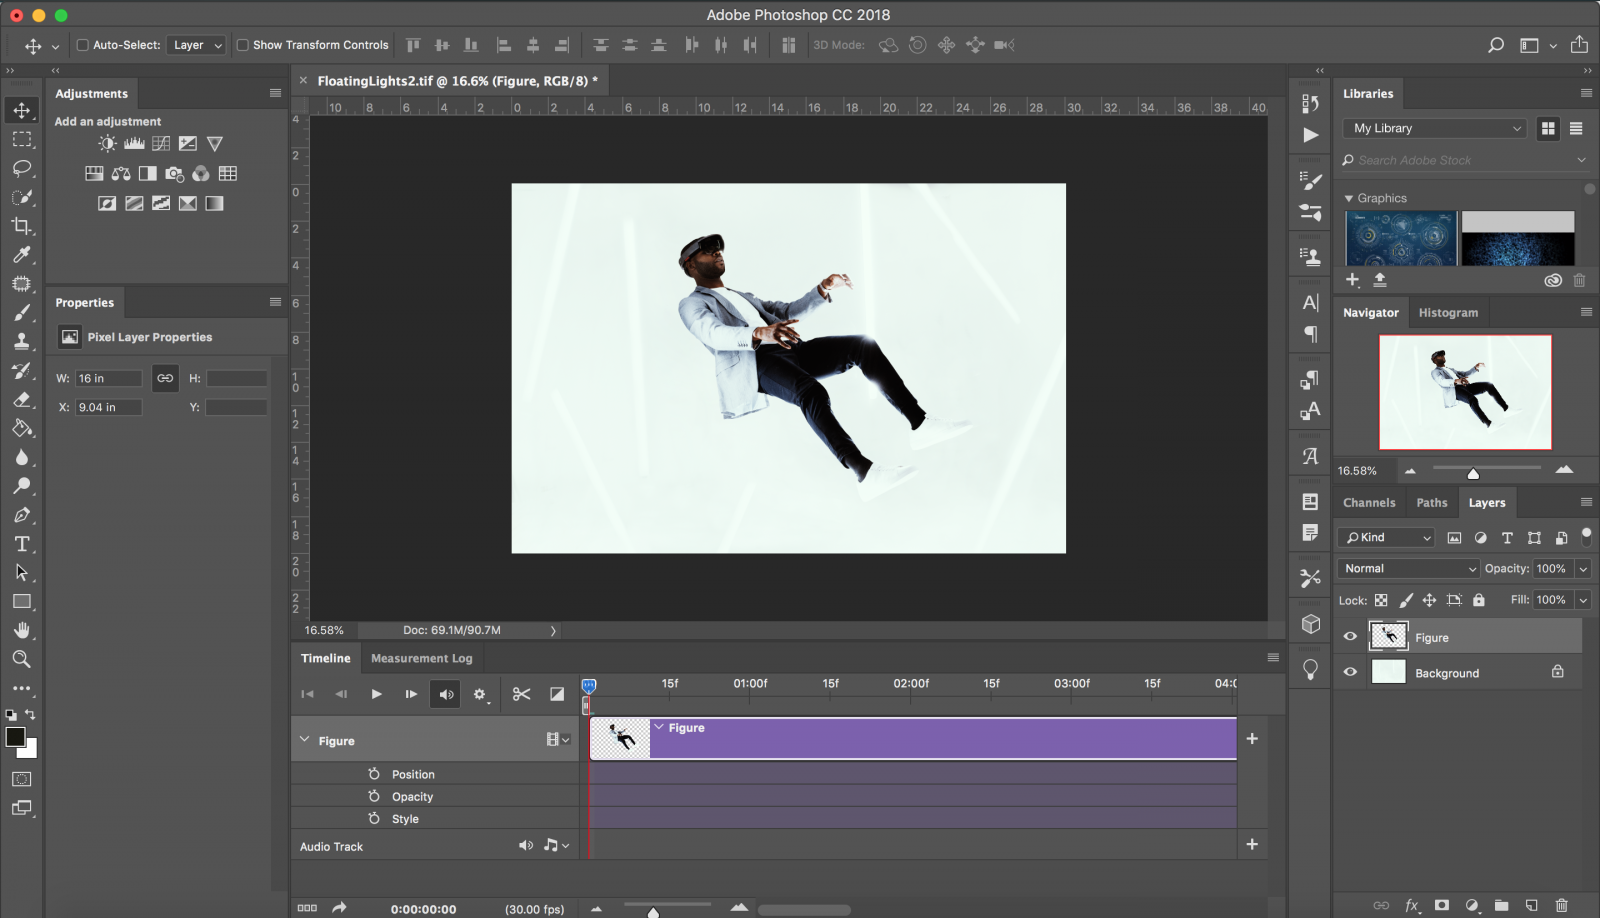
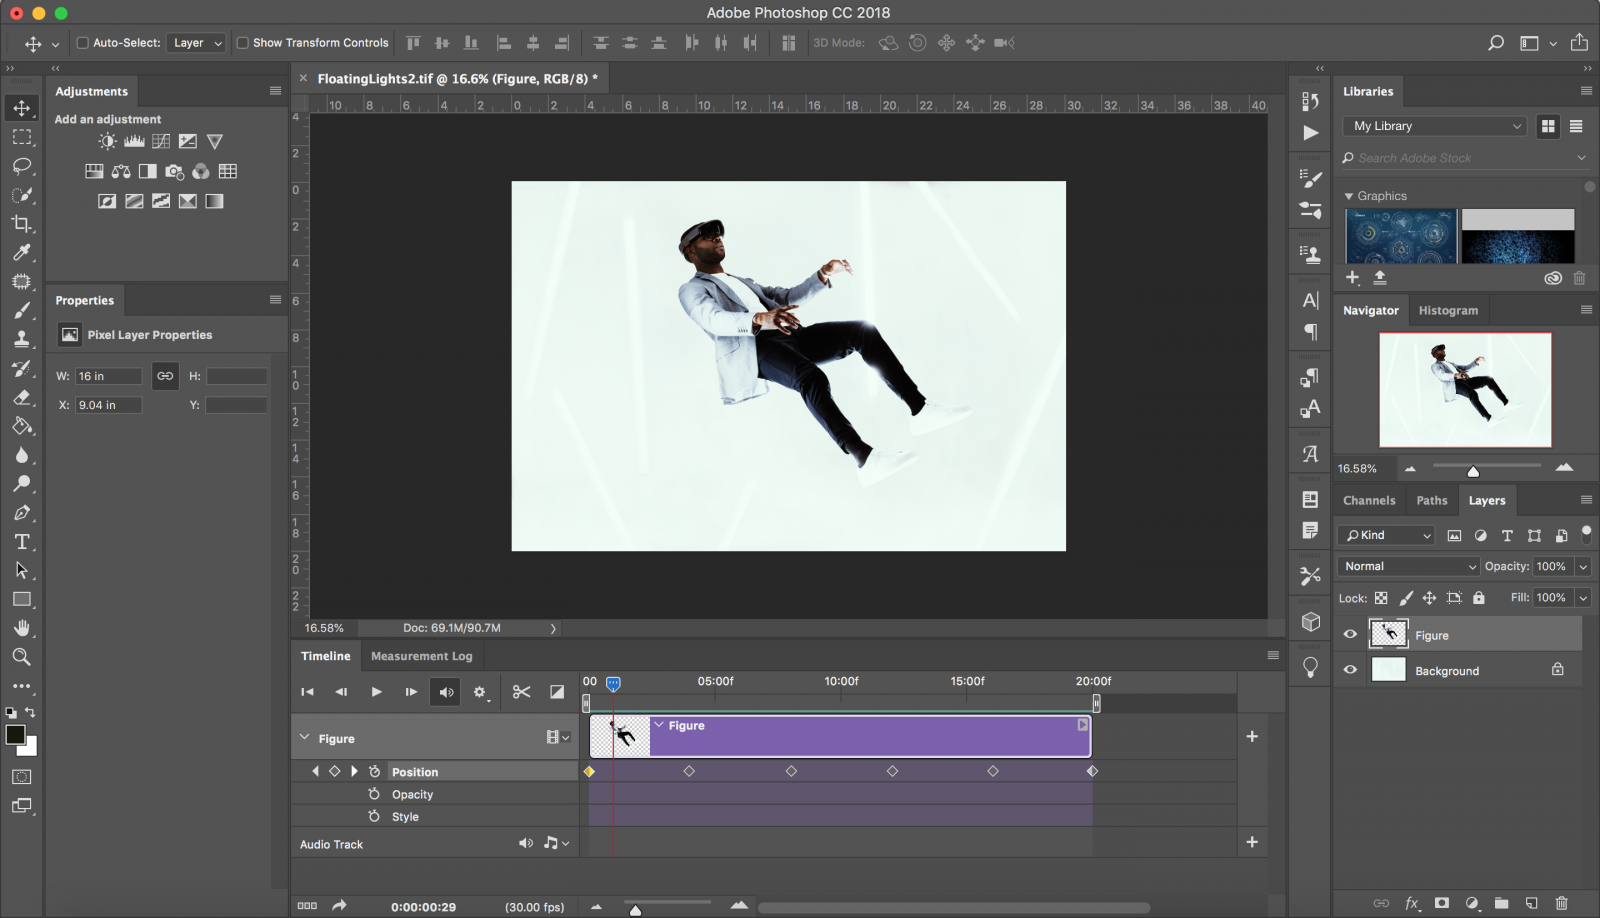
The new video clip of your image will be around 5 seconds or 5 frames but can be extended by hovering your cursor over the end of your new clip and dragging it to the right. I will extend my clip to 20 seconds for this example.
Next, click on the arrow to the left of your clip name in the timeline to expand its options. You will see, “Position”, “Opacity”, and “Style”, with stopwatches to the left.
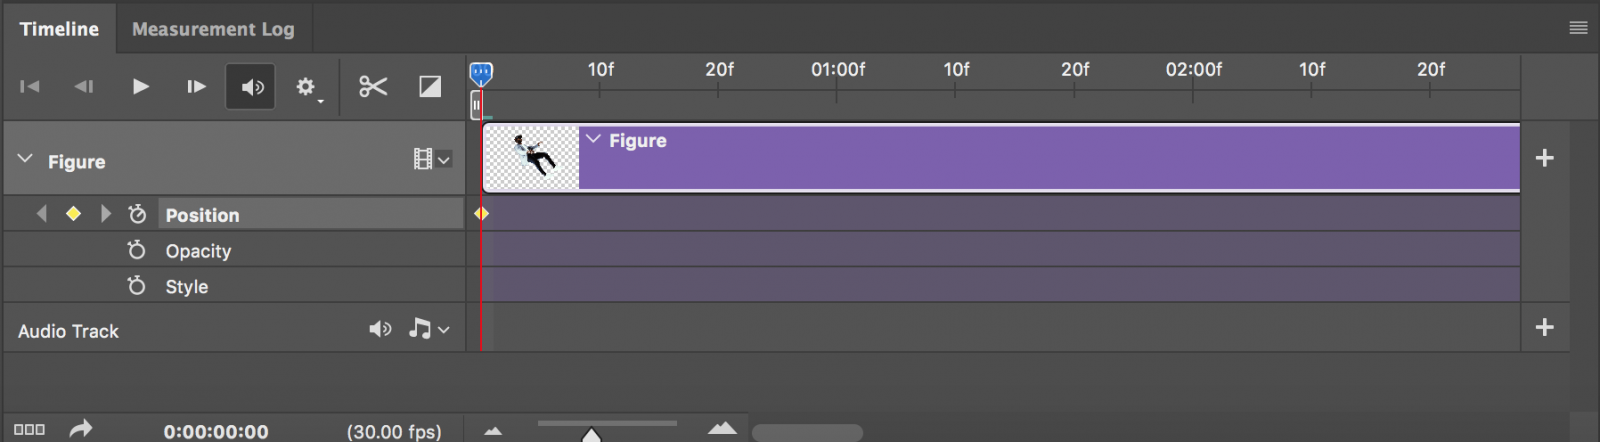
With the playhead at the start of your clip, click on the stopwatch next to “Position” to create a Keyframe on your timeline. This holds the position of your image as you start to animate it.
With your first keyframe created move the playhead further along the timeline and then move your image up. This will automatically create a new keyframe for you to hold the new position placement.
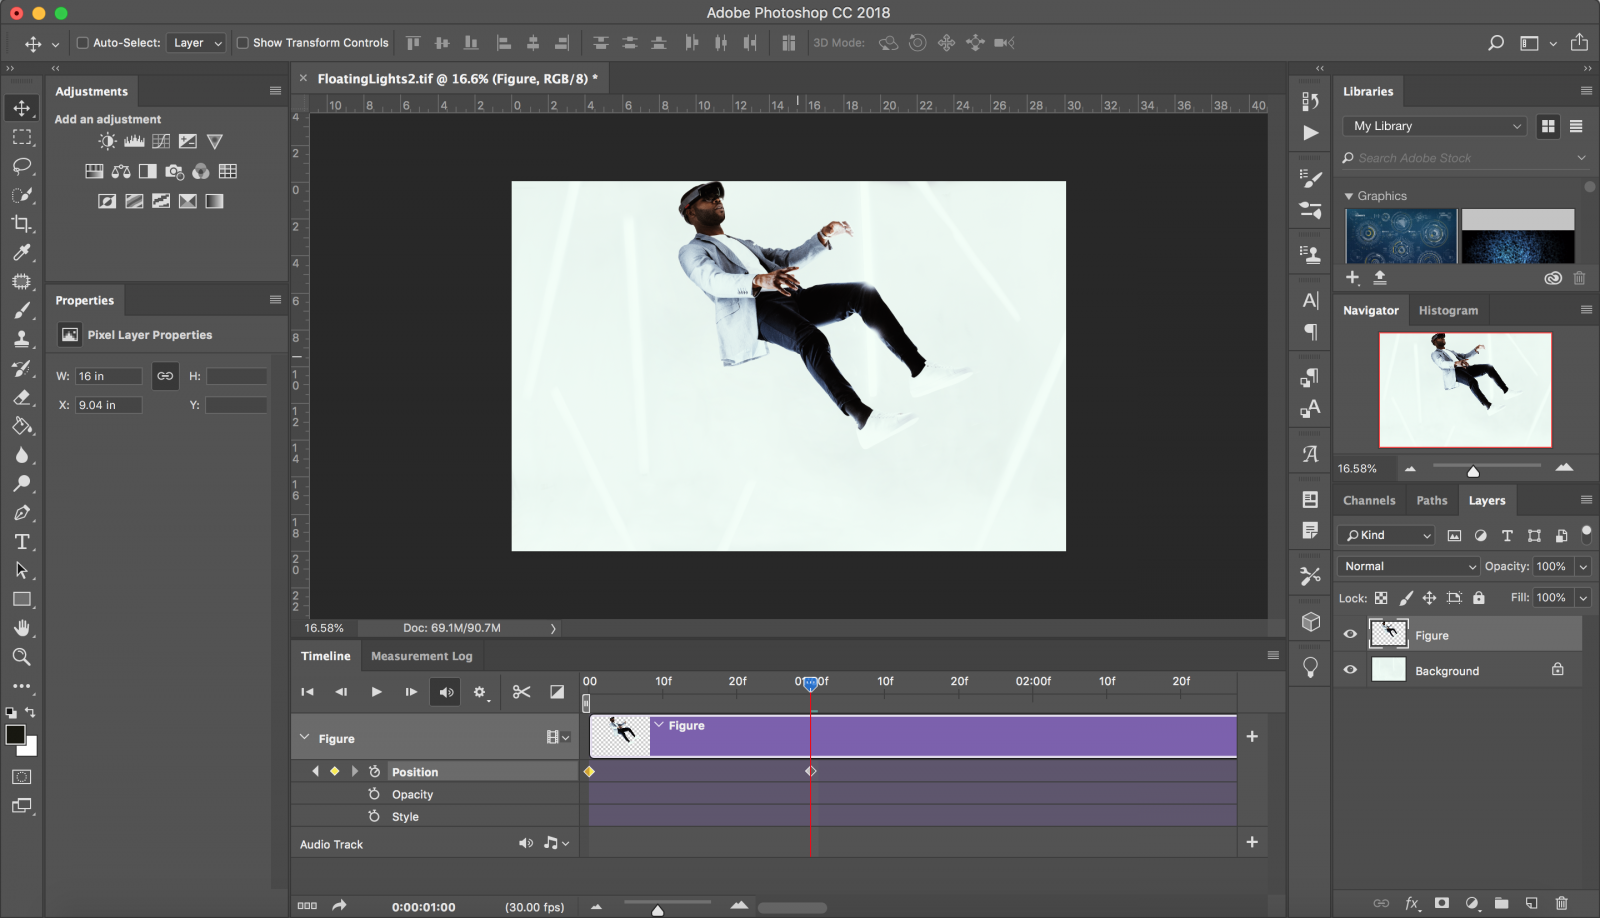
Repeat this by moving the position of the playhead and image until you have a timeline full of key frames. Once completed, press play and your image should appear to be floating.
Keep in mind, the closer your keyframes are to each other, the faster the images will move. The farther they are from each other, the slower your image will move.
Written by Aaron Ricketts
Follow Aaron here to check out more of his art + animation.
Comments