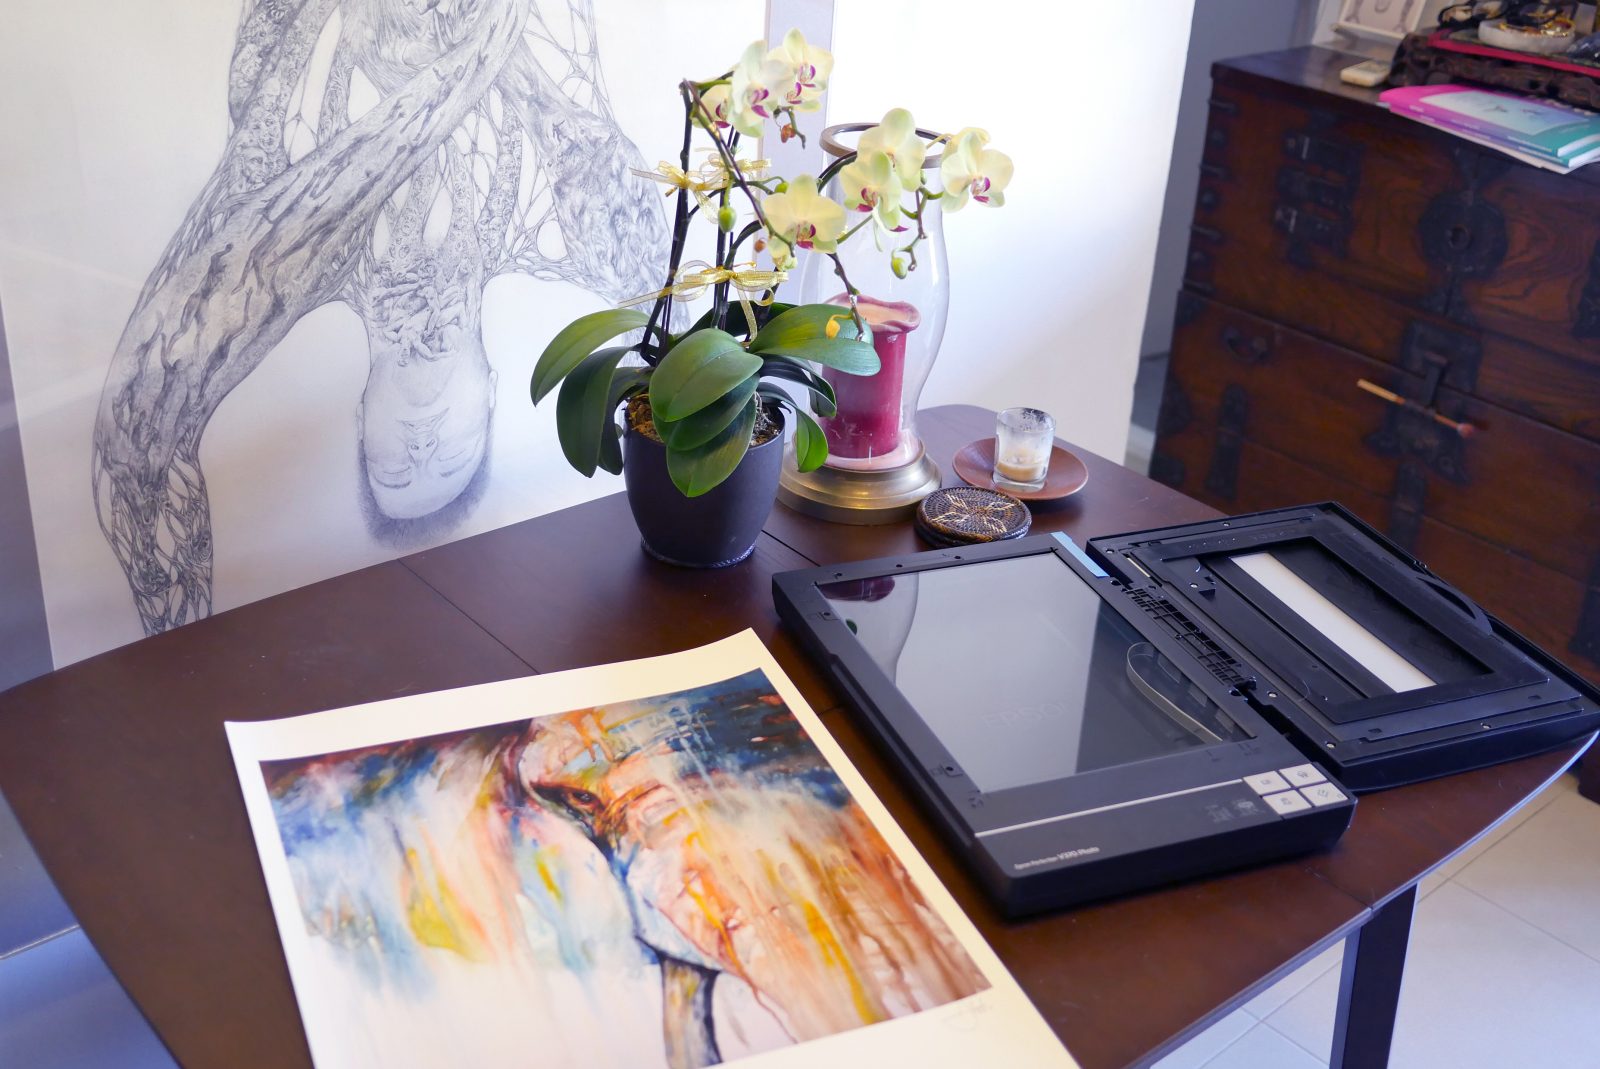
Back in the day, scanners could cost an arm and a leg, and professional scanning service sometimes still do! However with a lot of recent technological advancements, scanners nowadays come relatively cheap and are a very hassle free way of converting your artwork from hardcopy to digital reproductions fit for print. There are however some techniques you should be aware of as well as some specifications on scanning equipment that are often necessary to produce the highest quality reproductions of your artwork.
What artwork is appropriate to scan?
Unless you want throw down some serious cash for a large format scanner (ie for artworks larger than A3 in size), scanning is generally best for a smaller “flat” artworks ie works on paper with little texture. Most scanners have a glass scanning pane slightly larger than A4 but that’s not to say you can’t scan larger artworks. However, if you are working anything above A2 in size, or if you are not comfortable with the digital process of “stitching” artwork together (which I will go into later) I would highly suggest that you instead photograph the artwork! You can check out my guide to that here.
Why should I scan instead of photograph an artwork?
Scanning is a relatively simpler process that does not require as much extra equipment like extra, lenses, cameras and lights. It’s usually very accurate (depending on your scanner) and prevents the artwork reproduction from being degraded by outside influences such as lighting, shadows or distortion caused by lenses.
But I thought scanning is just clicking a button?
It is! But that is if your artwork is in a size that fits the scanner, is completely flat and that everything is set to the correct settings. There are a lot of other important considerations when scanning something for art reproduction.
What you need to be aware of:
- Scanning into the correct file type
- Scanning the correct pixel density or choosing pixel count
- Dealing with with large scale work, or work with texture
- Color Correction
All of these things will also be affected by the quality of the scanner you are using as well.
What Scanner Should I Buy?
Some terms you should make yourself familiar with before you buy a scanner
- CIS Scanners and a CCD Scanners
- DPI – Dots Per Inch
- PPI – Pixels Per Inch
- Tiff – Tag Image File Format
- CMYK Colours – Cyan, Magenta, Yellow, Black
- Scanner Resolution
No doubt most of you will already be familiar with some or all of these terms, but it’s important that they are all taken into consideration.
CIS Scanners and a CCD Scanners
- CIS Scanners: Need flat media to scan ie a plain piece of sketching paper
- CID Scanners: Can scan textured and slightly raised surface ie) a thick acrylic painting or watercolour paper
More or less self explanatory, but if you are using completely flat medium you can use a CIS scanner. However if there are any buckles in the paper, or it has a slightly texture surface, it may not actually scan properly or will need to be heavily weighed down. The CID scanner is the option I would recommend to purchase as it allows the scanned object to be slightly raised off the glass, letting you accurately scan artworks with some texture, making it easier to scan from a sketchbook or textured paper or artworks. They can be slightly more expensive than CIS scanners but in my opinion worth the investment.
Bonus Tip: I would also recommend a scanner where you can remove the top or bend it back more than 180 degrees to scan larger work!
DPI and PPI: The Importance of Dots Per Inch
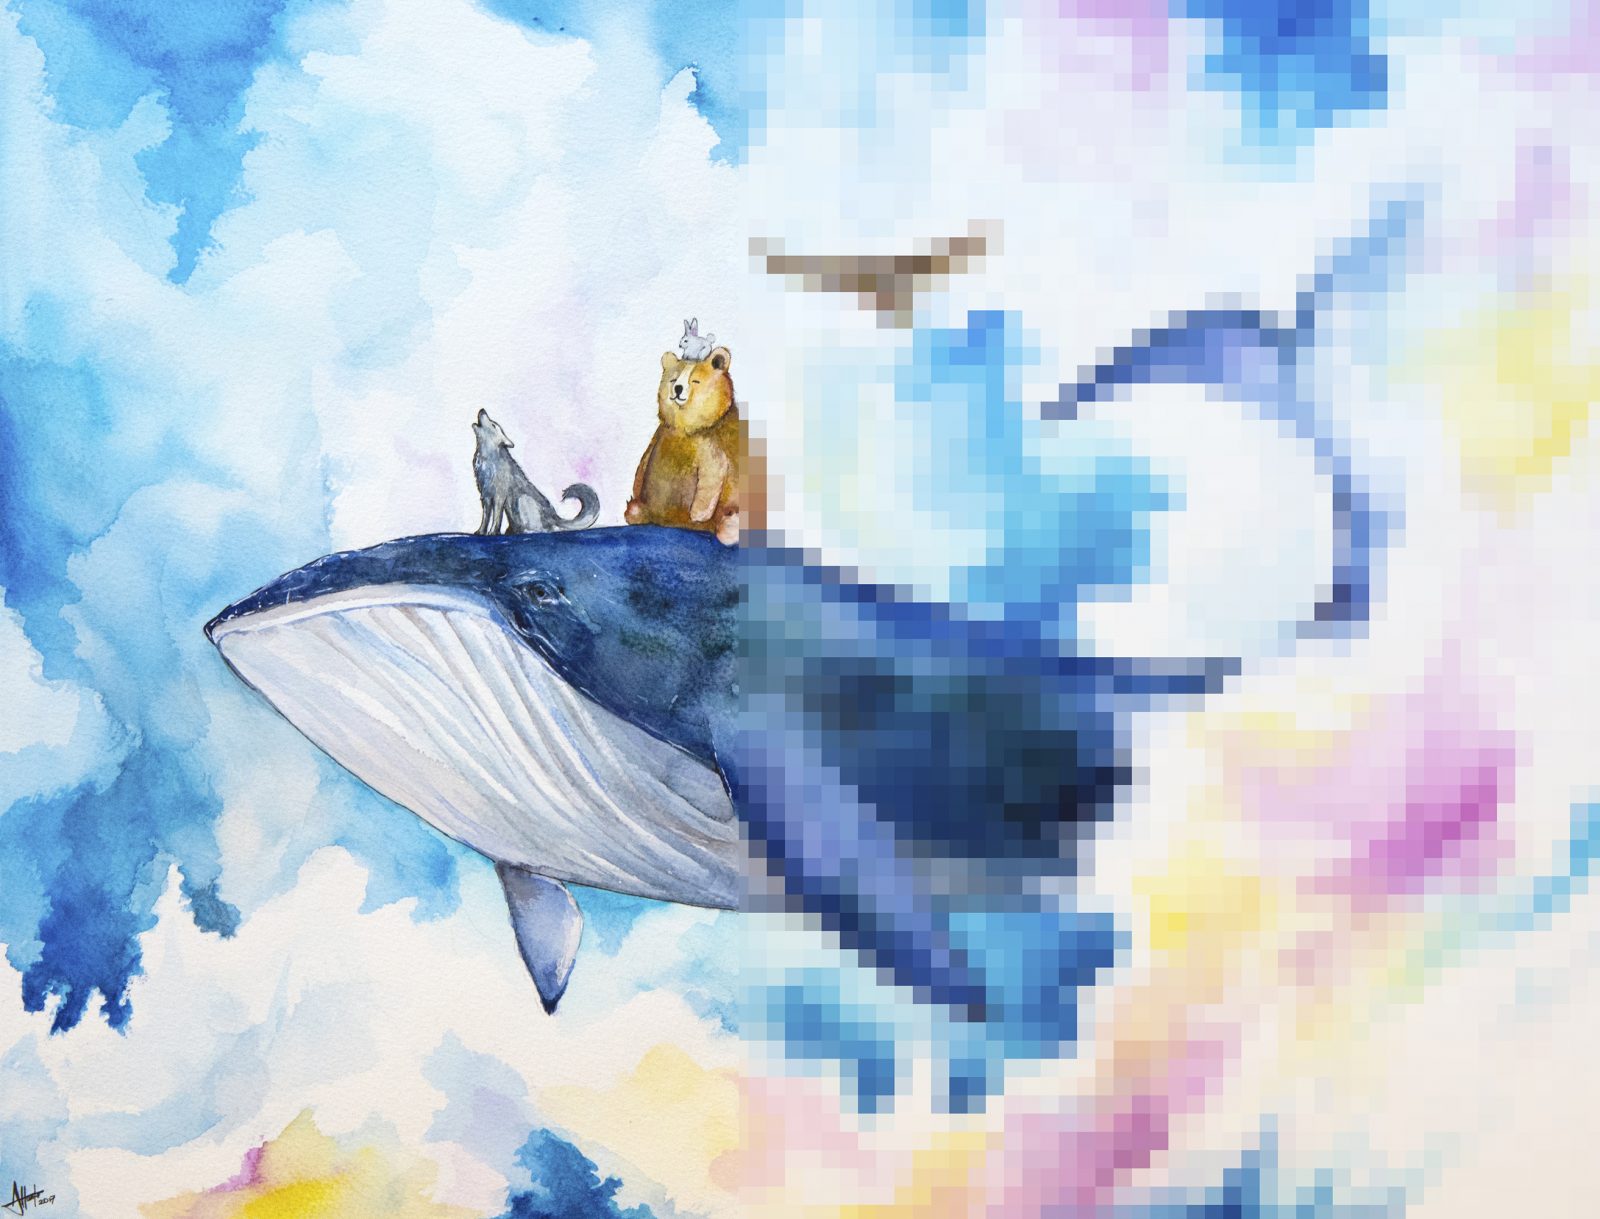
DPI count is a massively important part of scanning (and digital reproduction). At a minimum you should be scanning at 300DPI and if you are using photo editing software like Adobe Photoshop DO NOT INCREASE THE DPI THROUGH SOFTWARE. If you scan something under 100 DPI it often will appear pixelated or blurred and will be inappropriate for reproduction. Using photoshop to change the DPI will also cause some distortions to the image. 300dpi is the most widely accepted quality of reproduction and you should ensure that your scanner is able to scan at this level. The higher the DPI of the scanner, then theoretically the larger you would be able to print without pixelation but this is usually not necessary unless you are working in huge formats.
PPI is the resolution or pixel density of a digital image displayed on-screen. It’s not as important, but if you are editing its a term that may pop up and be sure to not confuse the two.
TIFF – Tag Image File Format
Most people will be familiar with JPEG formats and for the most part, a JPEG file or image will do just fine for print reproduction. However, there is some potential image degradation with JPEGS when they are saved and opened. TIFF can be used across different editing software such as illustrator and photoshop without this problem and its based on CMYK color schemes (Cyan , Magenta, Yellow, Black) which is what is used by printers, ie it will give you the most accurate color reproduction for your prints. If you are stressing about what format to use however, either of these will do but it’s good to be aware of the differences and potential changes in quality.
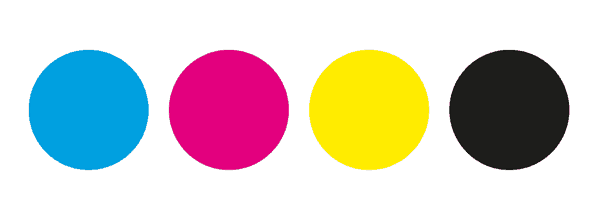
Edit and Scan in Cyan Magenta Yellow Black
How Do I Stitch an Artwork?
You will need some basic editing software to get this done. I use photoshop and will be showing examples from it for the rest of this tutorial, but you can theoretically even use MS paint and basic software as long as you work using the same fundamentals. The important part of this is lining up the multiple scans of your artworks correctly. Here is an example:
Step 1: Scanning Sections of the Artwork
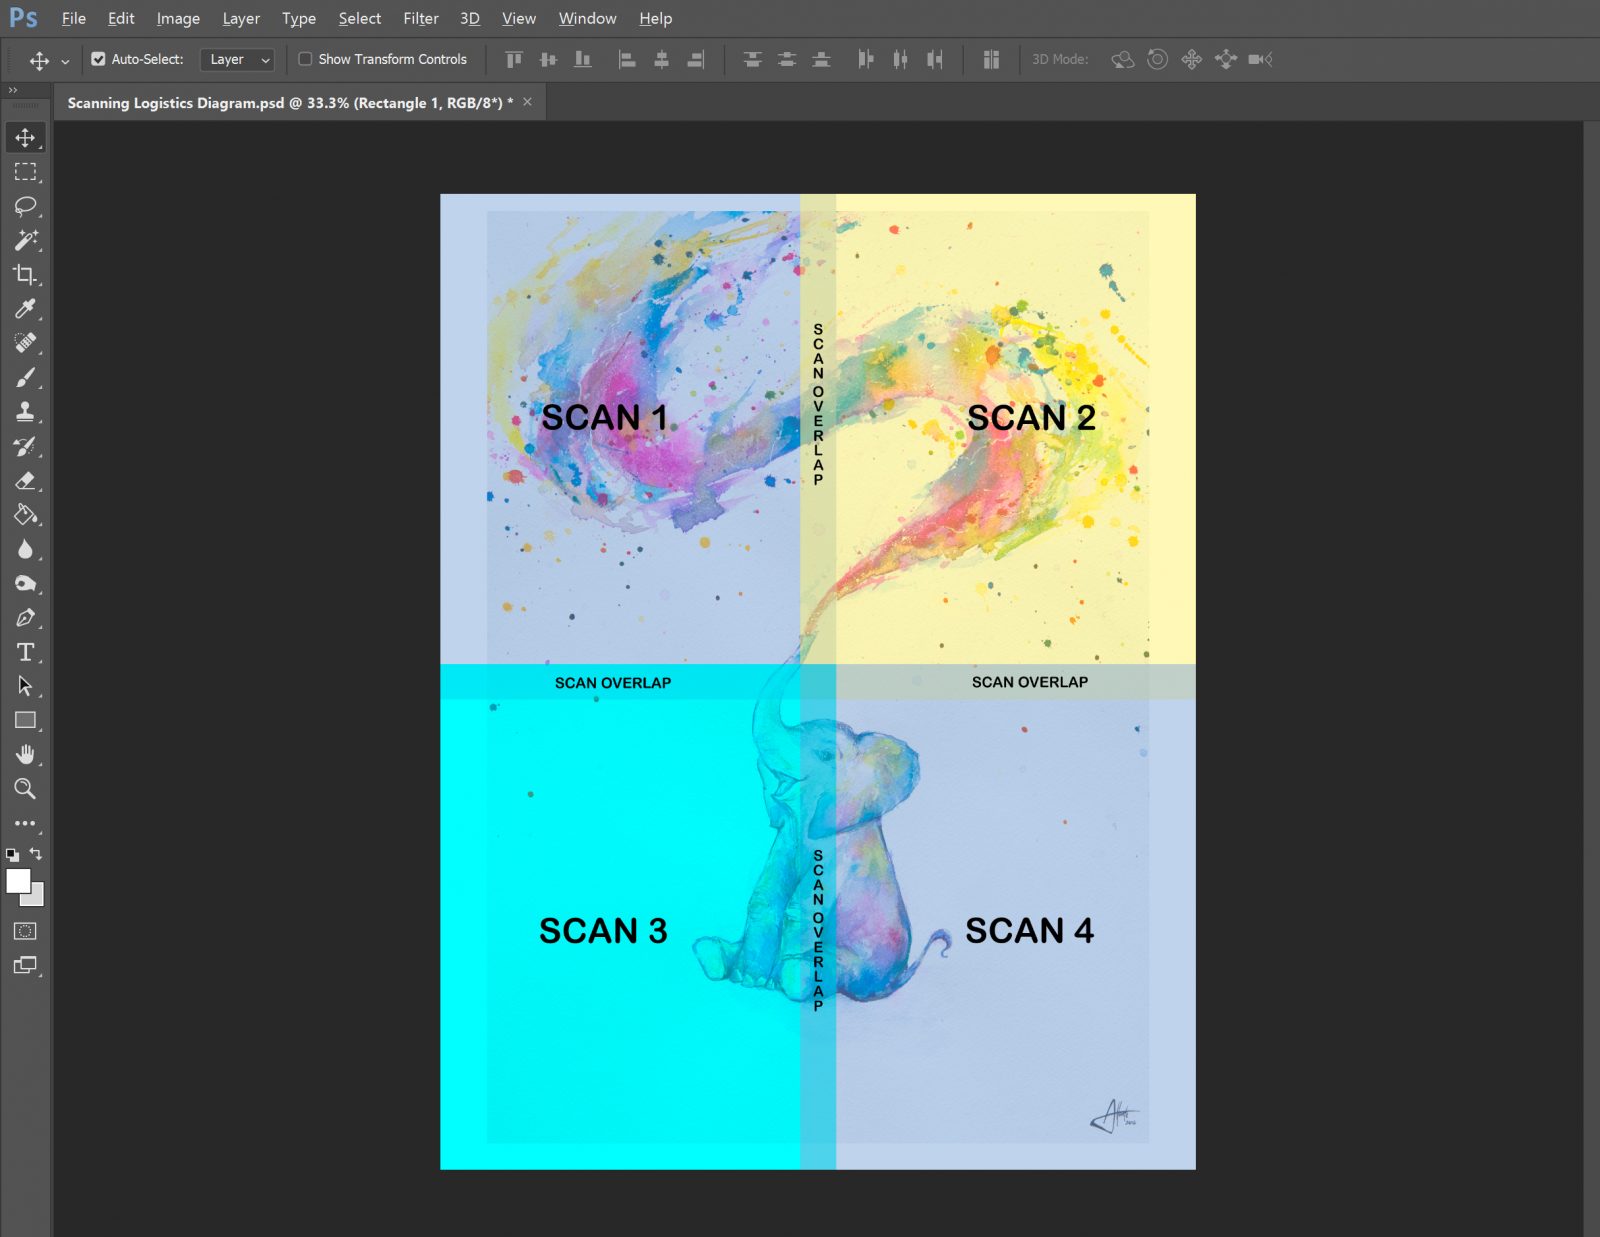
This is an approximately A2 artwork.
First, remove your scanners cover (if you can) to make things easier. Make sure the artwork is lined up perfectly square to the edges of your scanners glass pane or parallel to the edges of the pane. You should be able to get a scan with slight overlap with each image like in the diagram above.
It’s crucial that the section of the image you scan has an overlapping area with the other sections scanned, this is so that you can accurately line up the artwork for stitching which I will go into later. If you don’t scan with some overlap you may find yourself with a gap in the final artwork and having to redo the whole process.
Also note, that depending in your paper size you may require more scans to get the full image. As mentioned anything larger than A2 is possible but I would not recommend it as it takes a long time, there is too much room for mistakes and the chance that scans do not match up! Photograph it instead!
Step 2: Setting Up Layers for Stitching
Once you have your various scans open up a large workspace in your editing software and lay out each scanned section of the artwork and if you can as separate layers.

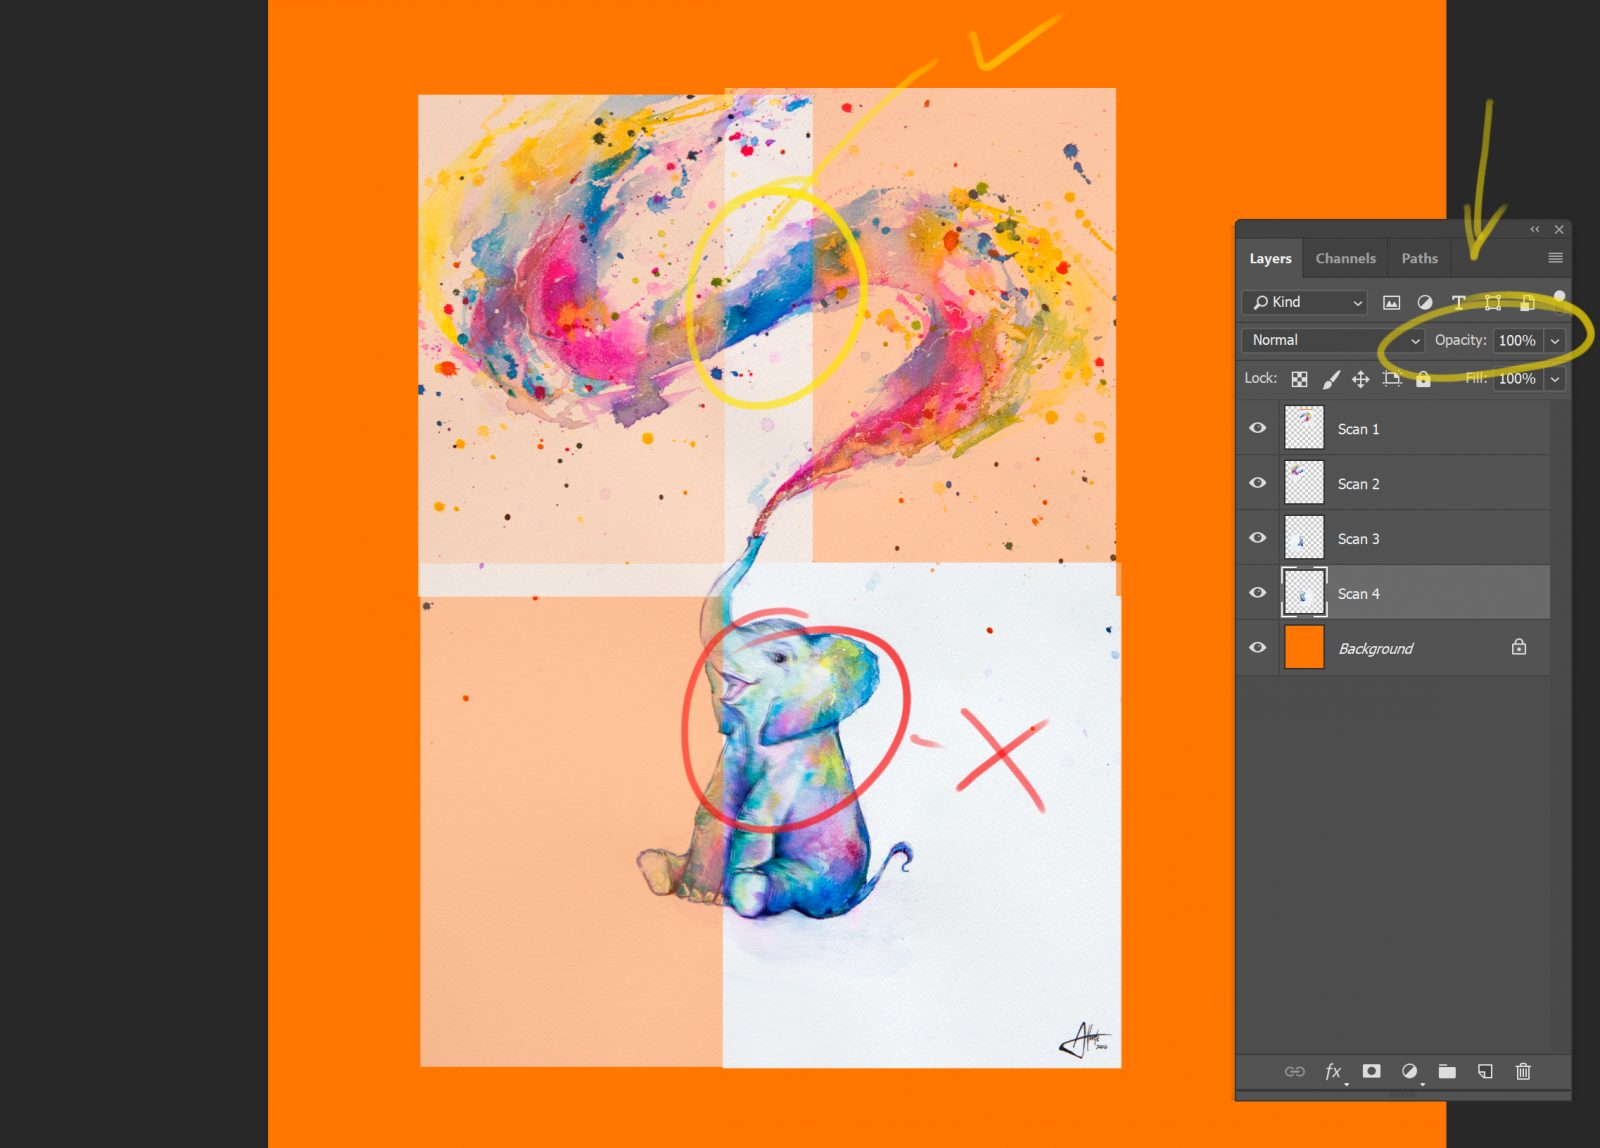
Why am I using an obnoxious colored background you may ask? Just in case you missed an area of the artwork during the scanning process, it will become very obvious with the bright background when you try and stitch things together. If there is a gap anywhere, that obnoxious color will shine through.
Step 3 Adjust the Opacity and Start Stitching
To make things easier to “stitch” temporarily adjust the opacity of the layers you are working with. This is usually available under the layer settings but this may vary depending on your editing software. I usually put the opacity at 50% because once the two layers are correctly aligned, the overlapping sections will be at 100% and show a very accurate stitch.
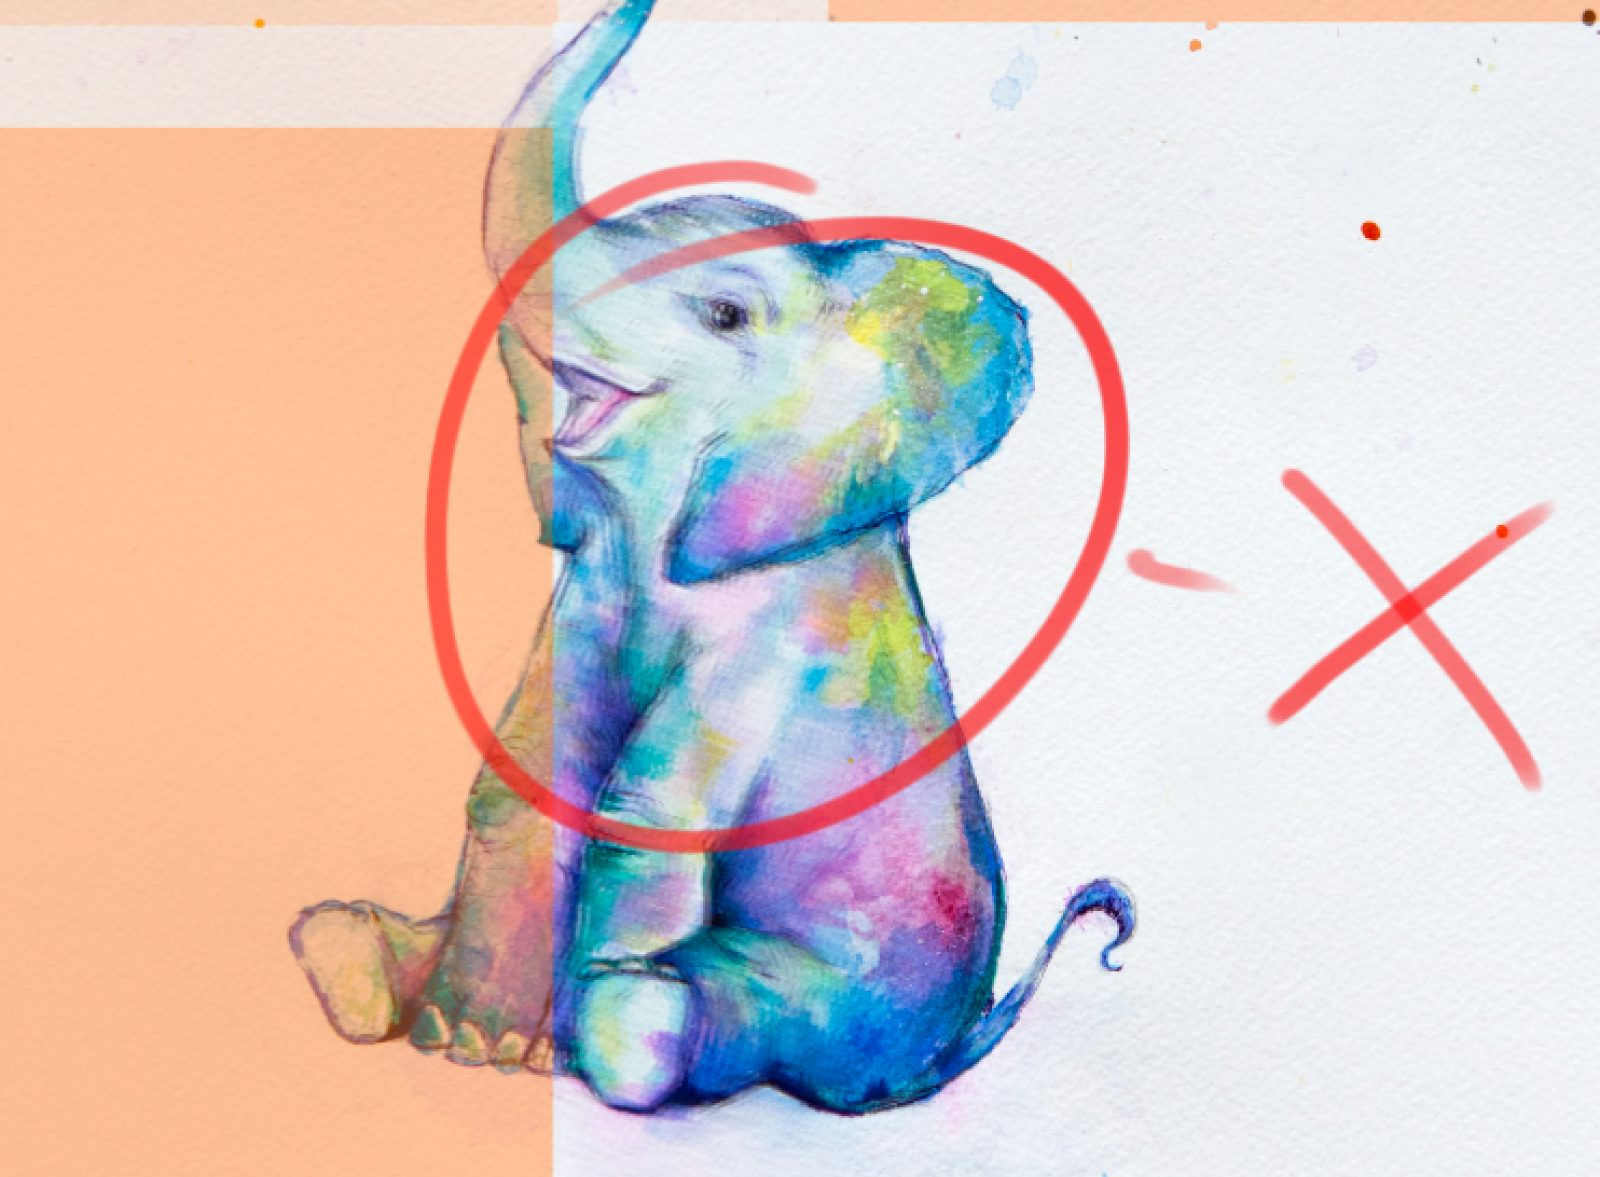
Align each layer / scan one at a time by first moving the two images as close together as possible with your mouse, then use your arrow keys to make the final tiny adjustments for accuracy so that the scanned images are perfectly aligned.
This is why you need a little overlap with each scan!
If you look closely the bottom right of the artwork, it is slightly blurred. Which means the artworks have not been stitched correctly. It is good practice to zoom in on the image to ensure that there is no blur or what looks like “double vision” and that the scans are aligned perfectly.
Step 4: Crop and Combine
If everything lines up, the final step is relatively easy. Once you are sure everything is aligned properly, return each layer back to 100% opacity. It should (in theory) look perfect! Crop the excess workspace ie all the orange bits in the image to get your final stitched artwork!
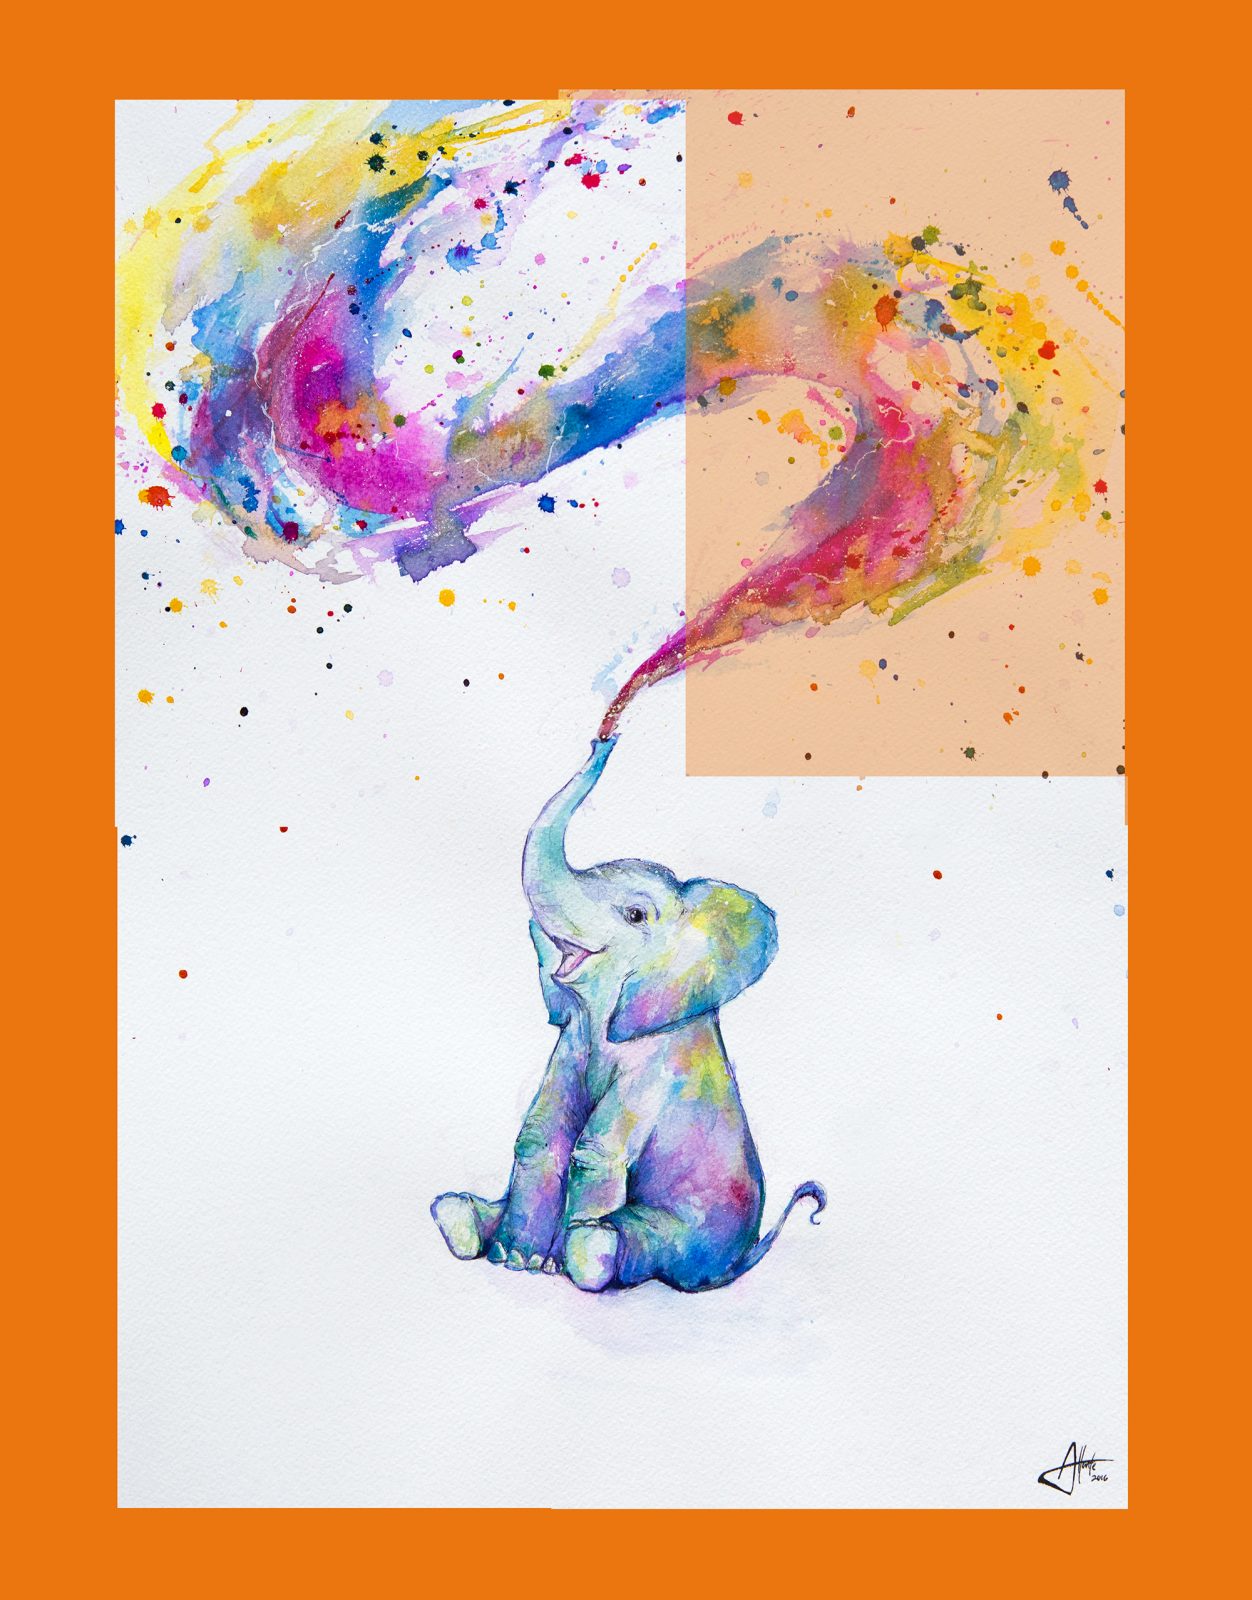
I usually “flatten” the image to combine all the layers together at this stage. In photoshop this is under the layer tab at the very bottom. You may also need to do a little editing to make sure the white balance and colors have matched up with your artwork but otherwise you should now be done!
A little summary:
- Buy a scanner that can scan at least 300 DPI
- Preferably get a CCD scanner especially if you are scanning textured artwork
- TIFF format is better than JPEG format
- Editing in CMYK is better than RGB
- Learn to digitally stitch if your artwork is larger than A4
- Photograph really big artworks instead of scanning
There are various other ways to scan and stitch artwork and if you have the time, make sure to do some extra research online to find a method that suits you. For the most part, this method has worked for me and should be a good way to get you started!
I’m always happy to answer questions at art@marcallante.com, but if you are looking for more info head to my social media pages with the handle @marcallanteart or www.marcallante.com
Happy scanning!
Written by Marc Allante, a self taught artist, based in Hong Kong. He merges traditional Chinese inks with European painting techniques in a contemporary style that reflects the fusion of his Chinese-French ancestry and brings it into a modern context. Marc utilizes a variety of techniques, subject matter, and themes to expand the repertoire of his artworks.
Comments