The broke college student trope may be tired, but it remains true.
We’re no stranger to sprucing up our space on a dime, and now we’re giving you a little DIY inspo to take your dorm from blah to beautiful with this wire wall grid hanger, perfect for displaying all your art prints, class schedules and haphazardly stuck Post-Its. Read on for the full how-to.
Attention art-loving DIYers. Here’s an unbelievably easy print hanger project that even the most inexperienced crafter can pull off. This uber stylish wire wall grid with storage pocket is the perfect way to keep your space updated according to your current mood. Just clip on your fave art prints, photos, notes to self, daily affirmations — whatever inspires you to make it a productive AF day. Let’s get started!
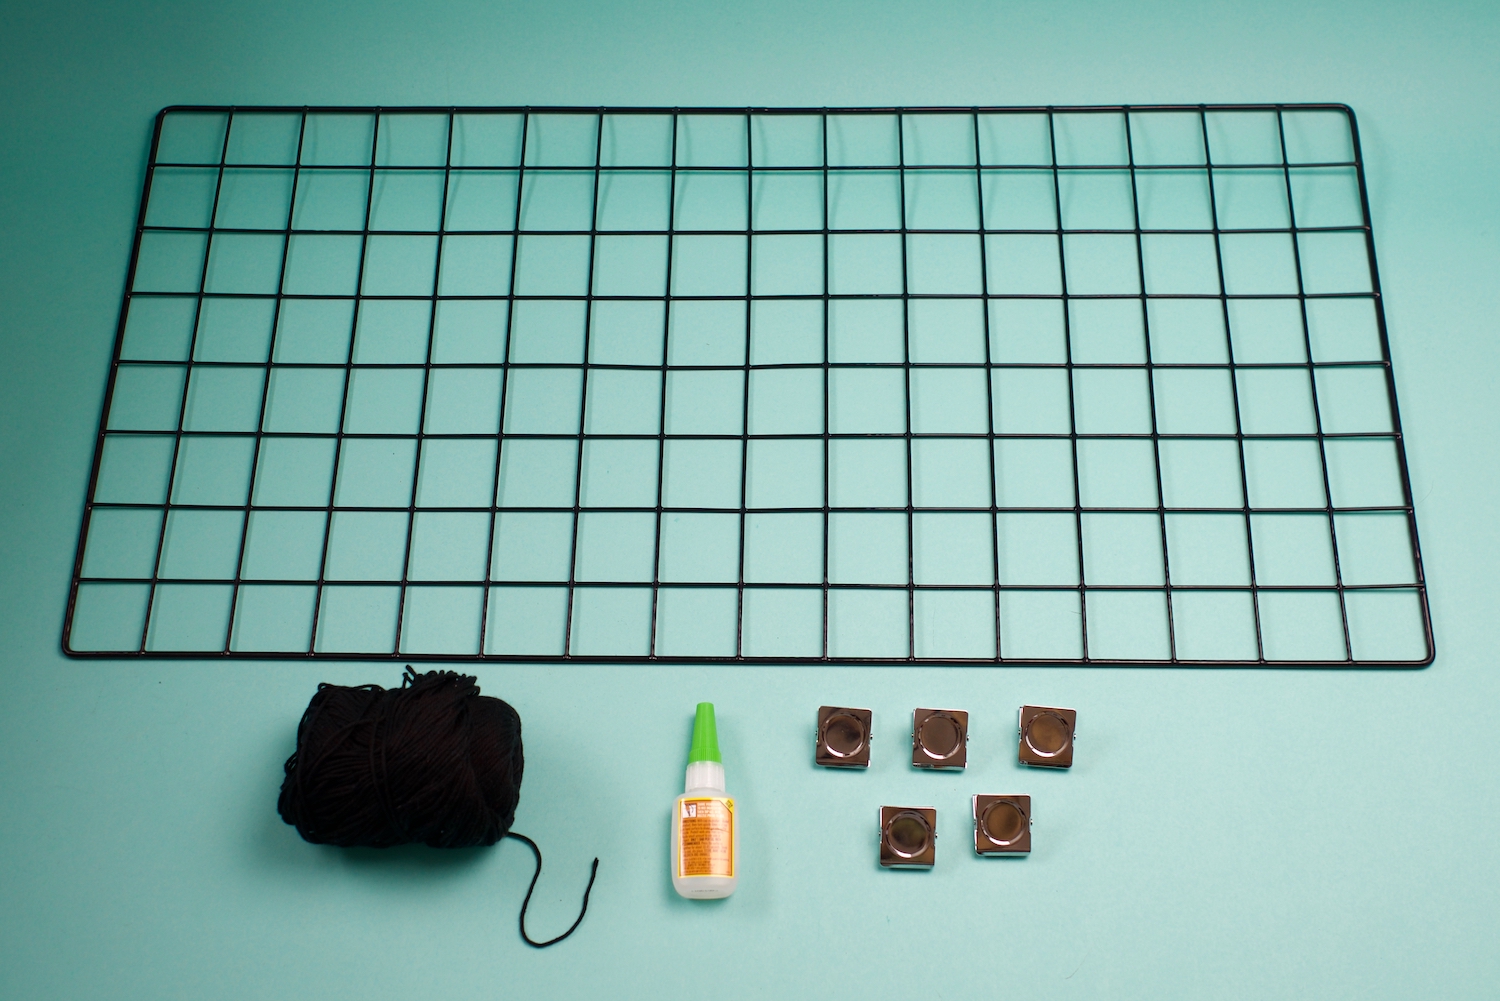
What you’ll need:
- Rectangular metal wire grid panel with a width-to-length ratio of about 1:2 (ours was 16” x 32”). Available online or in stores usually in the garden dept.
- Magnetic clips (non magnetic clips would work, too)
- Strong yarn or twine (same color as your wire grid)
- Super strength gel adhesive
- Scissors
Step 1
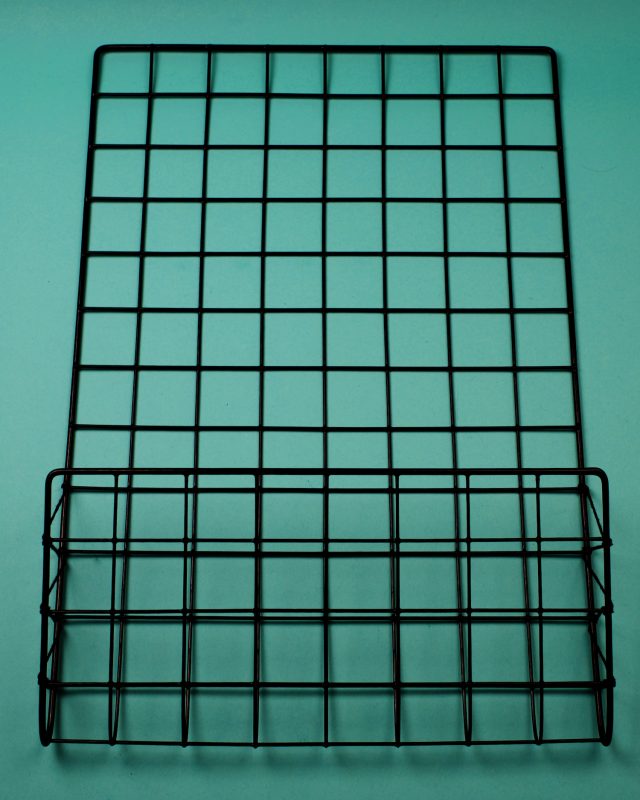
First, you’re going to create the bottom storage pocket on your wall grid simply by bending up ¼ of the length until it’s at a 20-degree (or so) angle. For example, if the length is 32”, bend up 8” of the length. There are a couple of easy ways to do this:
a) Place a heavyweight, straight-edged object like a large book or wood plank where you’d like to bend the grid (¼ of the length from the edge). Hold down the object while bending up the wire grid until it’s in the right position. (See below.)
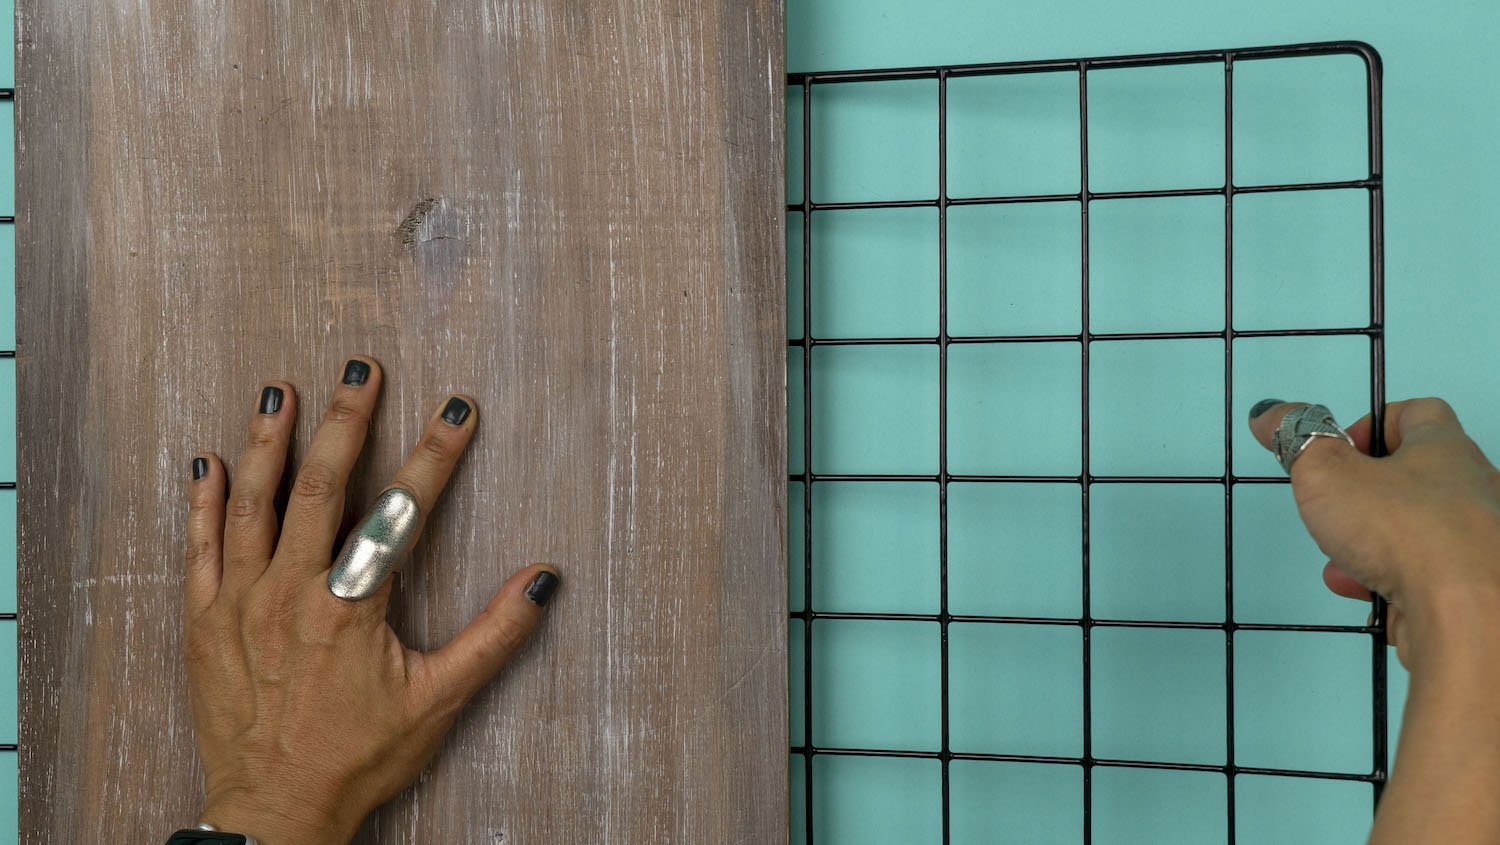

b) Or, place the wire grid over a table so that about ¼ of the length hangs over the table’s edge, then press down on the overhanging section to bend it over until it’s at a 20-degree angle.
Voila—you have a pocket!
Step 2
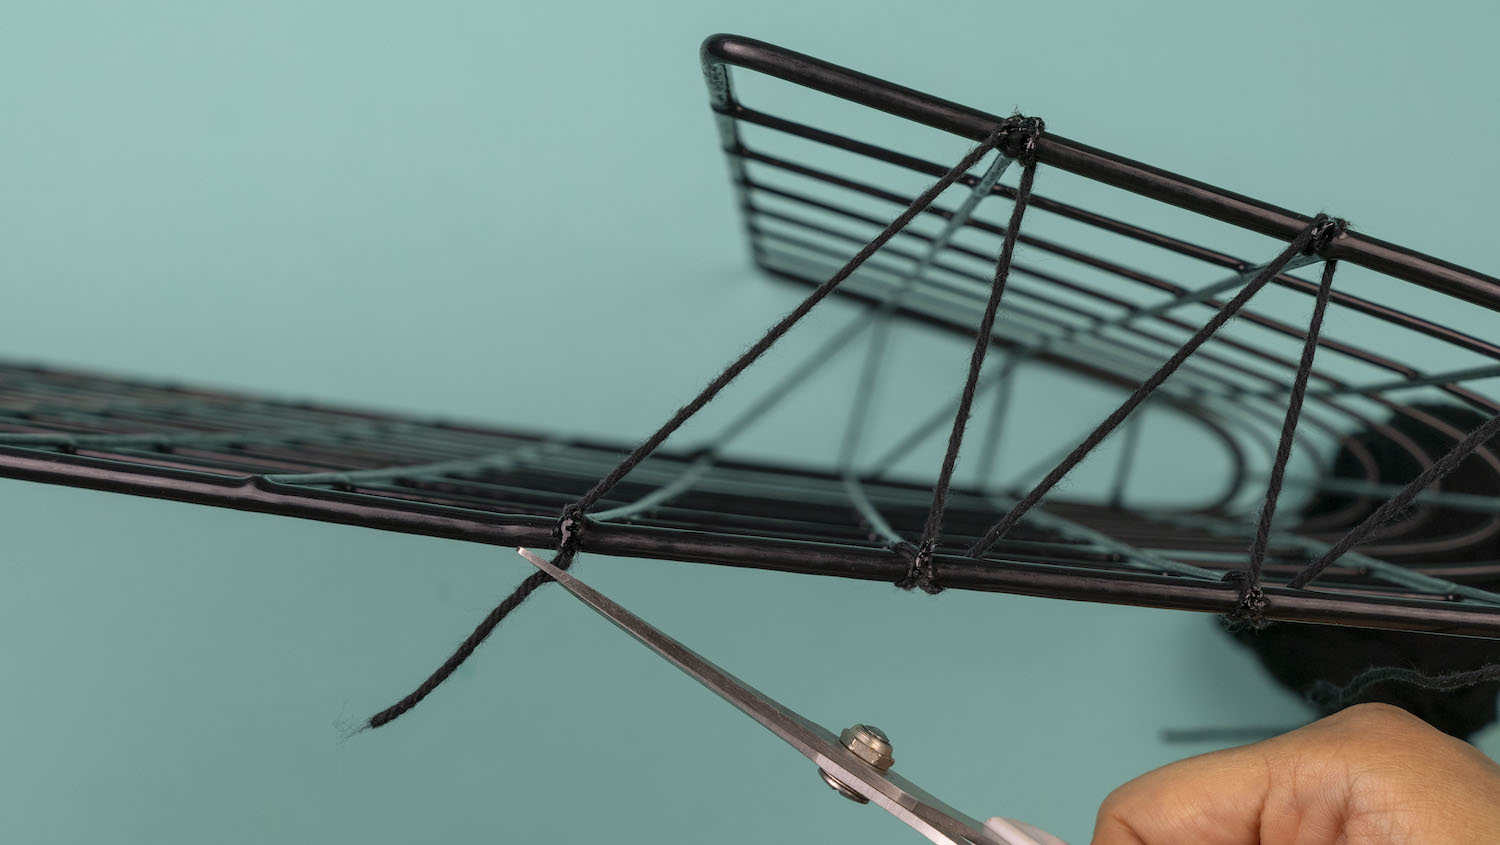
Now you’ll create the sides of the pocket using some strong yarn or twine.
Cut off a 30″ piece of yarn and tightly double-knot one end to the back edge of the grid where the pocket starts as shown in the picture below.
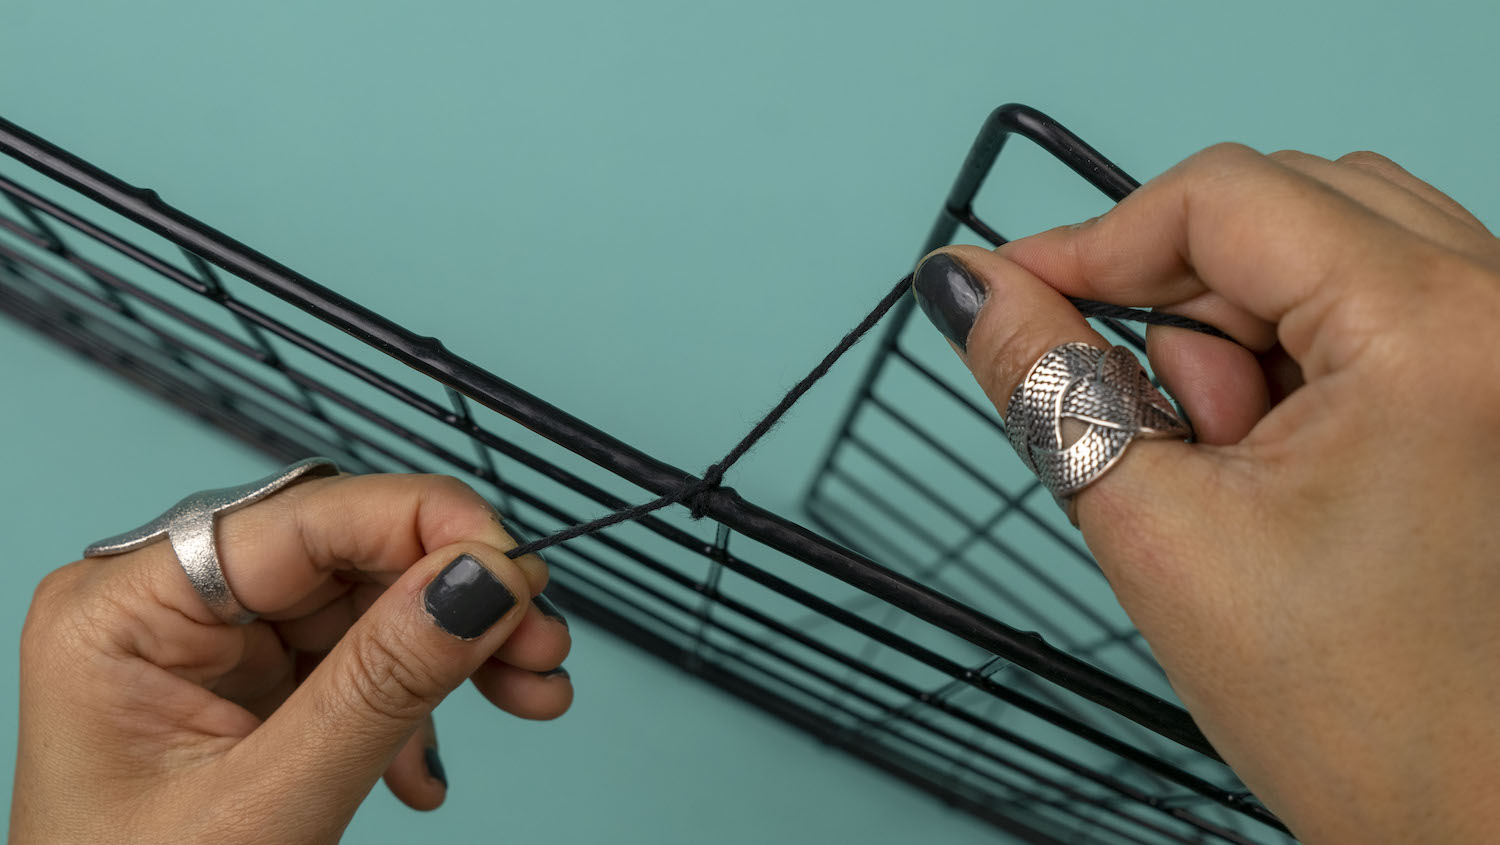
Pull the string taut and loop it twice around the opposite edge of the pocket at the joint where the second horizontal wire meets the grid side edge so that the yarn is strung at a slope. See the picture below to see what we mean.
Pull it taut and then loop it twice around the vertical and horizontal wire joint on the opposite edge.
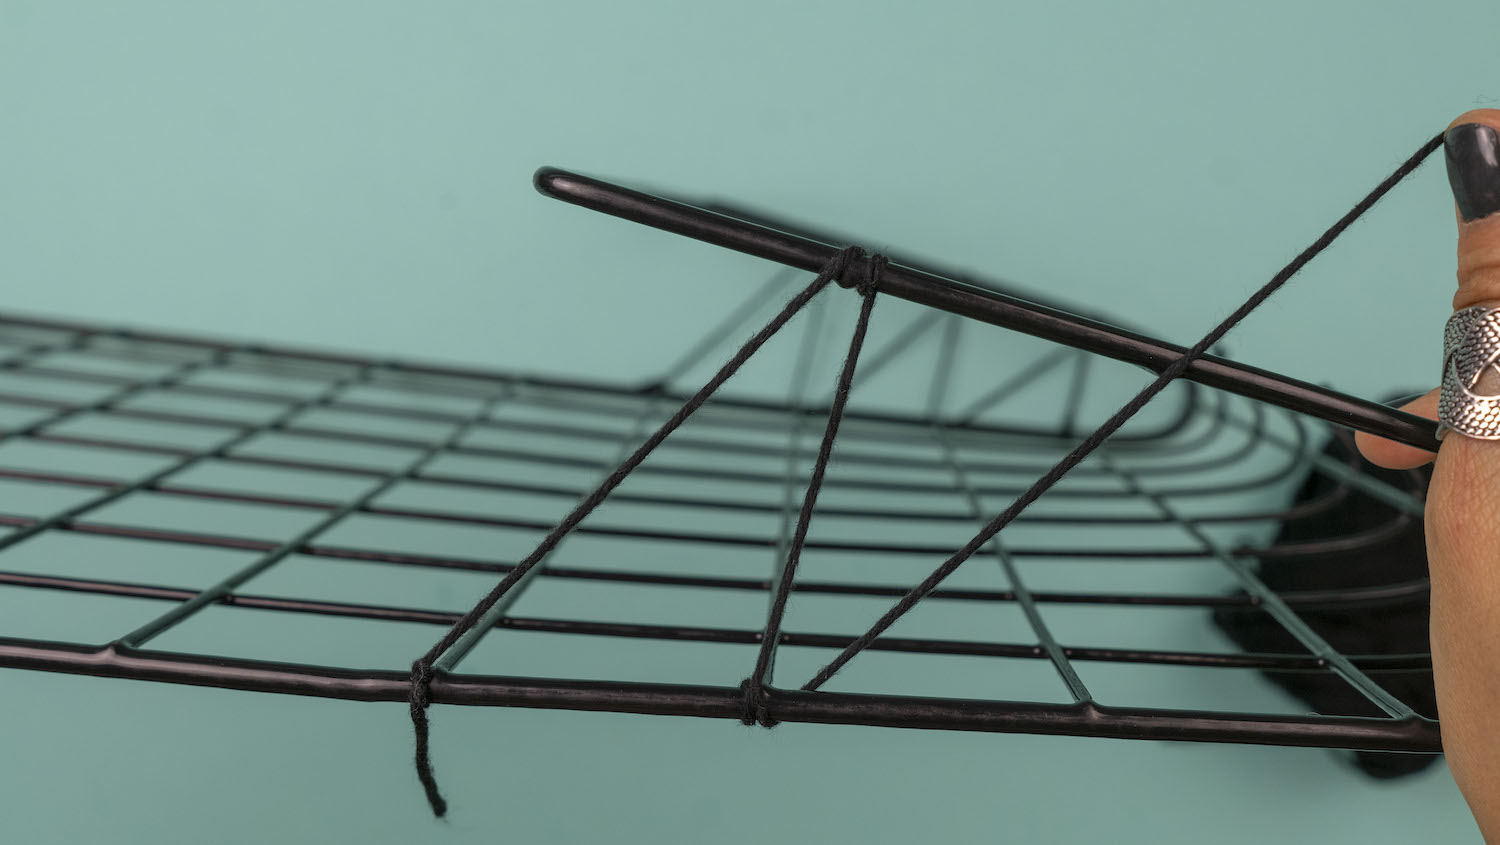
Continue looping the yarn back and forth in the same way to make a zig-zag pattern along the side of the pocket.
When you reach the bottom, secure the yarn to the last grid joint with a double knot as you did at the start.

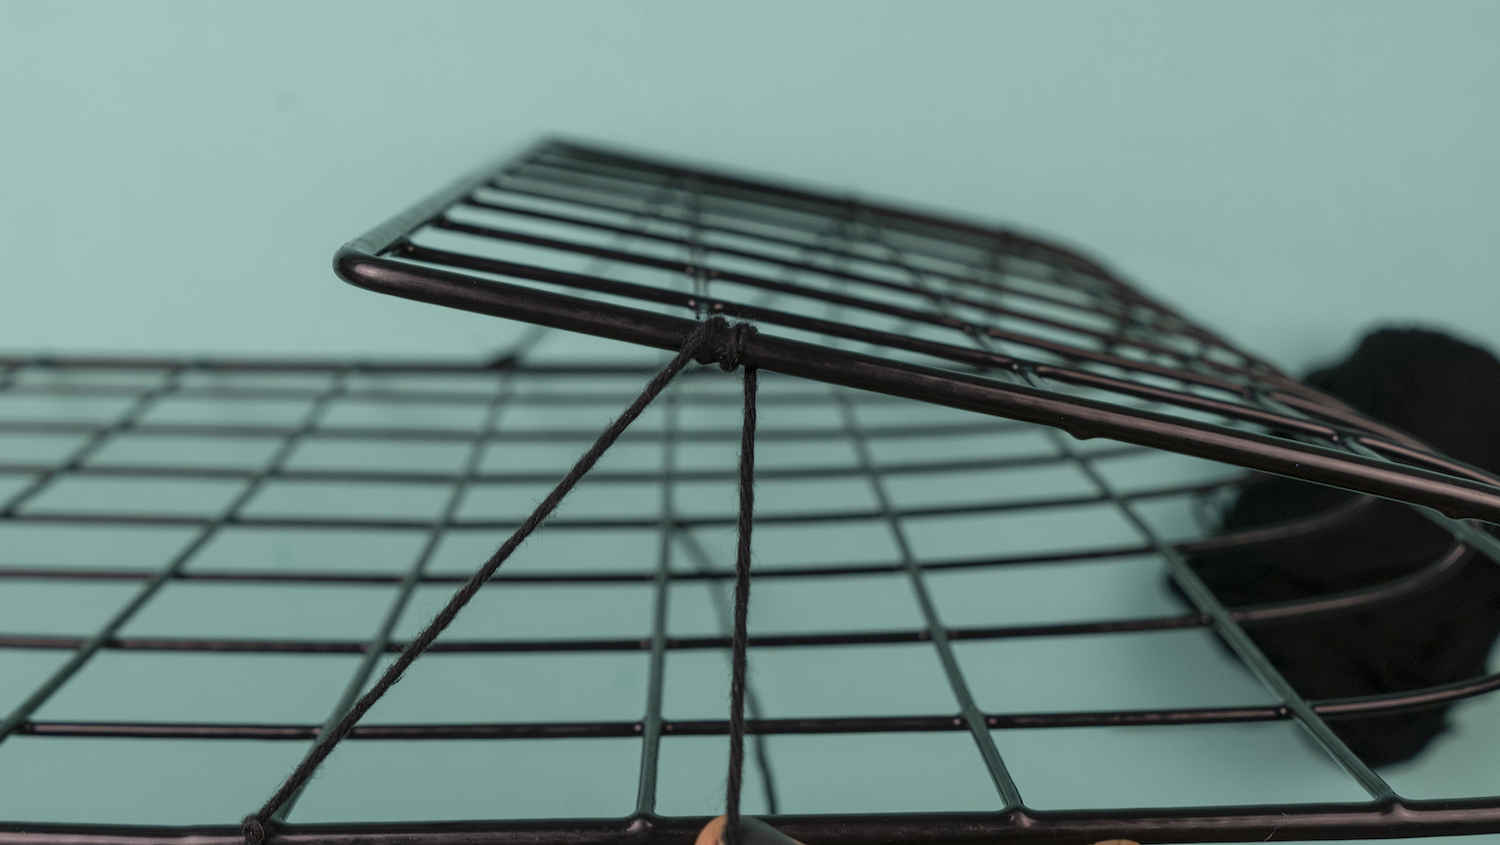
Step 3
To make sure that the yarn stays in place instead of sliding up and down the wire, apply a dab of super strength gel adhesive to the starting and ending knots and to the double loops wherever the yarn meets the wire.
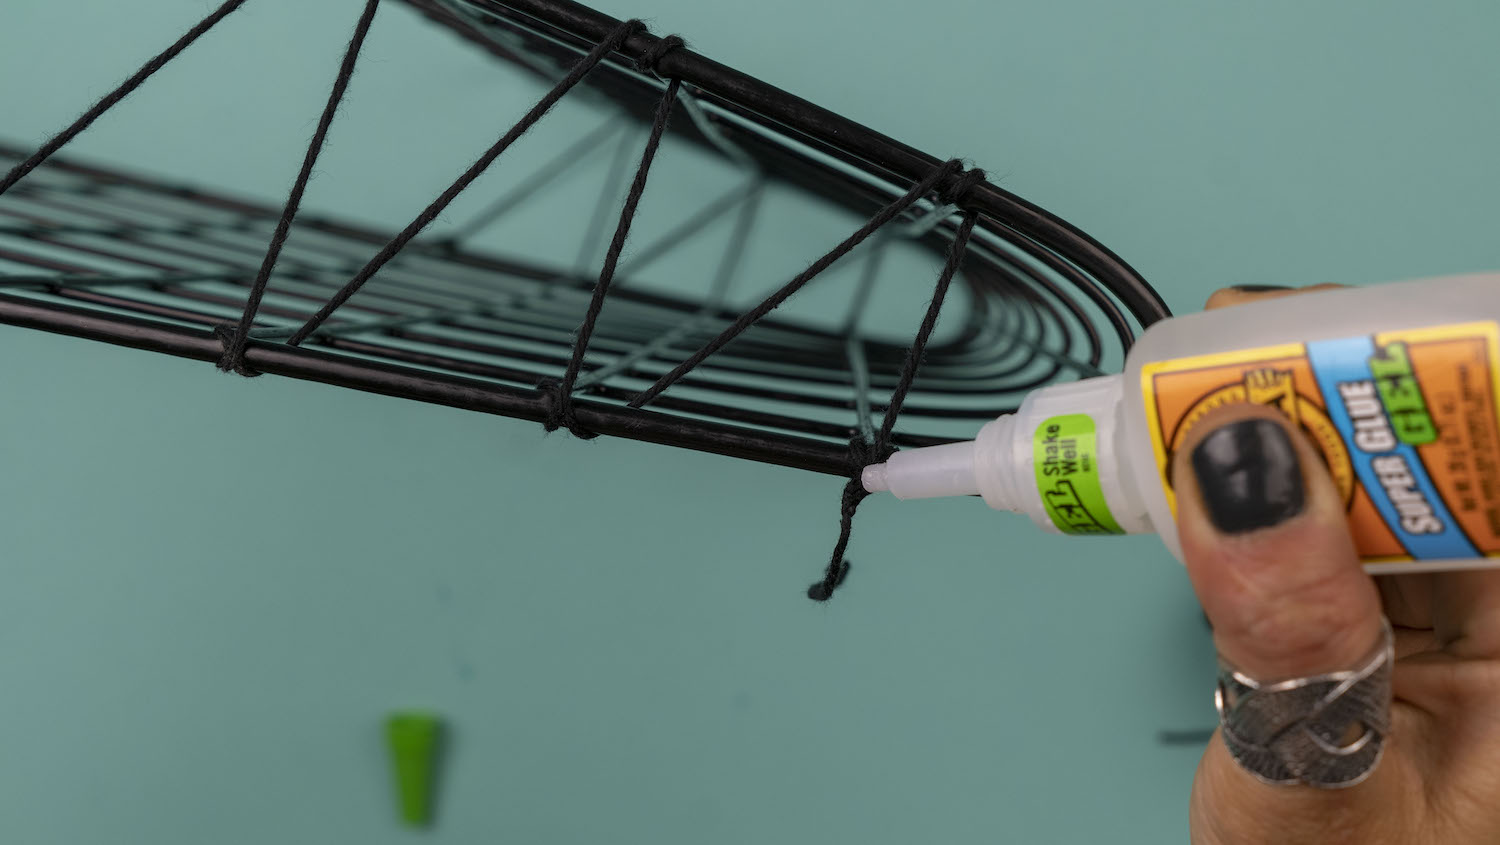
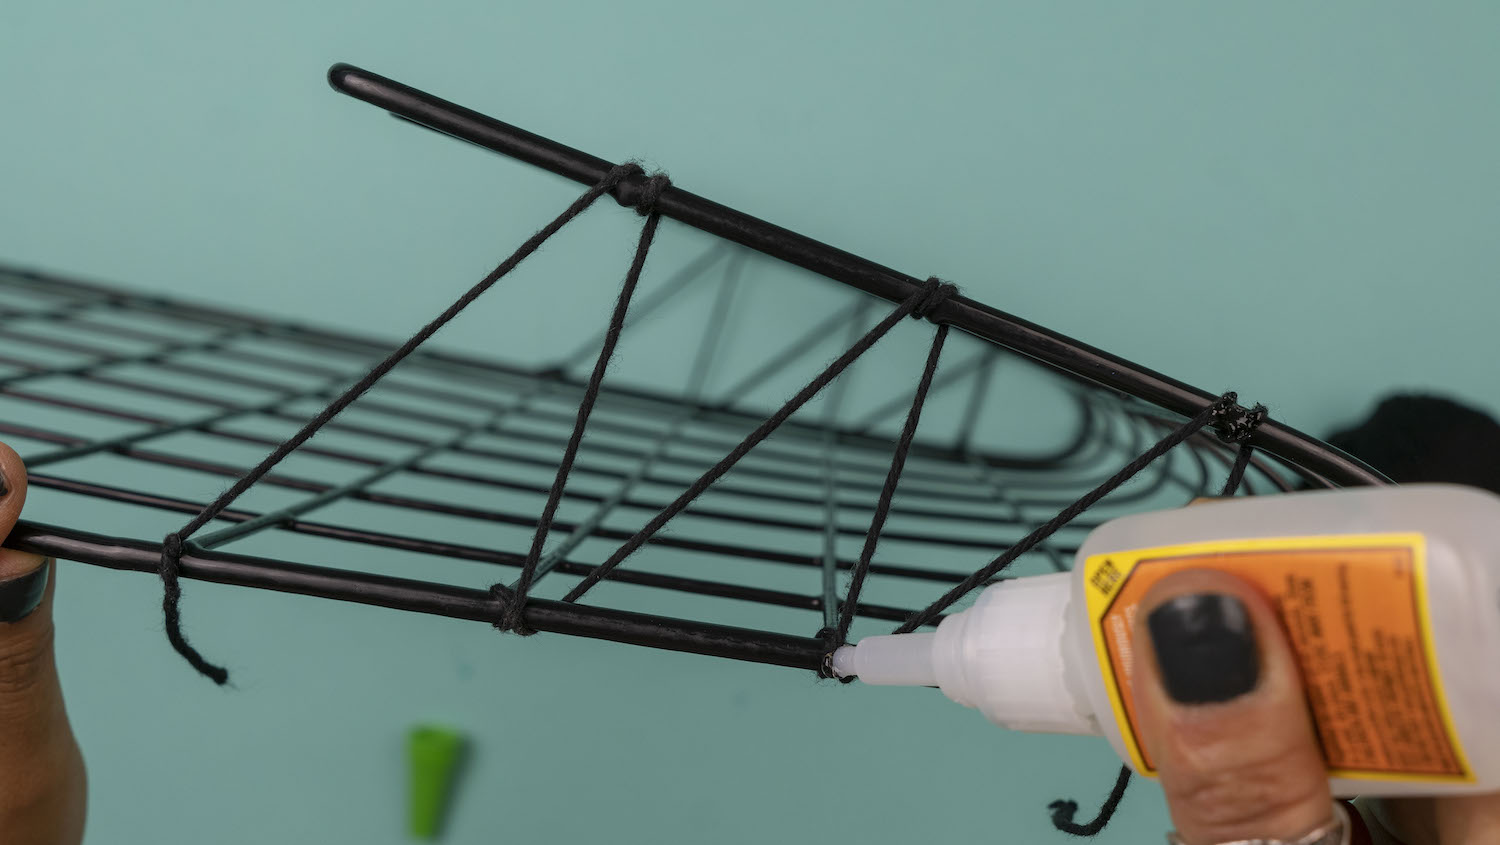
The yarn is now secure.
Repeat step 3 for the opposite side of the pocket.
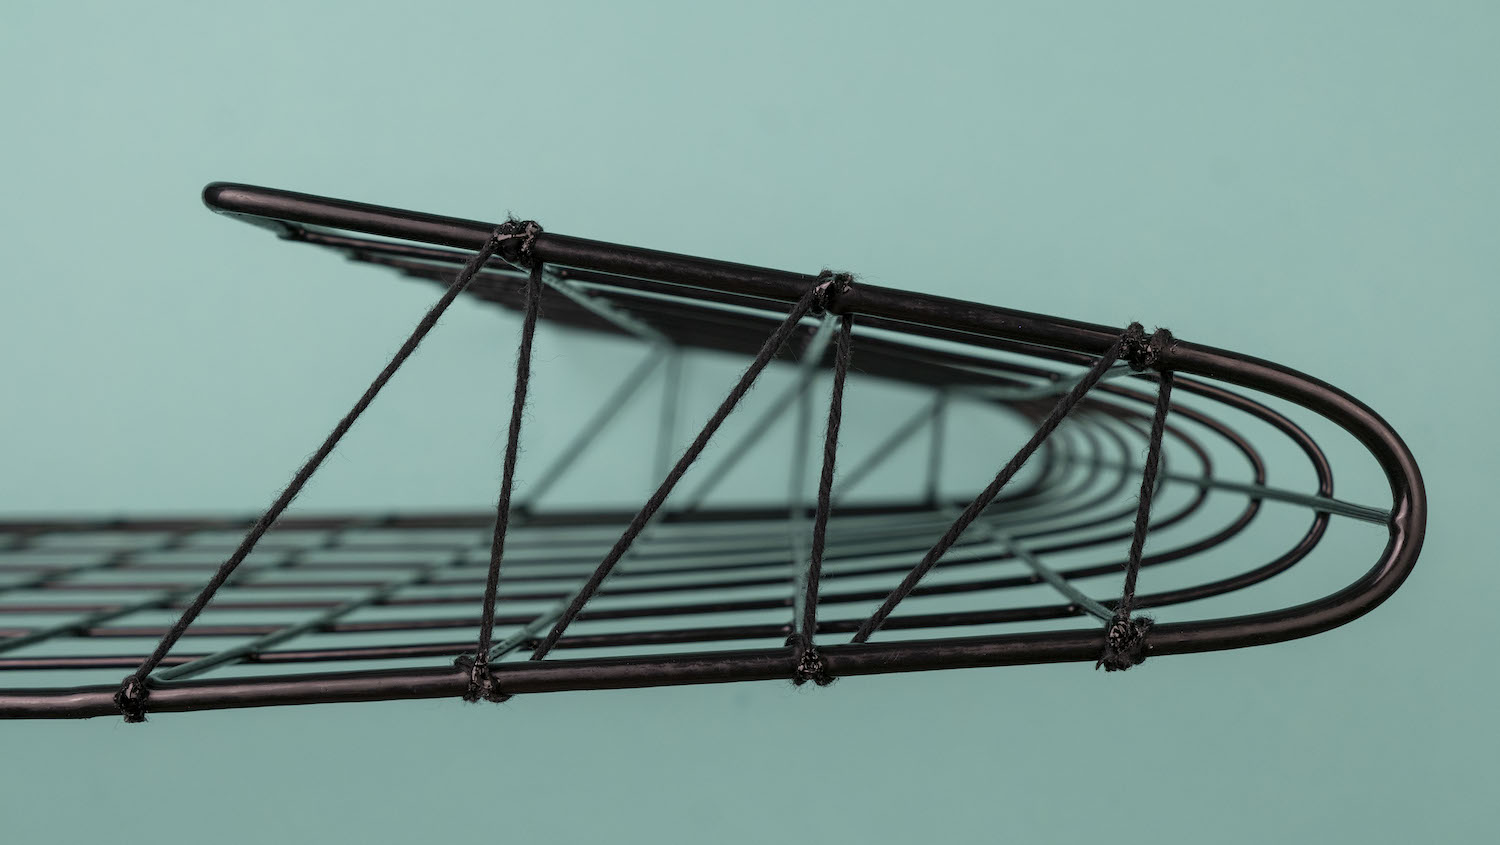
Step 4
When the glue has completely dried, snip off the excess yarn from the knotted ends.
And that’s all there is to it! Told you it was easy.
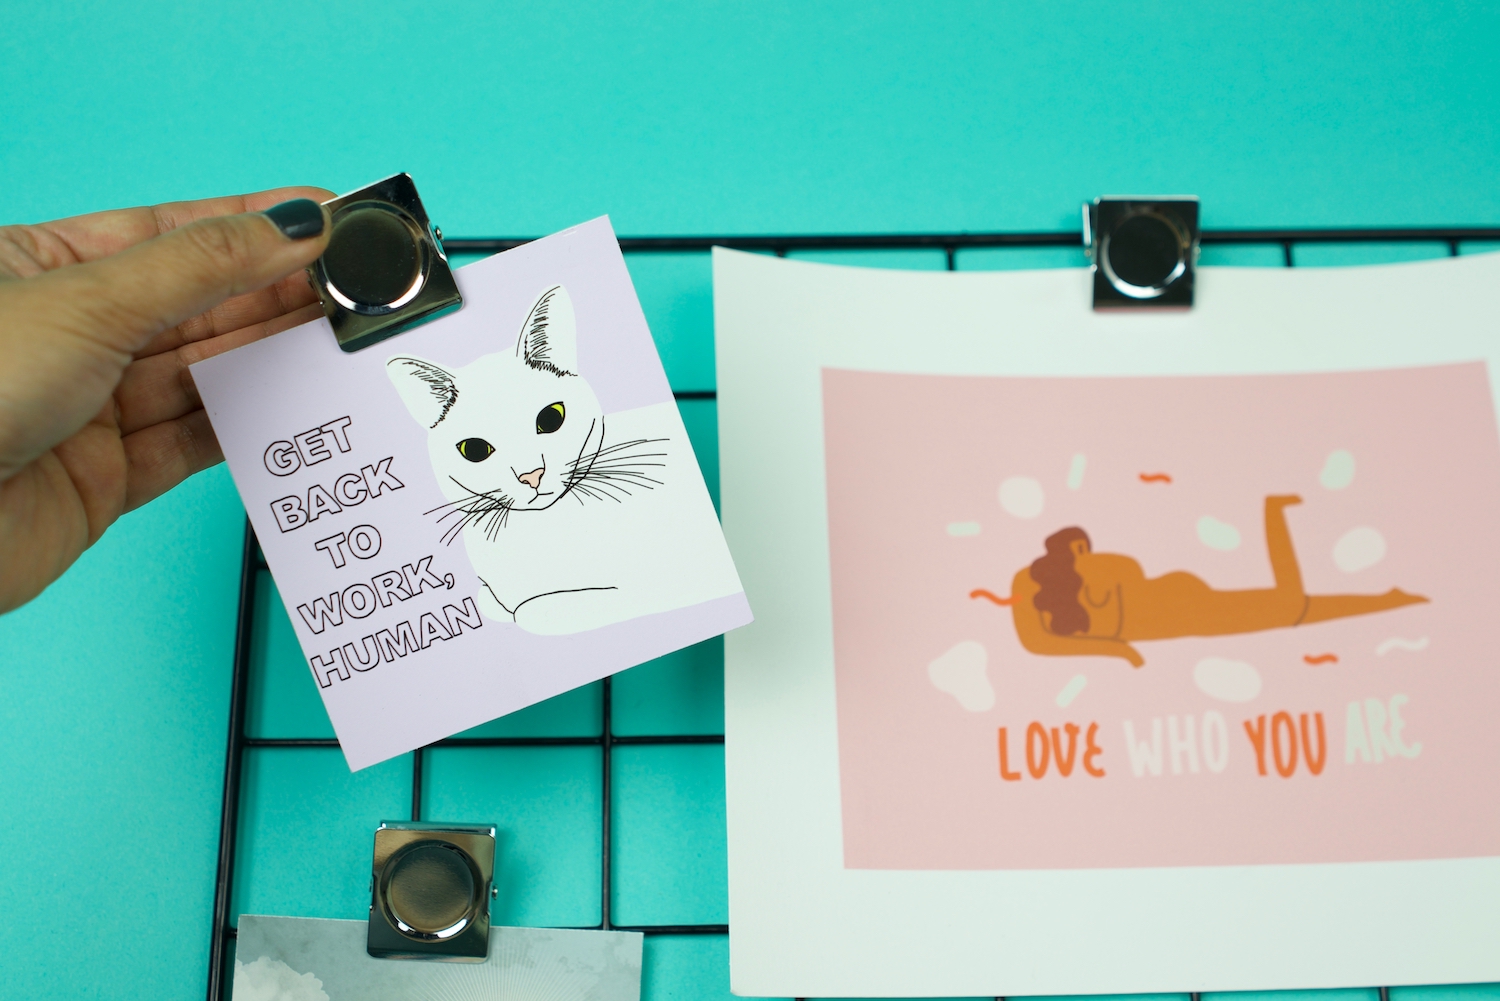
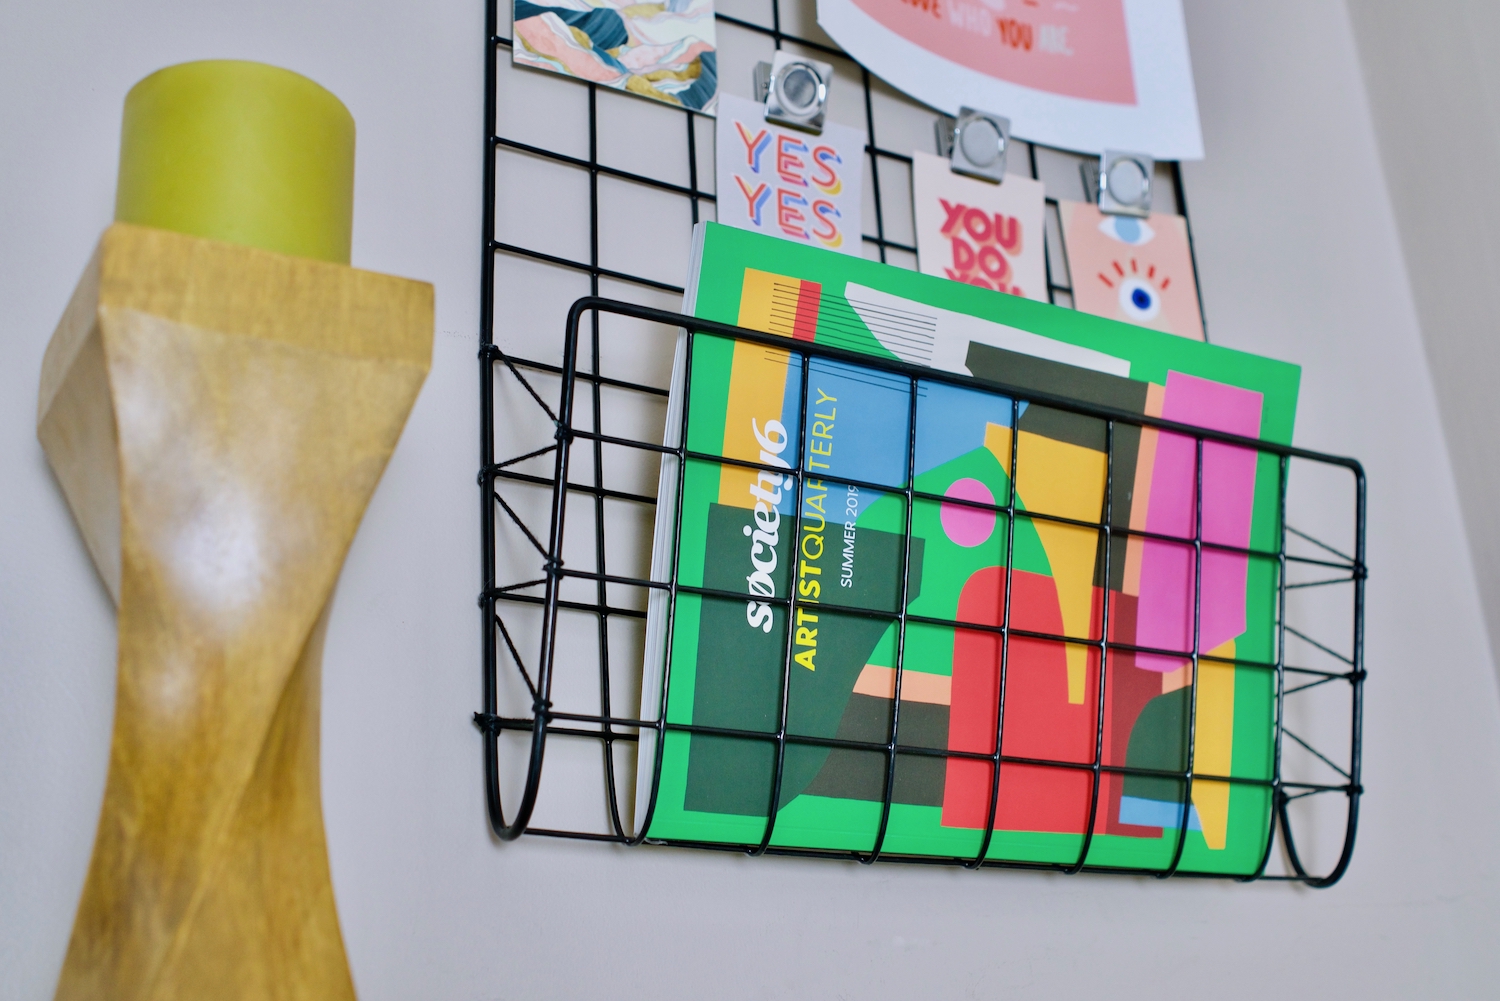
All that’s left to do now is curate the goodies you’d like to put on display and use the magnetic clips to hang them onto your grid in an eye-pleasing arrangement. We chose a mix of beautiful visuals and affirmative messages because you can never get enough daily inspo.
Finally, mount the grid on your wall using a wall hook or drywall screw and admire your awesome handiwork!
Photos and copy by Maya Marin
Comments