Let’s talk tassels.
They’re classy. They’re sassy. They’re as fun to make as they are to look at. (Dare I say, even more so?) Attach them to your favorite throw pillows and your home decor game instantly skyrockets. Ok, enough talk–here’s how to make your very own tasseled throw pillows. Grab some yarn, some scissors, your favorite Society6 throw pillows, and go class up the joint!
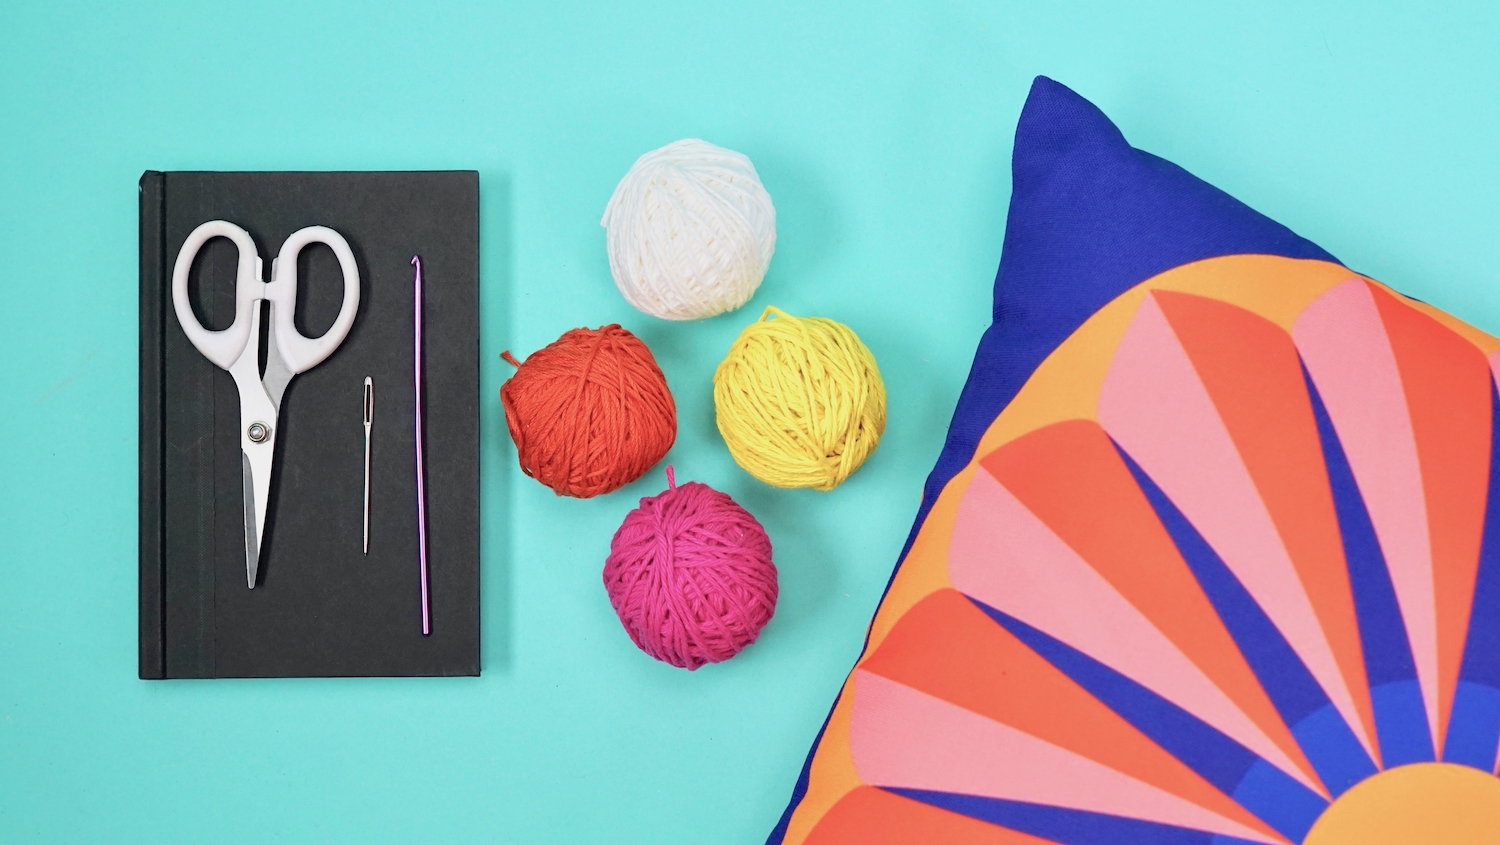
Materials
-
- Yarn (for washability, we suggest cotton or acrylic)
- Large-eye, hand-sewing upholstery needle
- Sharp scissors
- A book a little wider than your desired tassel length (hard cover works best)
- Crochet hook (optional, but may come in handy)
Step 1
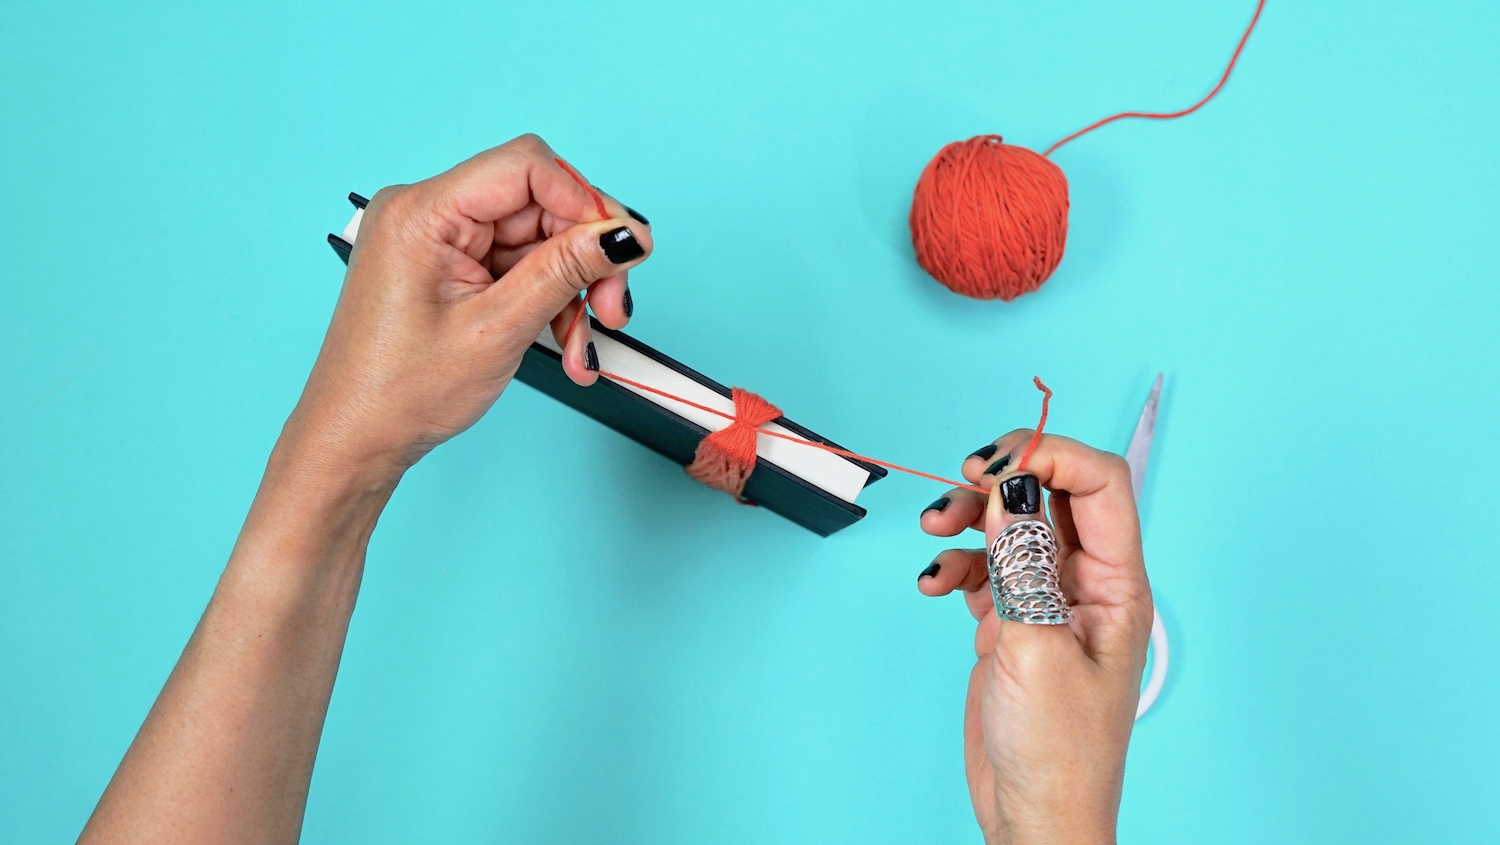
Wrap yarn around the width of the book around 25 – 30 times depending on the desired fullness of your tassels and the thickness of your yarn. (I did 25 rounds.) Make sure the loose end of your yarn is at the spine edge.
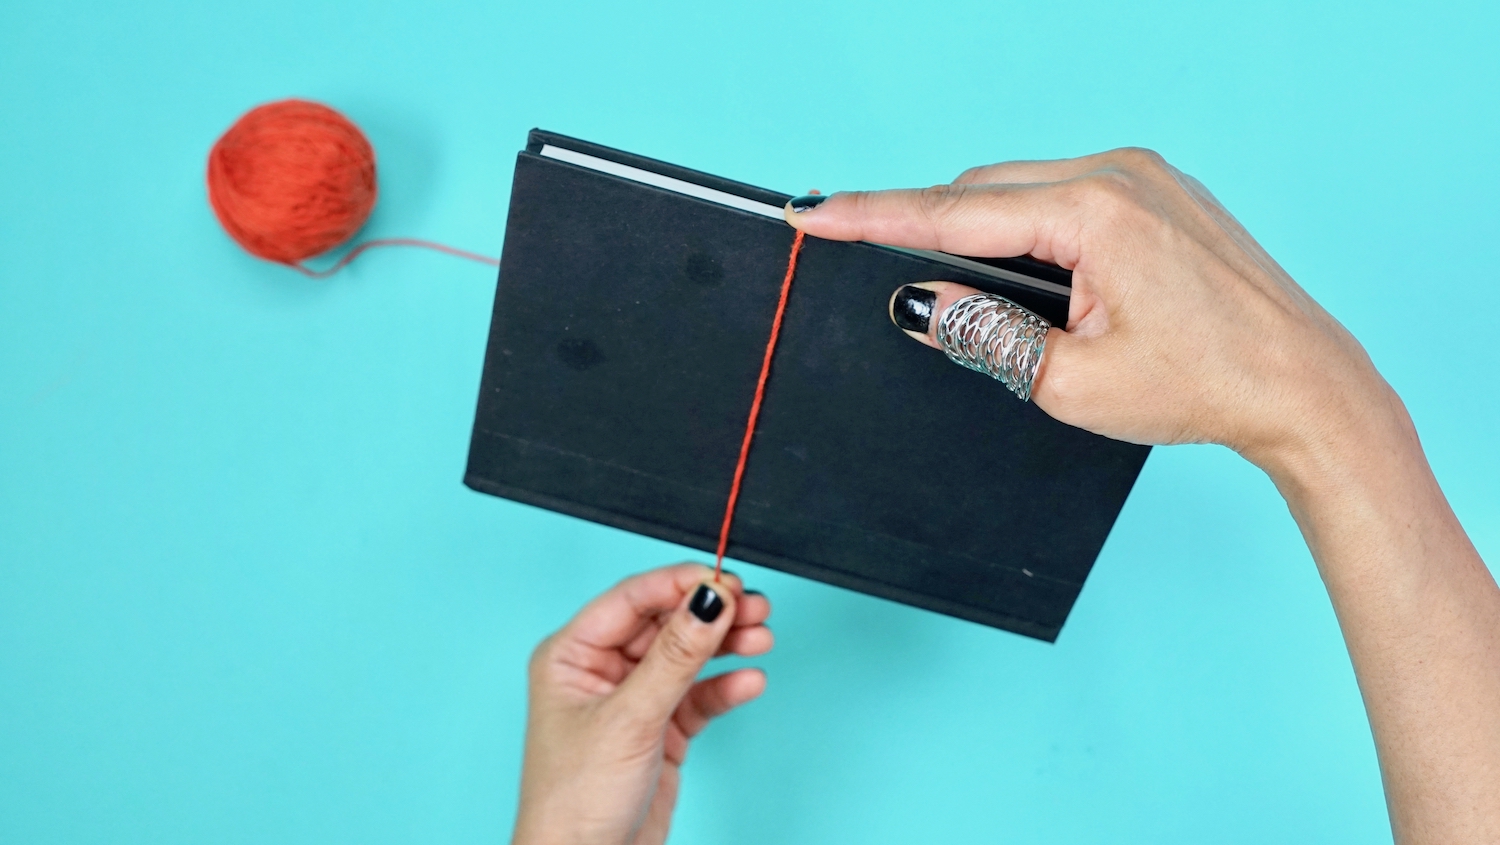
Wrap tight-ish, but not too tightly as you want the yarn to slip off fairly easily later. Also, you’ll want enough of a gap to be able to pass a loose piece of yarn underneath the wrapped yarn.
When you’re done wrapping, snip the yarn at the spine.

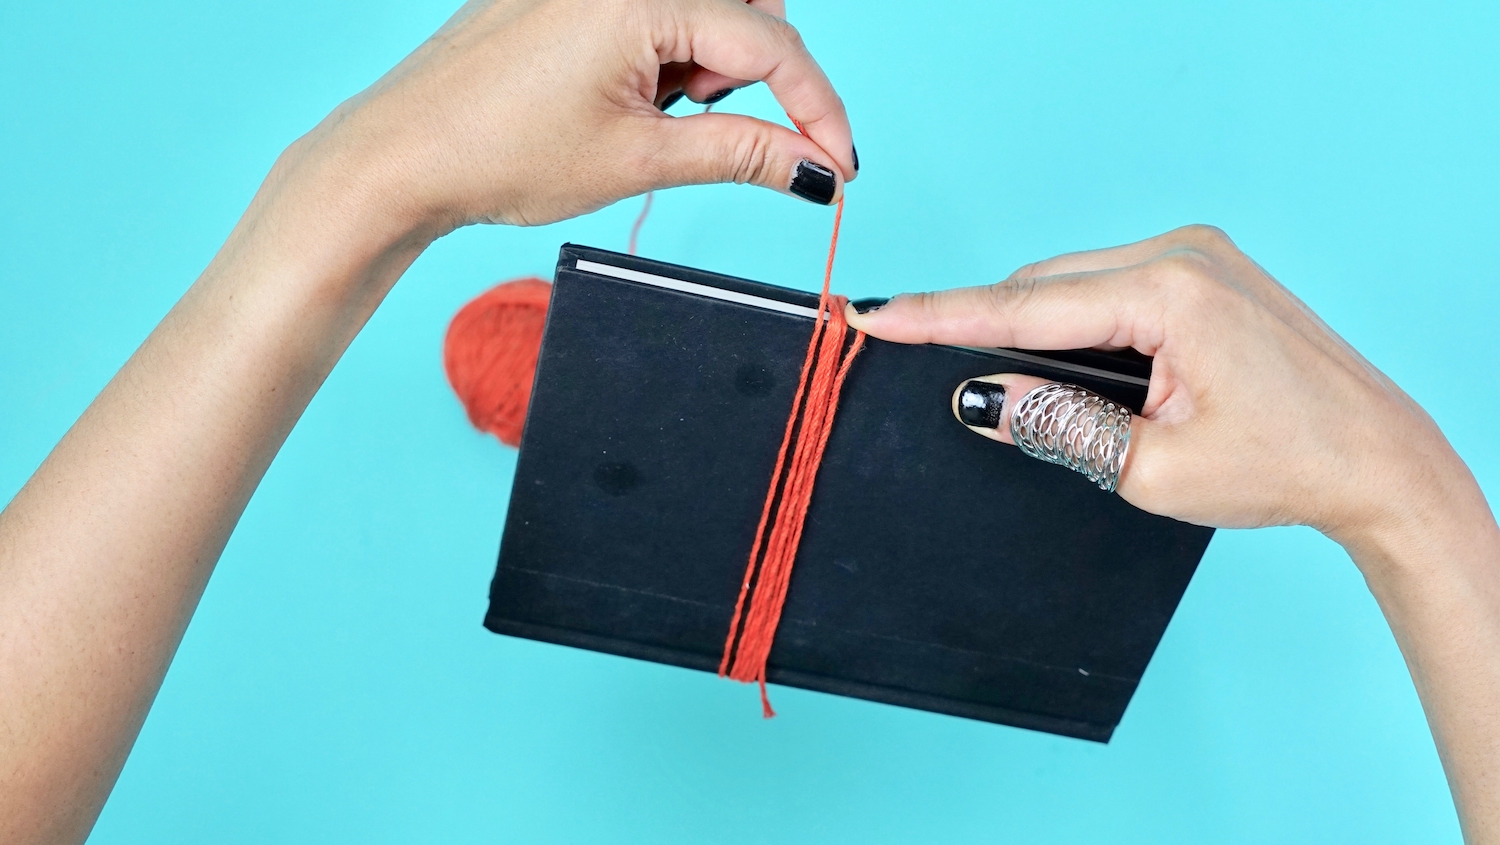
Step 2
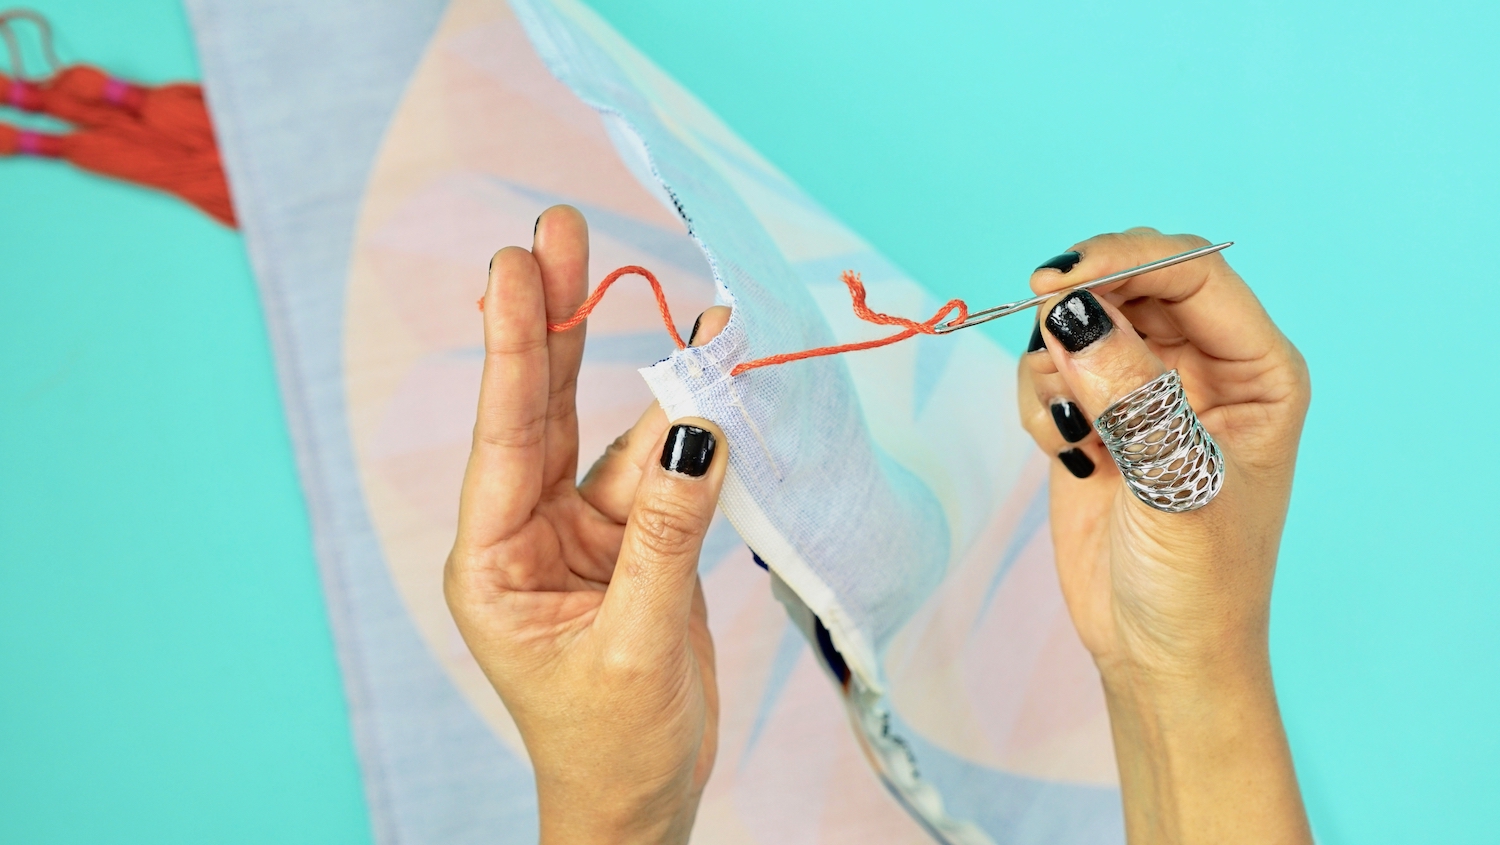
Cut off a piece of yarn about 10” long and pass it between the looped yarn and the book along the pages edge, opposite the spine (see image below). If you’re using a hardcover book, it should be easy to pass the yarn through the groove between the front and back covers. If you need a bit of help, use a crochet hook to grab and pull the yarn underneath the wrapped strands.
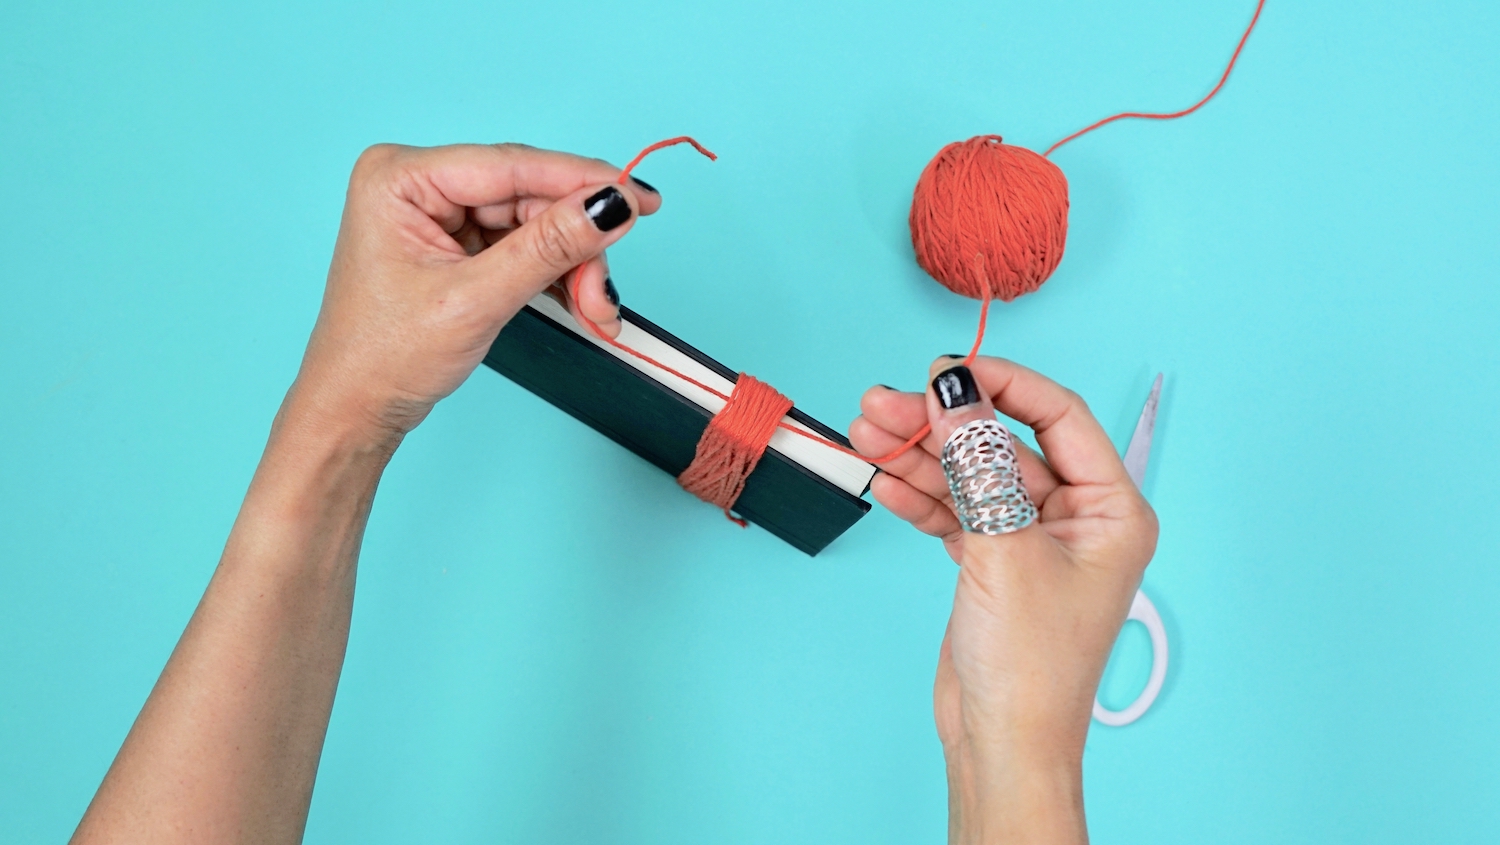
Cinch and secure the looped strands together tightly with a double knot.
Slip the yarn off the book.
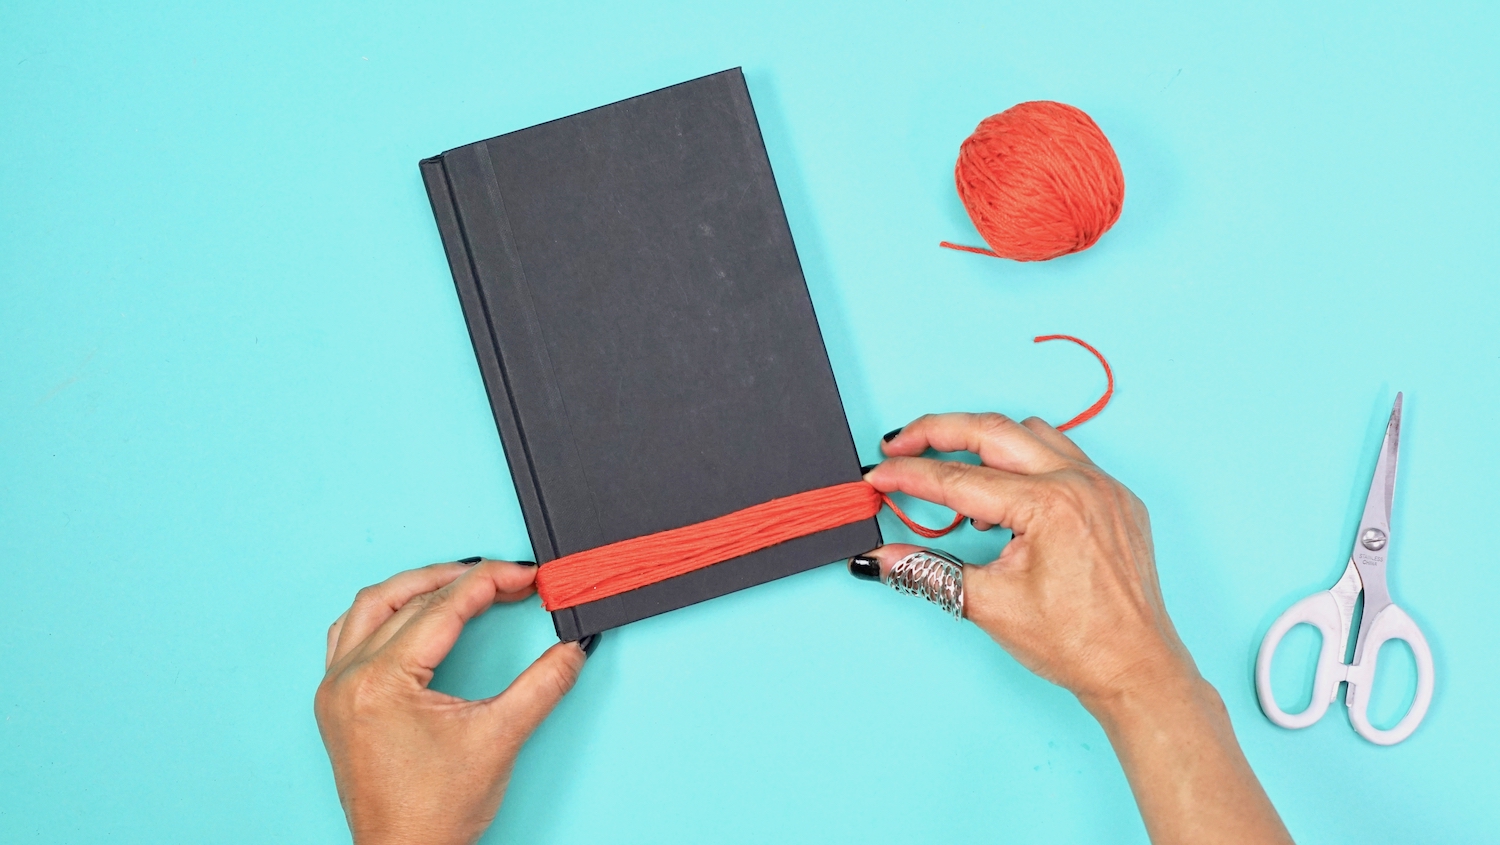
And what you’ve got now is something that already resembles a tassel!
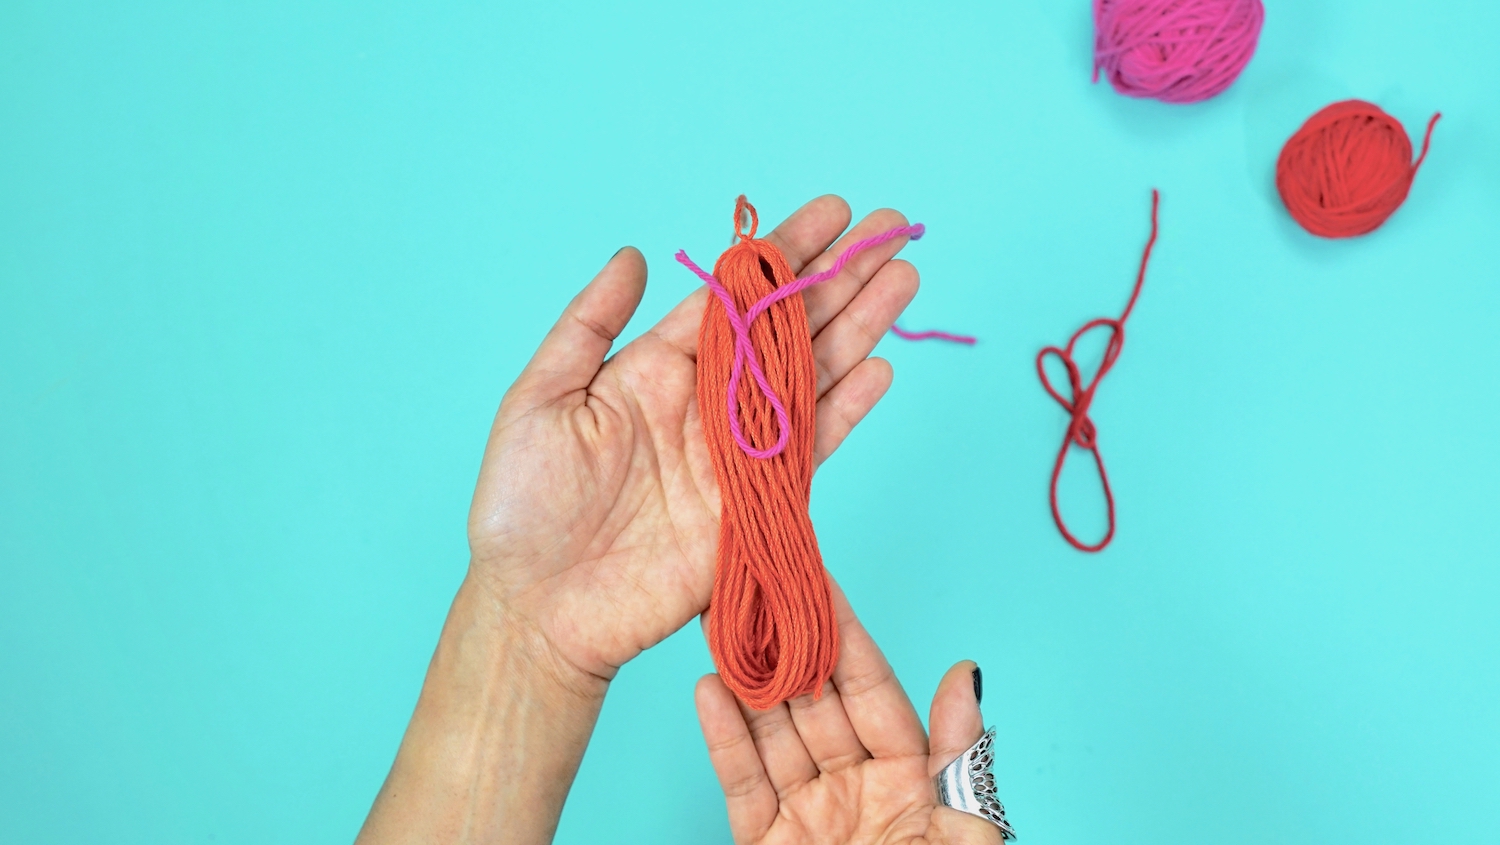
Step 3
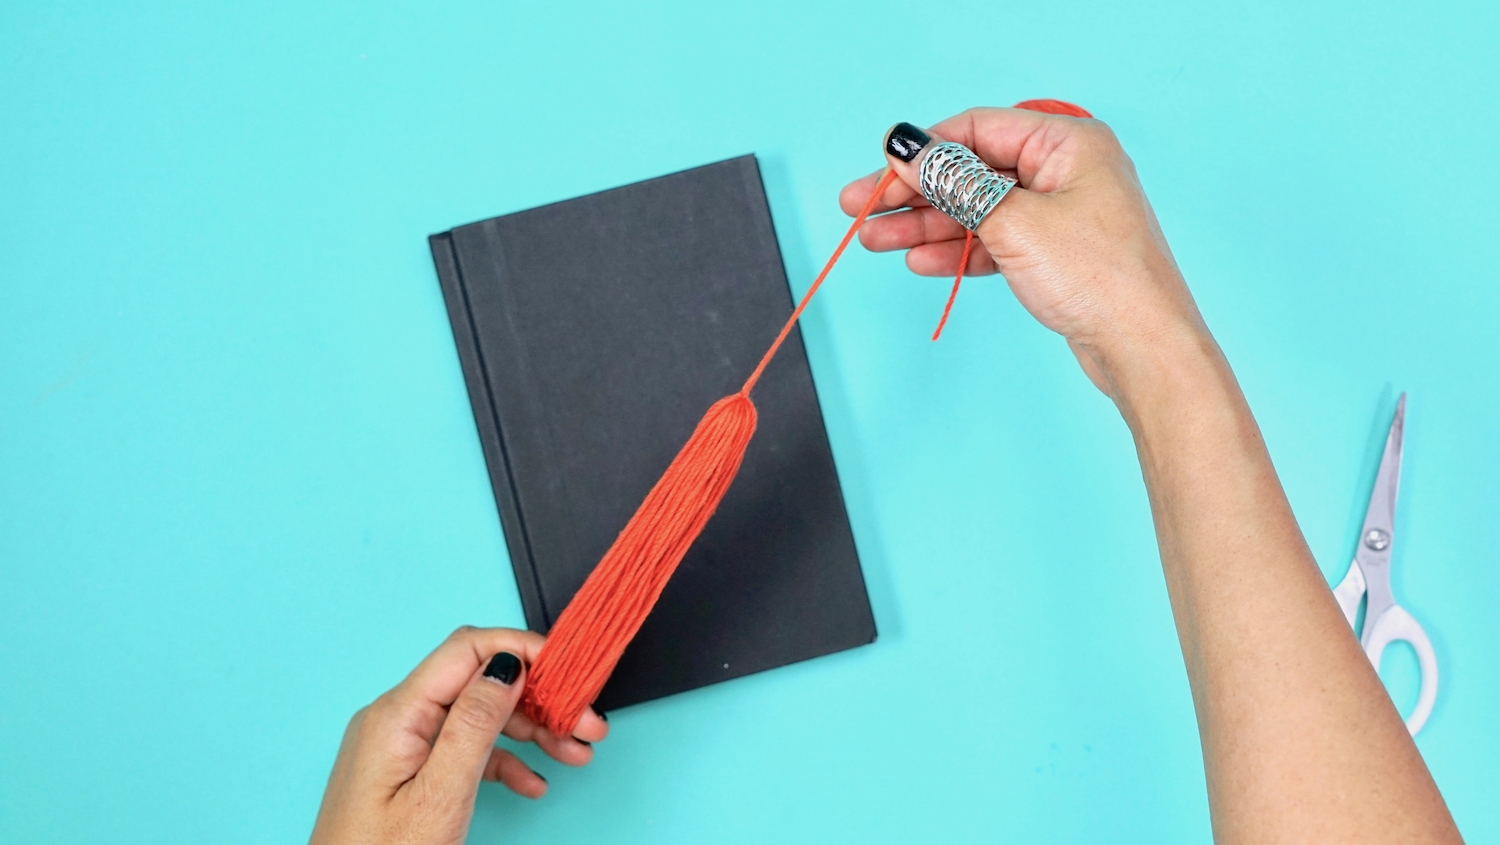
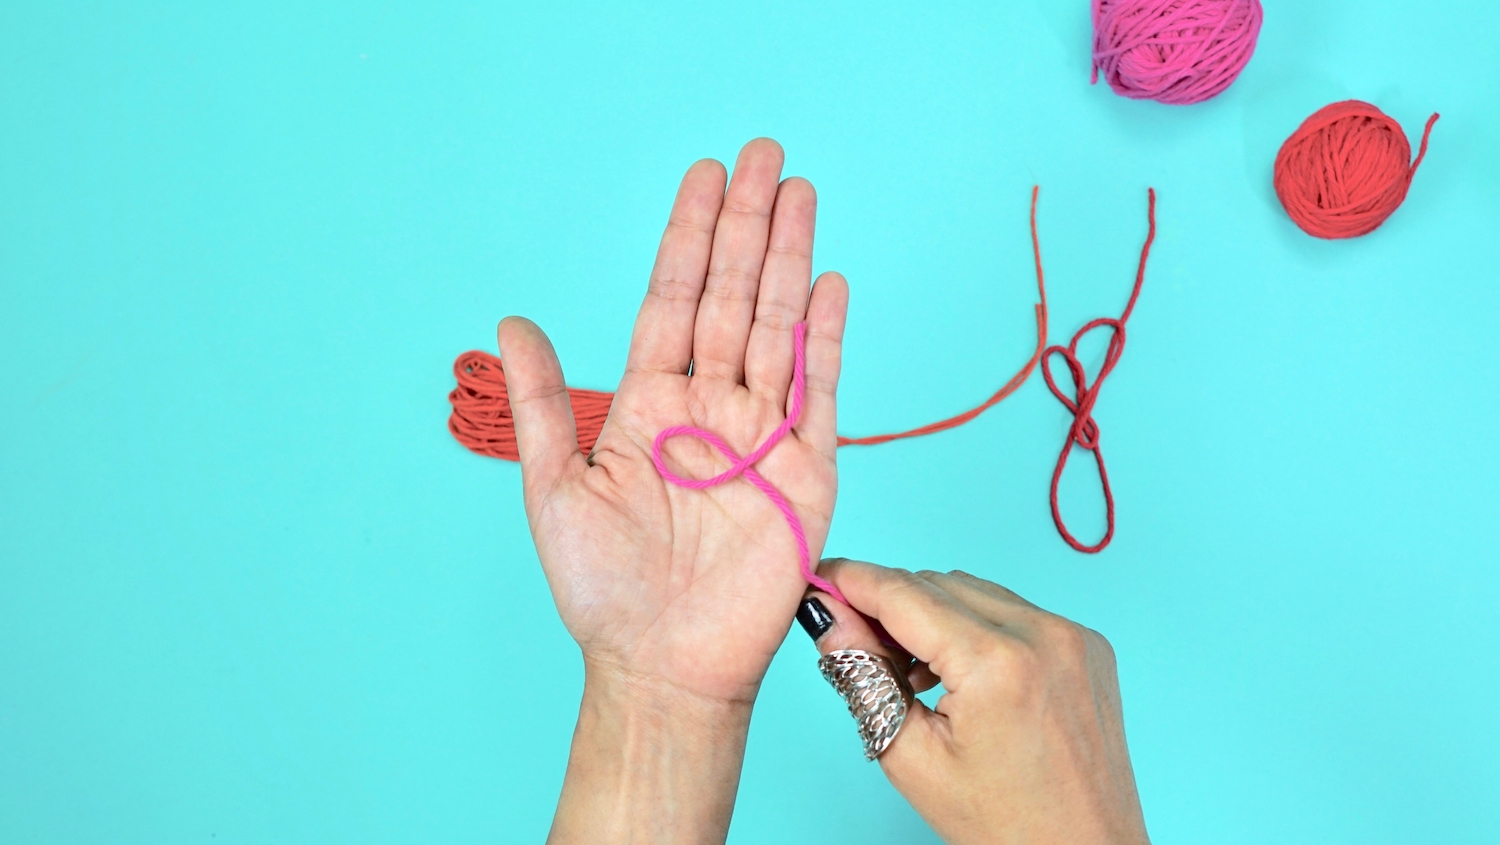
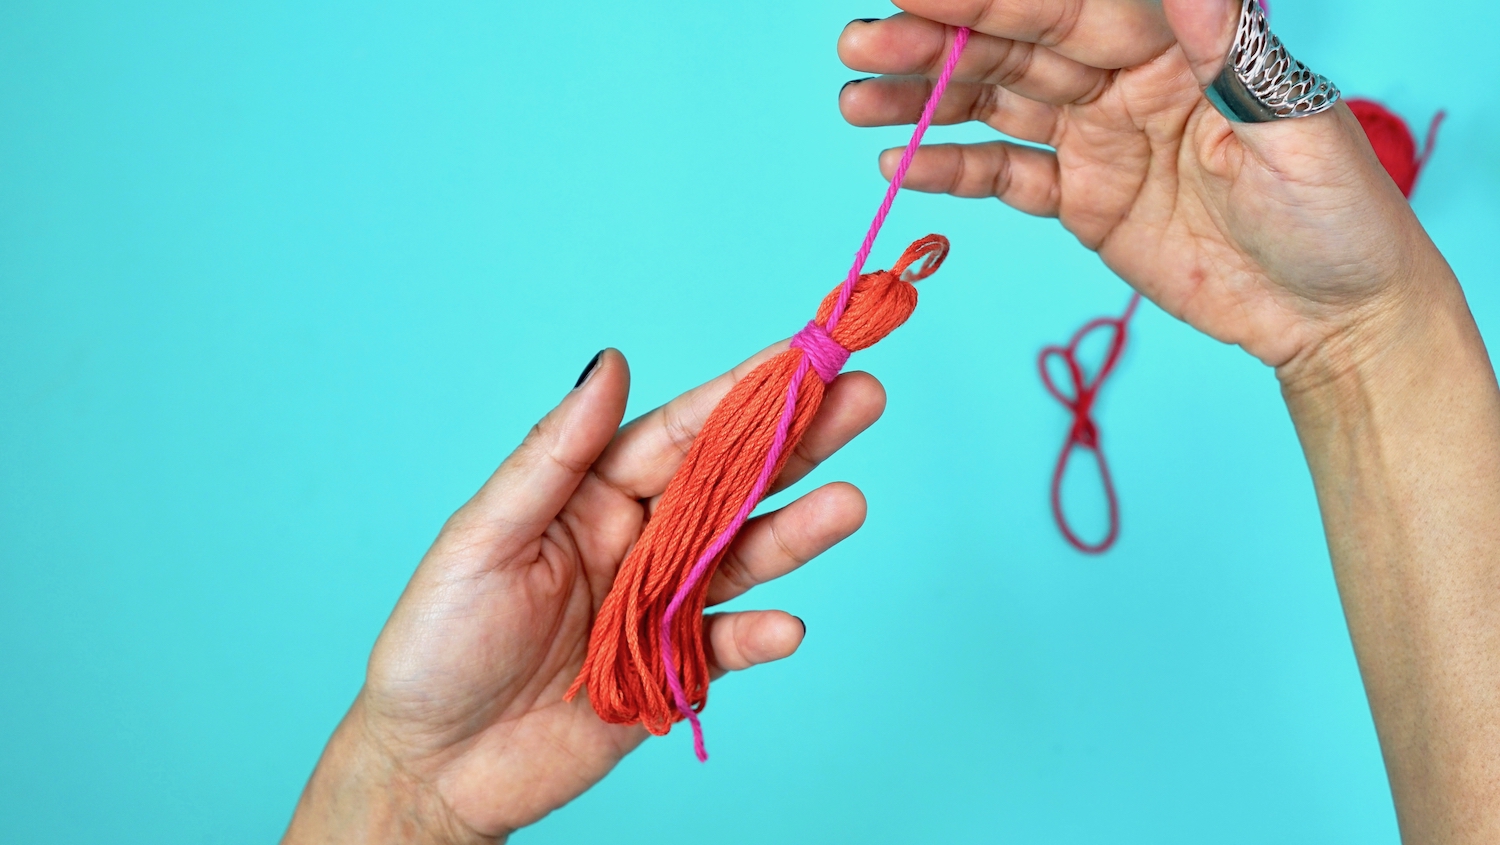
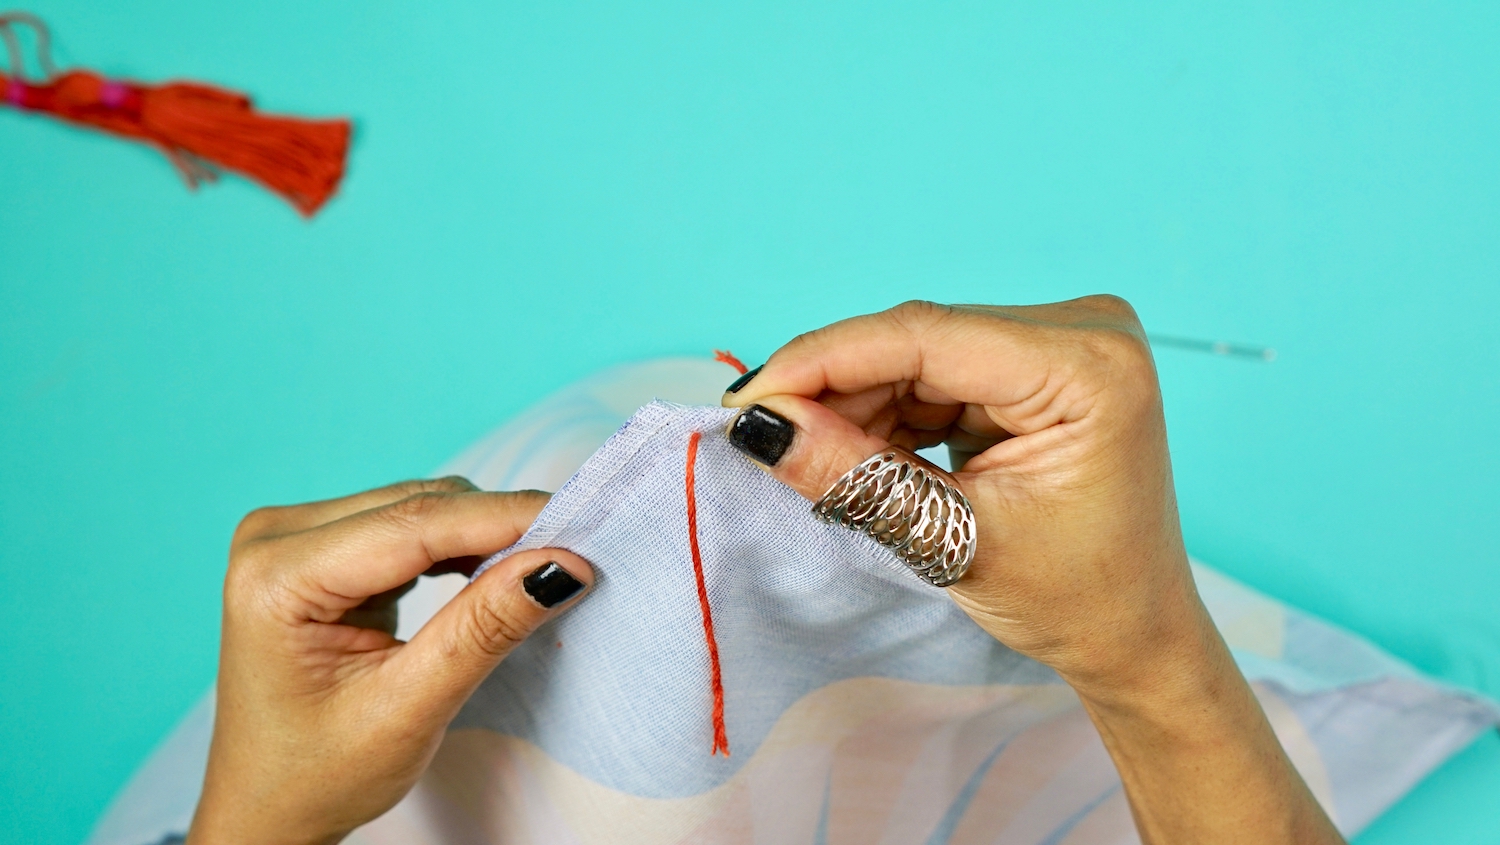
Select 2 (or 3) additional complementary colors of yarn. Or, use the same color in different shades for a monochrome look. Cut a piece approximately 14” from each color. Now take one piece and form a loop about 2” inches from one end as shown.
Place the loop on top of the tassel near the bound end like so.
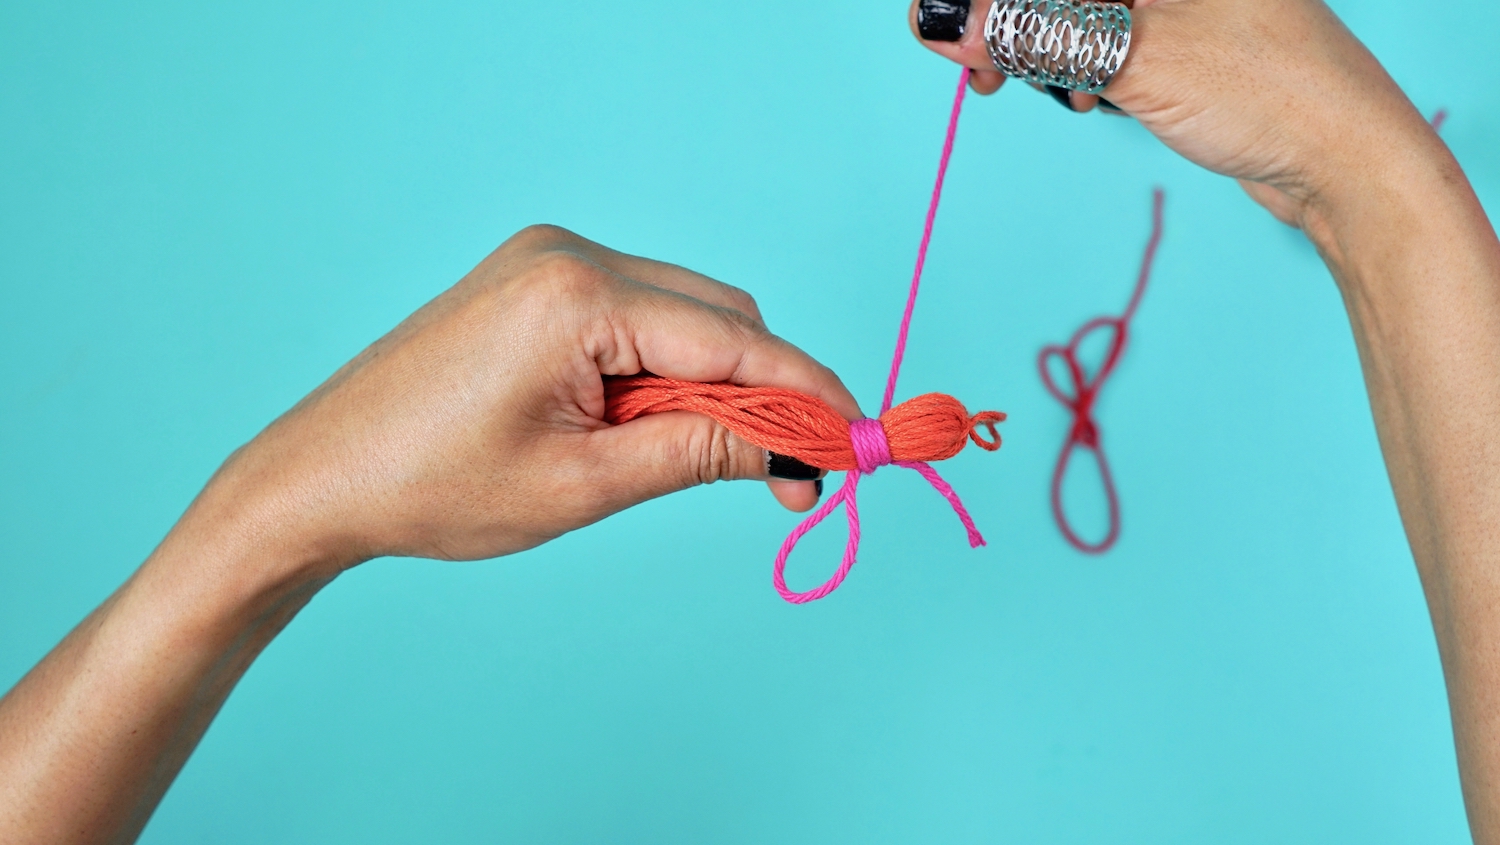
Tightly wrap the longer end of the looped yarn around itself and the tassel approximately 3 or 4 times. This will create the “head” of your tassel by binding the strands together. For a cleaner look, don’t overlap the binding wraps — allow them to sit side by side in a single layer of rows as shown.
IMPORTANT: Make sure that the 2” short end of the loop remains outside of the binding wrap (refer to the image below). You’ll need this end loose to complete the next step.
Step 4
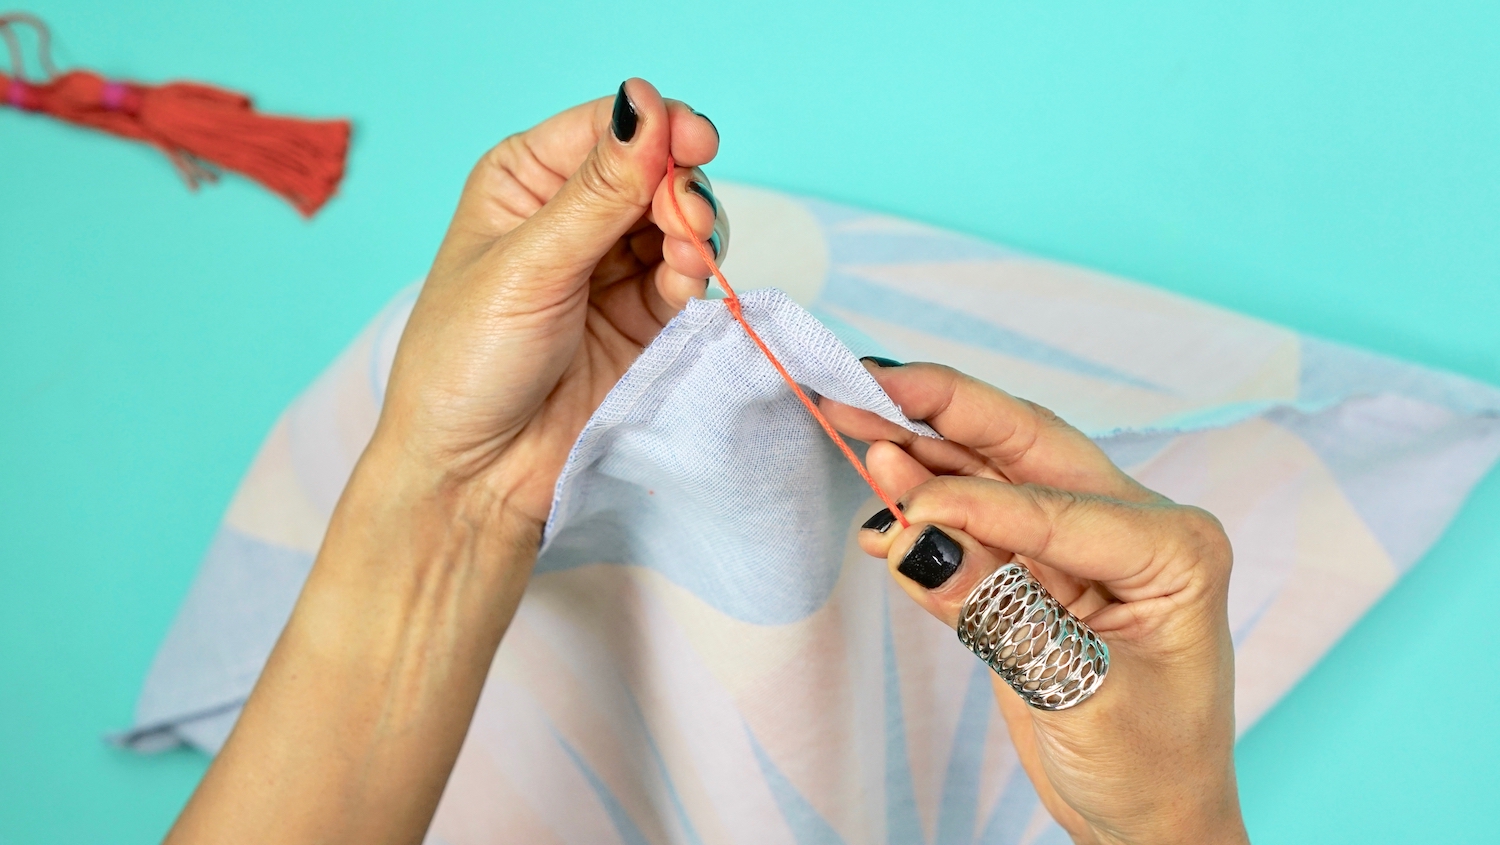
Secure your binding wrap by threading the long end (the end you were wrapping around) through the loop. Make sure that your wrap remains tight as you do so by pulling it taught through the loop.
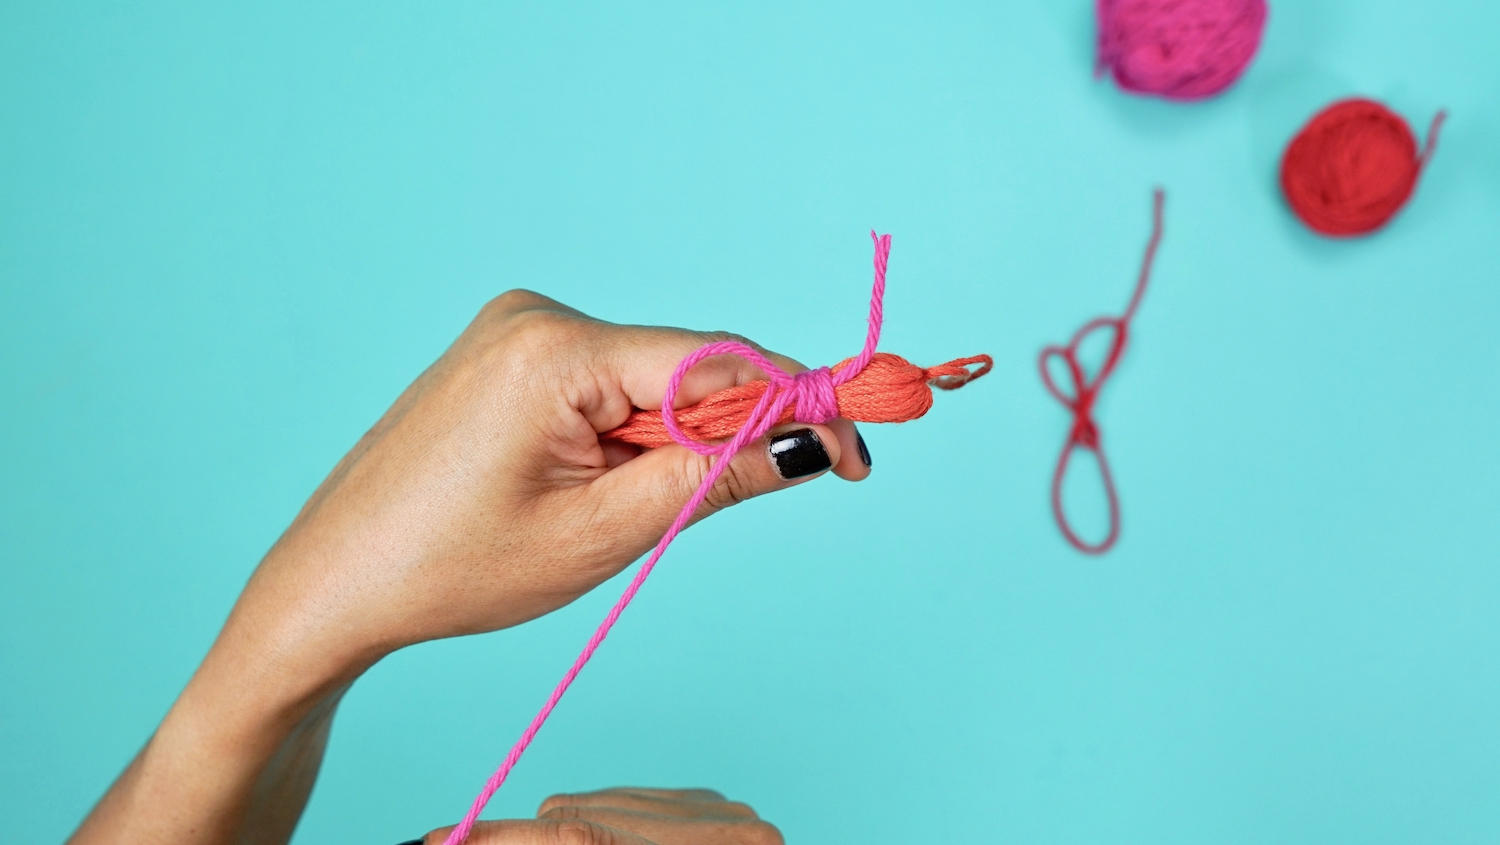
Once your long end is pulled taughtly through the loop, grab the loose short end that you made when you first created your loop and pull it. This does a couple of things: 1) it closes up your loop and 2) simultaneously grabs onto the end that you just threaded through that loop.
Now keep on pulling until the knot disappears underneath the wrapped yarn.
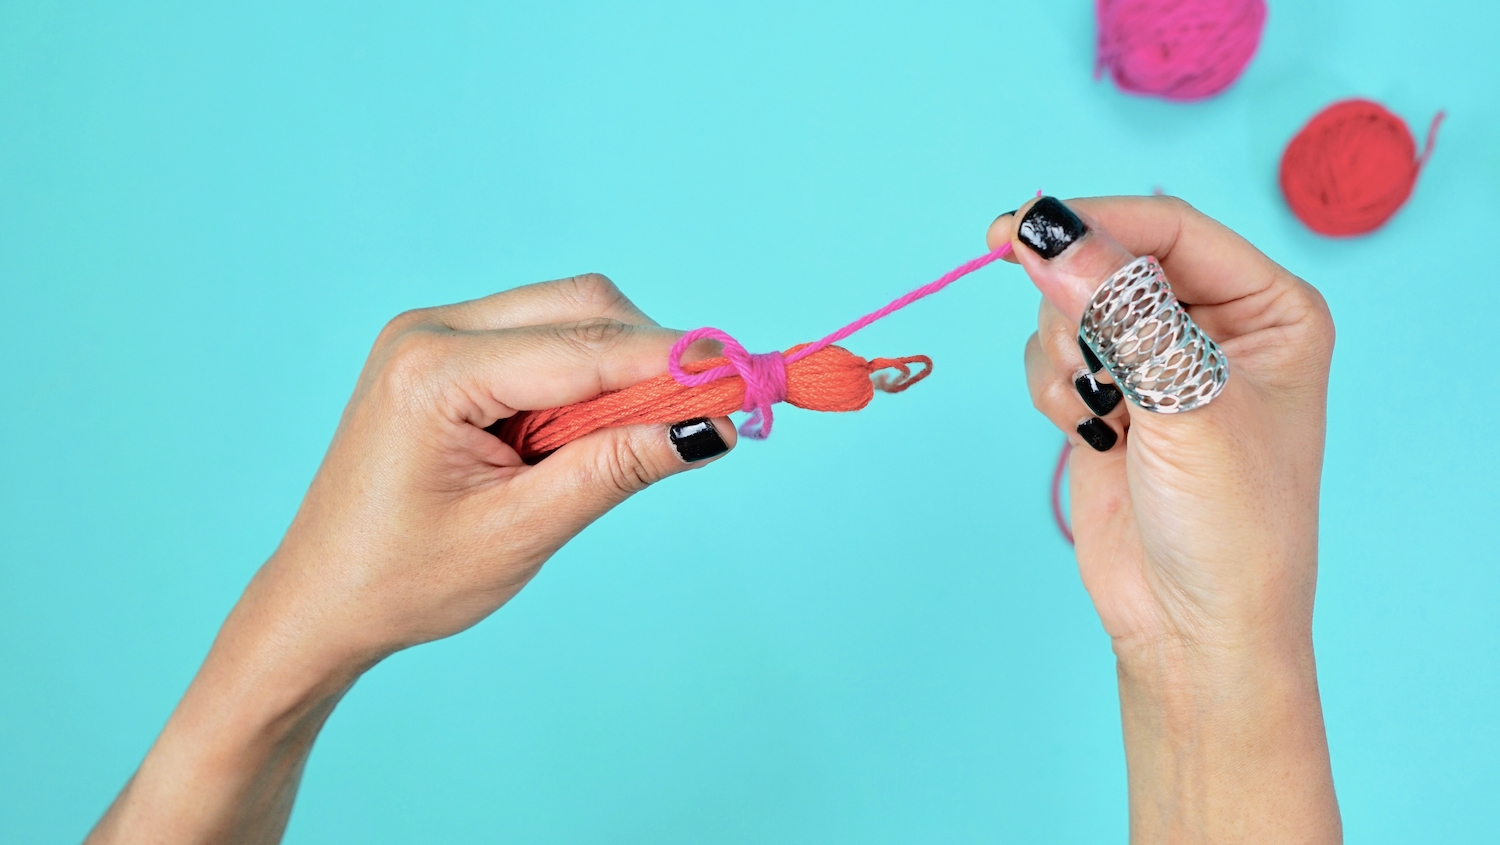
Now snip off the two ends. If you’re a perfectionist, you can use a rounded edge instrument (like the end of a crochet hook) to stuff the super short cut ends of yarn underneath the wrapped yarn. They’re hardly noticeable, so I didn’t bother.
Repeat this step with one or two more contrasting colors for a striped look.

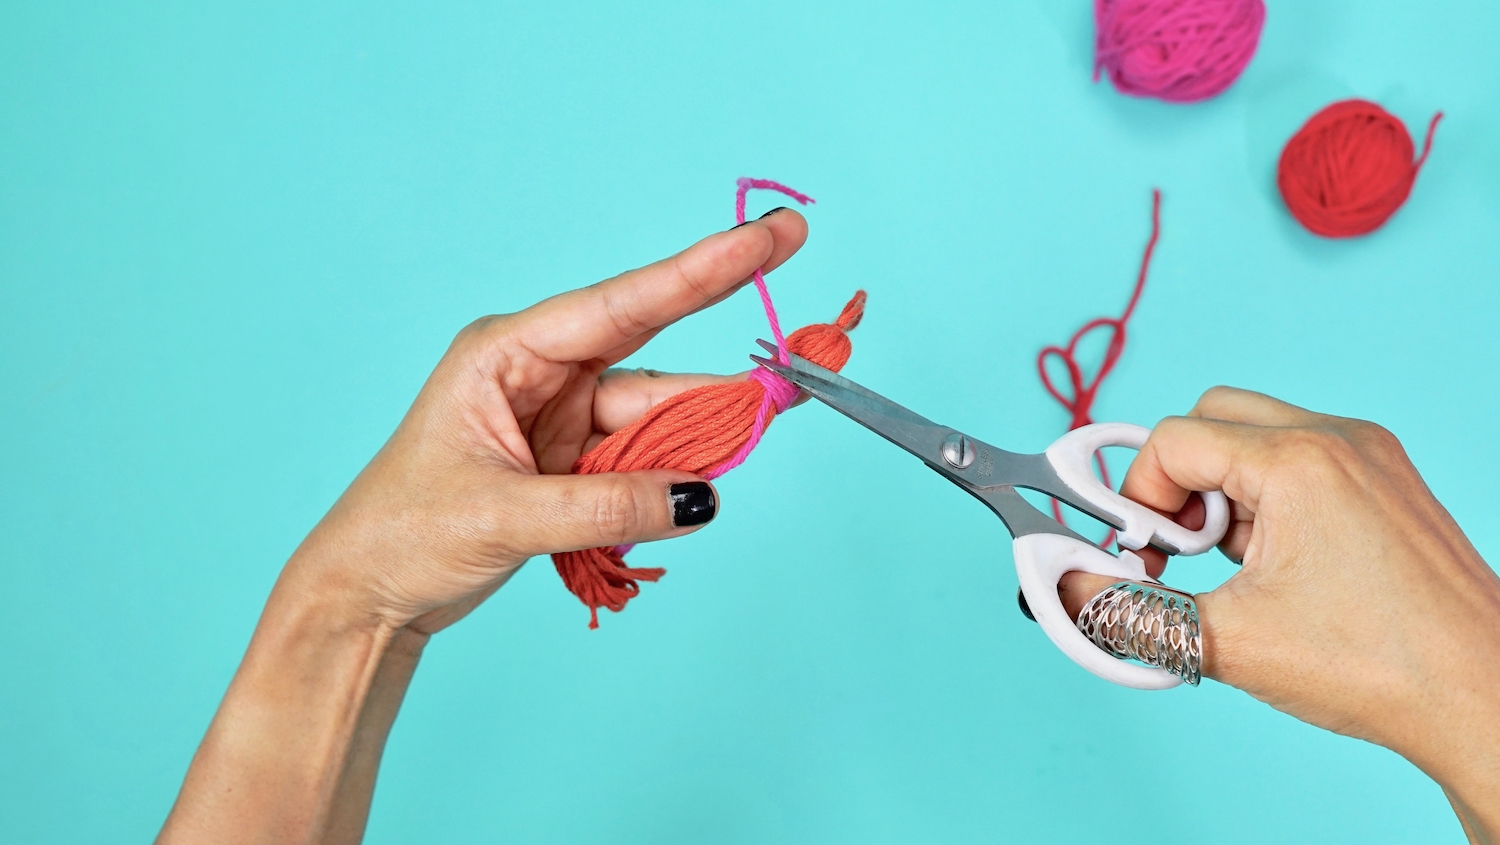
Step 5
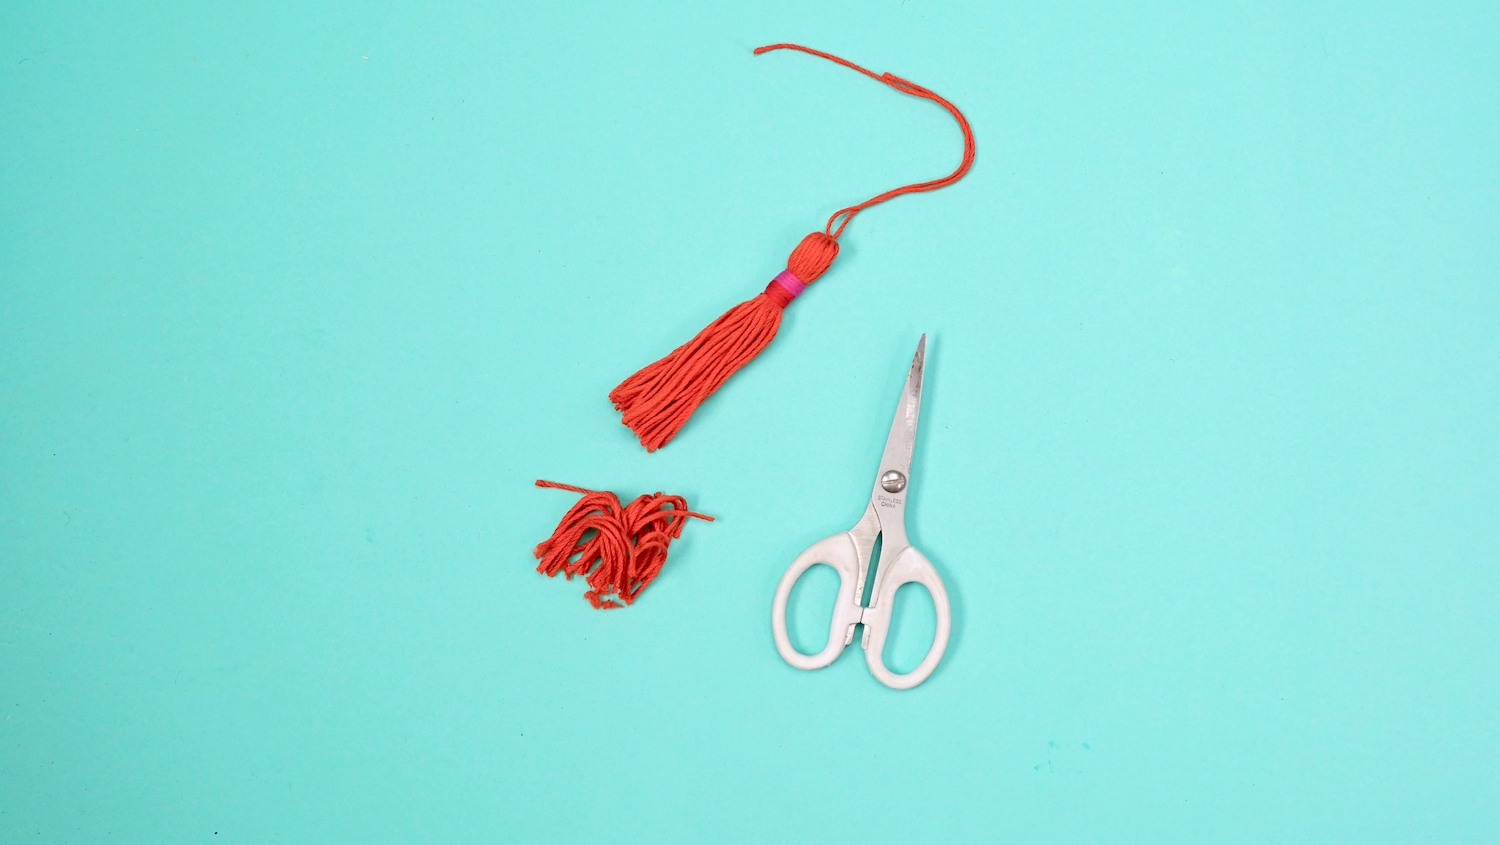
Finally, trim straight across the bottom edge to make the fringed end.

Tassel one complete!
Repeat steps 1 – 5 three more times for a total of four lovely tassels.

Step 6
Time to attach those tassels to the corners of your throw pillow cover.
First, remove your pillow insert and turn the cover inside out.
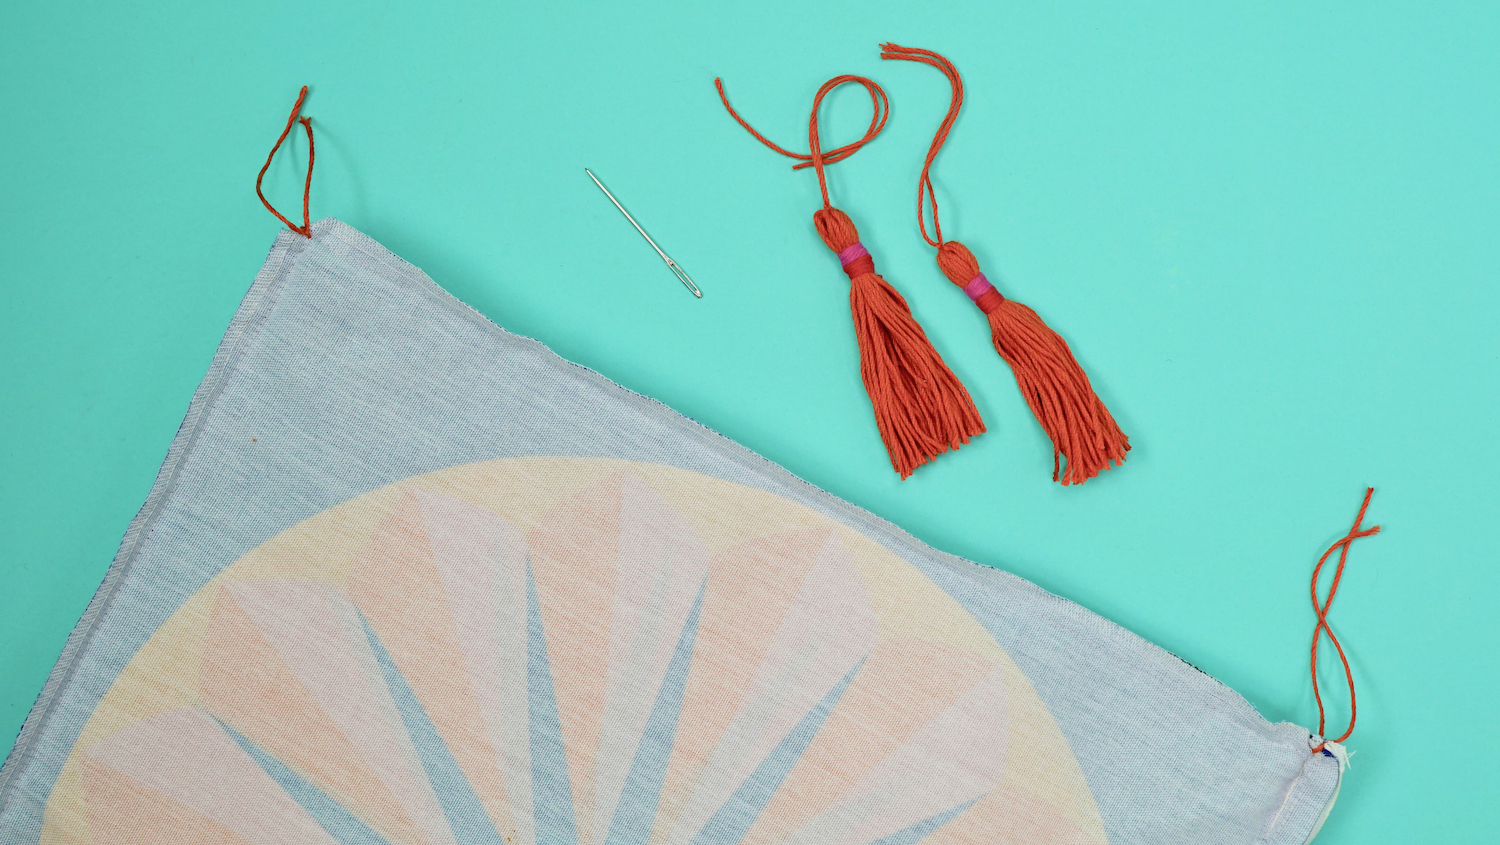
Step 7
Your tassels should have two loose ends at the top from when you tied the initial main-colored strands together during step 2. Thread one of those ends onto your upholstery needle.
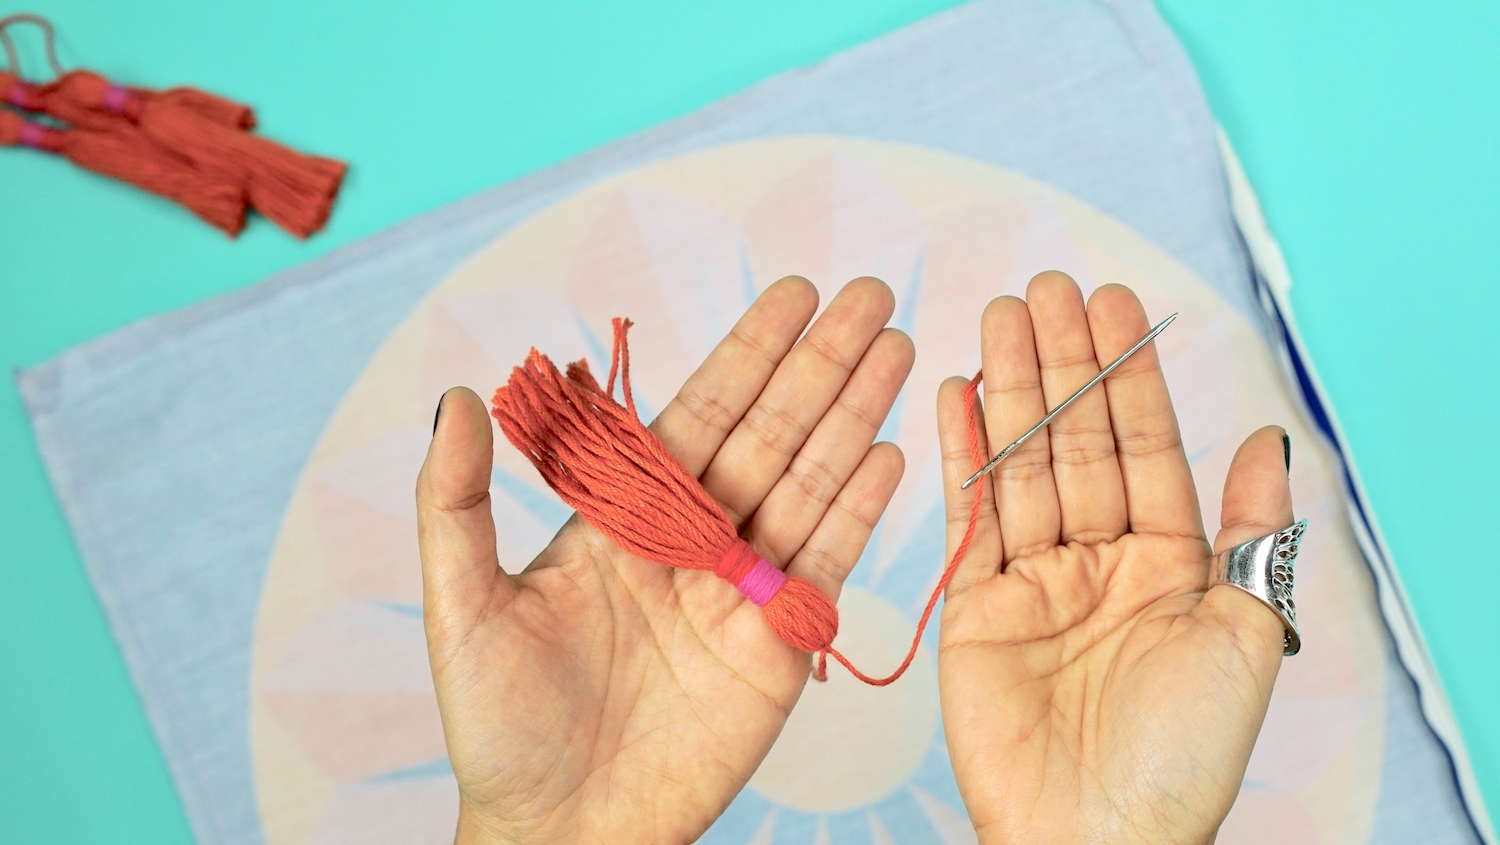
Insert tassel and threaded needle inside the inverted pillow cover.
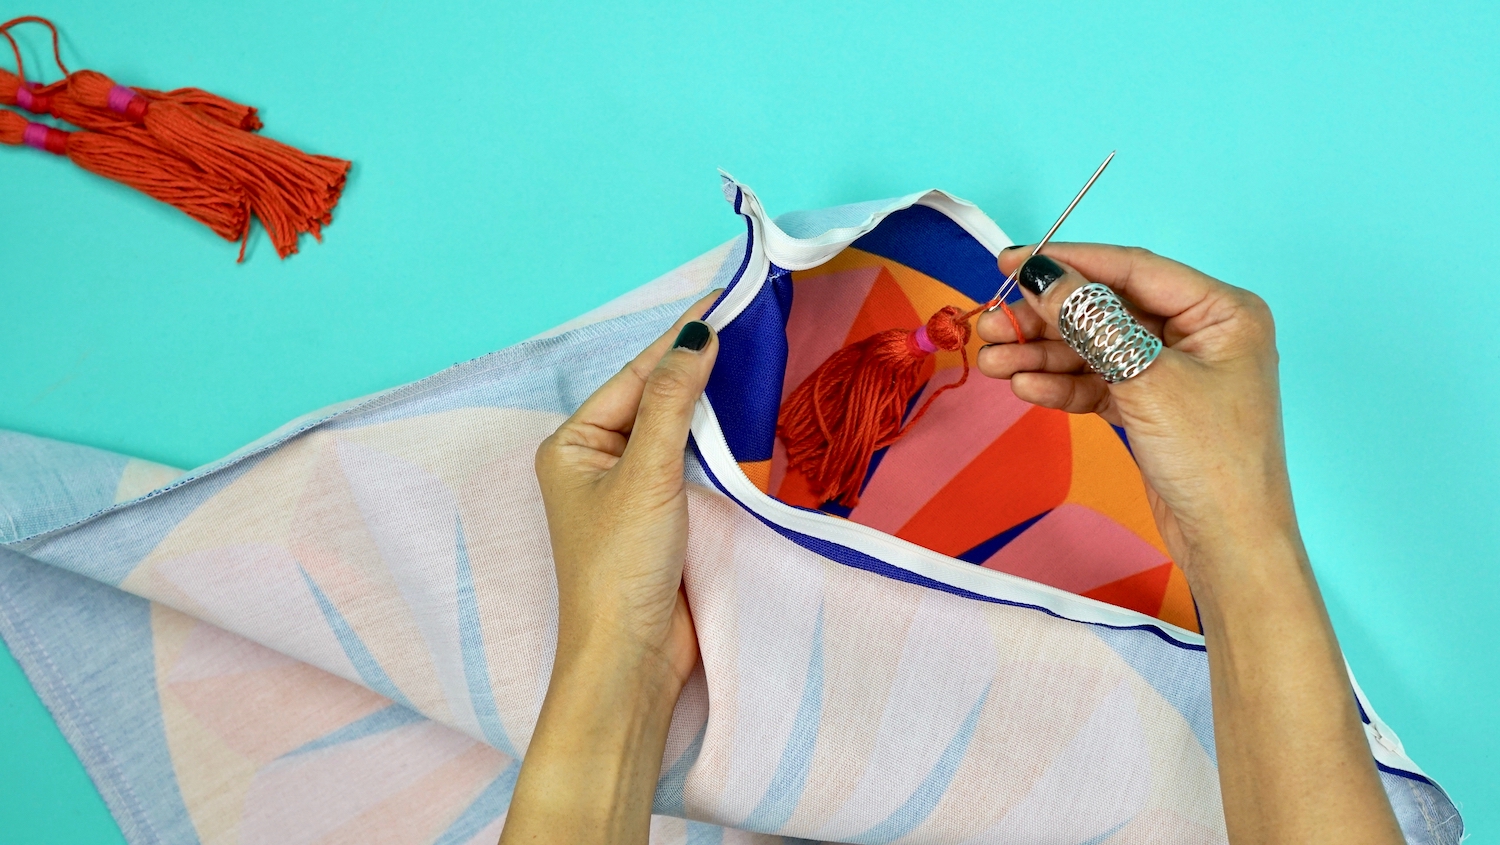
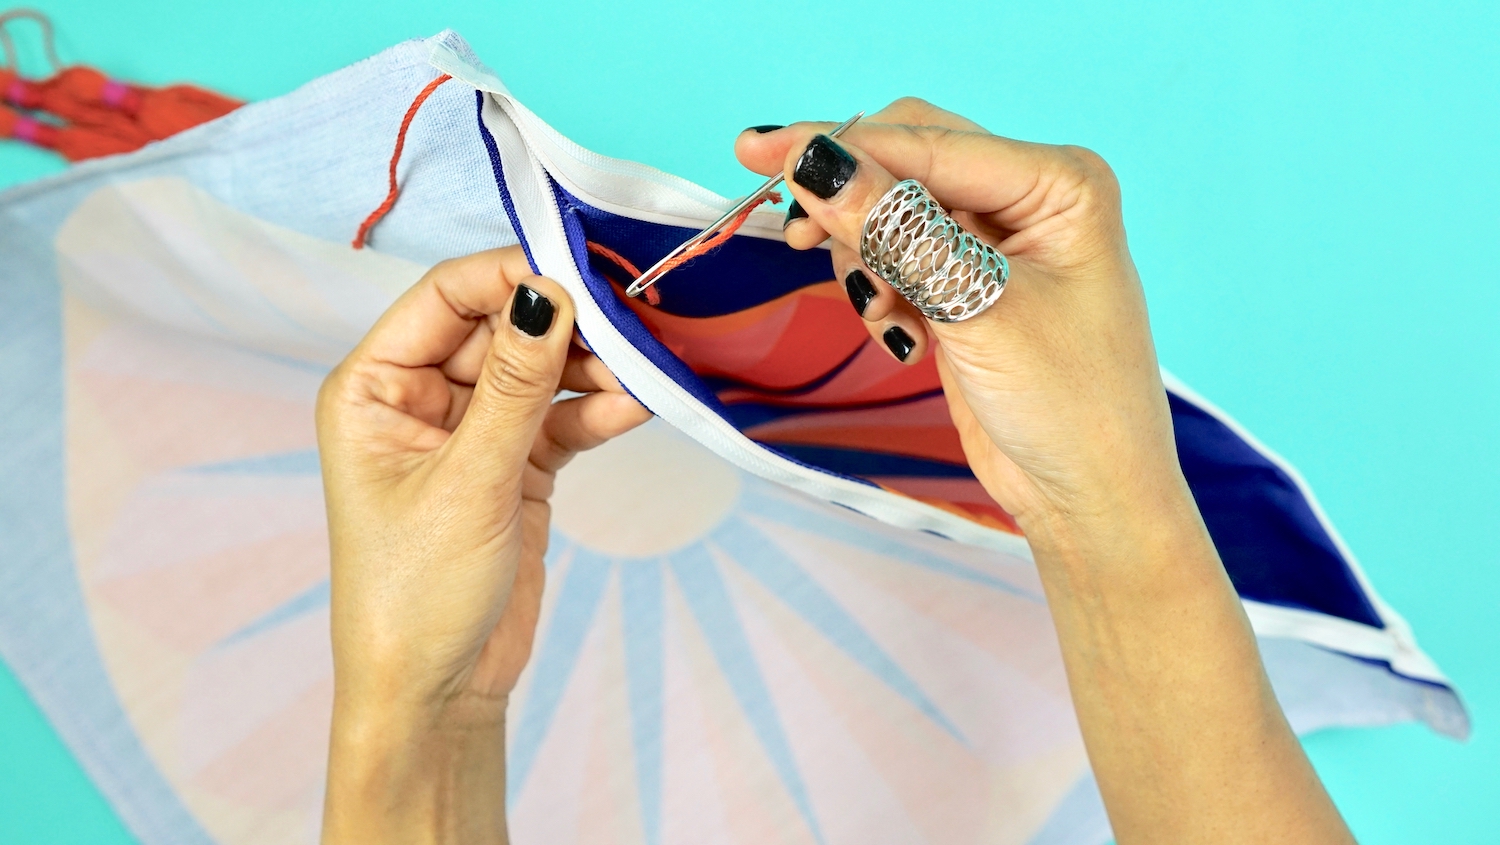
Pick a corner, any corner. Now, with one side of the pillow case facing you, take the needle and insert it through the pillow case at the corner — that is, the spot where the side seams meet to form the 90-degree angle. See the image below for guidance.
Pull the needle and yarn through as far as it will go.
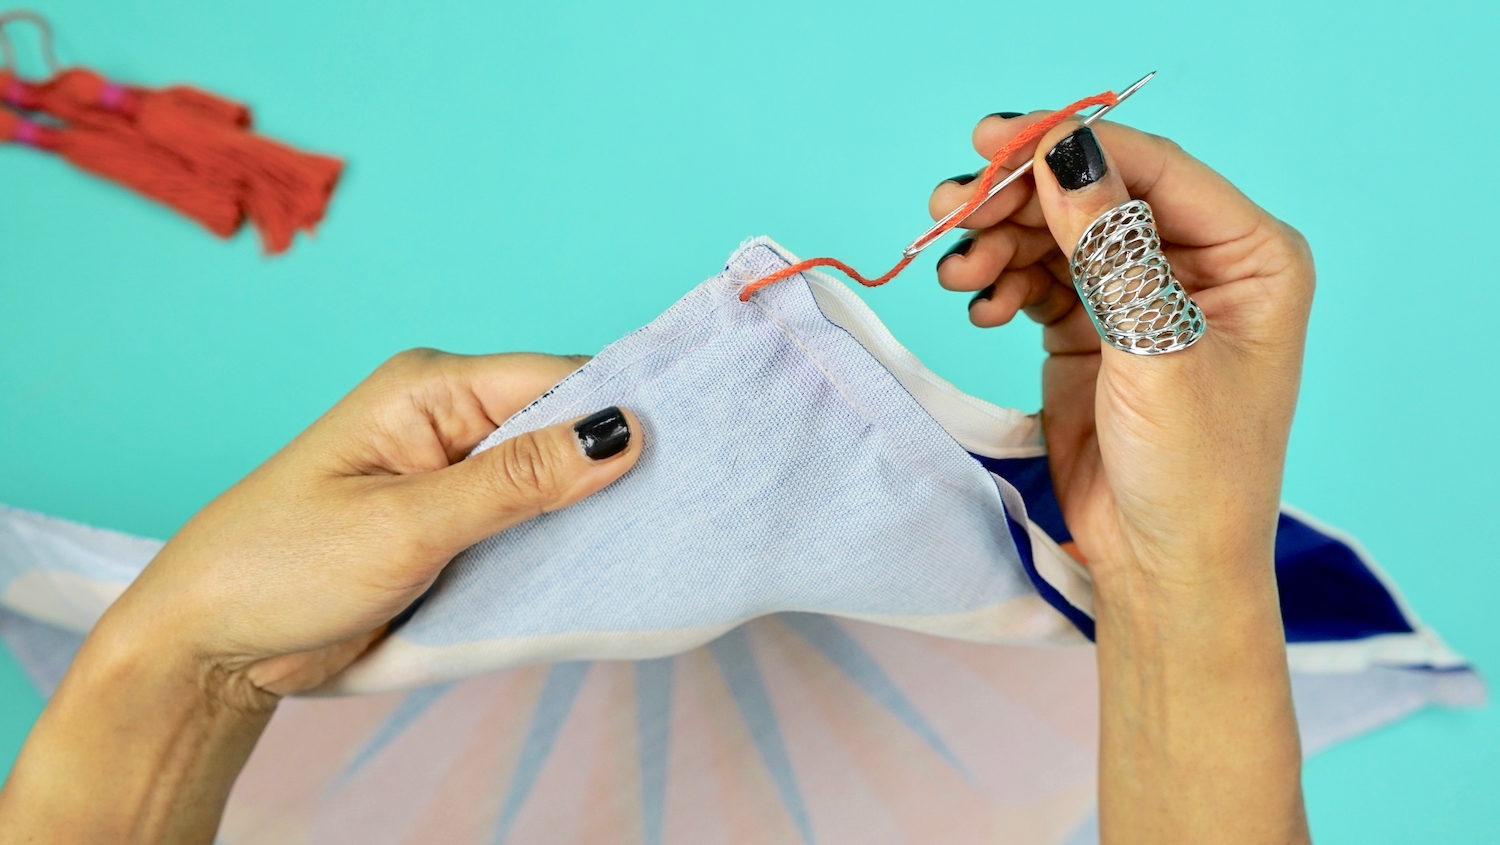
Now you’ll do the same with the other loose tail of your tassel. Working from inside the inverted pillow case, thread the other piece of yarn on the needle.
Insert the needle through the other side of the pillow case at the corner seam. Pull it taught.
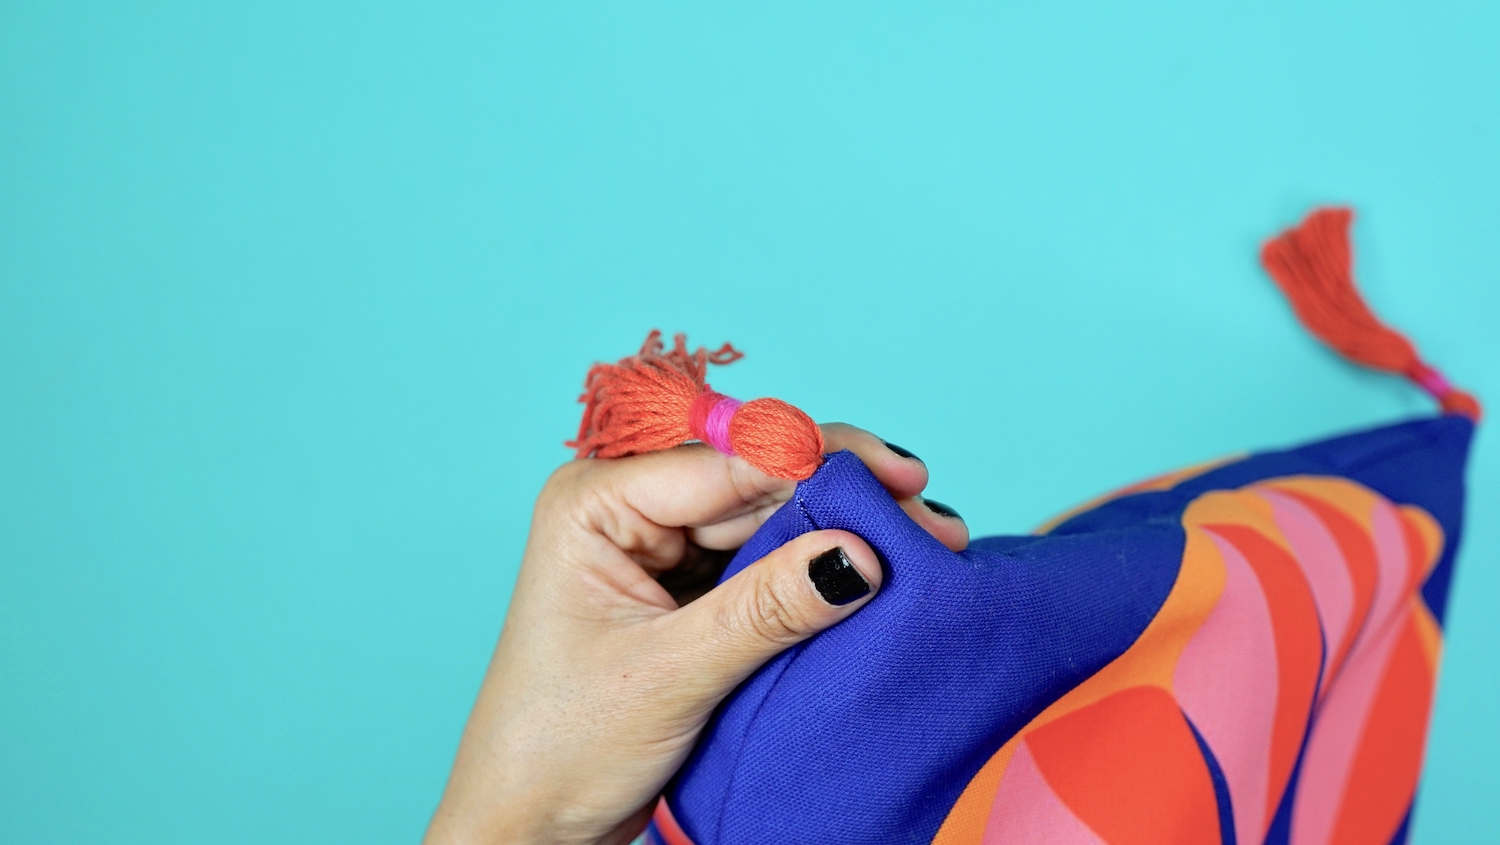
Step 8
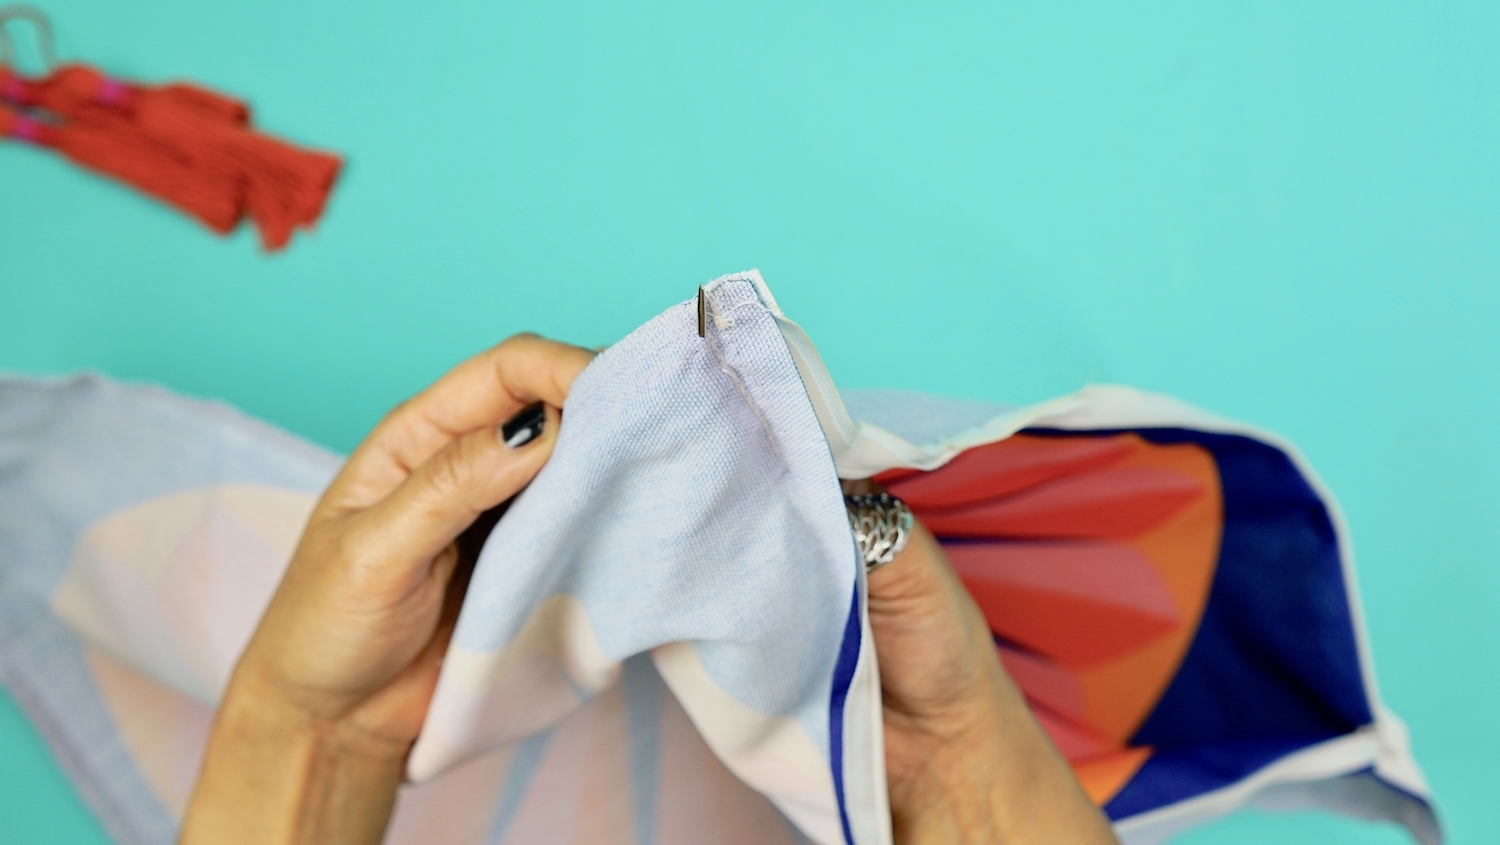
Time to attach the tassel to the corner. Fold the corner over and pinch to secure.
Tie the two ends together over the folded corner and pull tightly so there’s no slack between the tassel (on the other side of the pillow case) and the corner. Double knot it.
Repeat for the other three corners.
Step 9
Finally, turn the pillow cover right side out and use your index finger to push the tasseled corners out.
And what you should be seeing now is a thing of beauty, indeed!
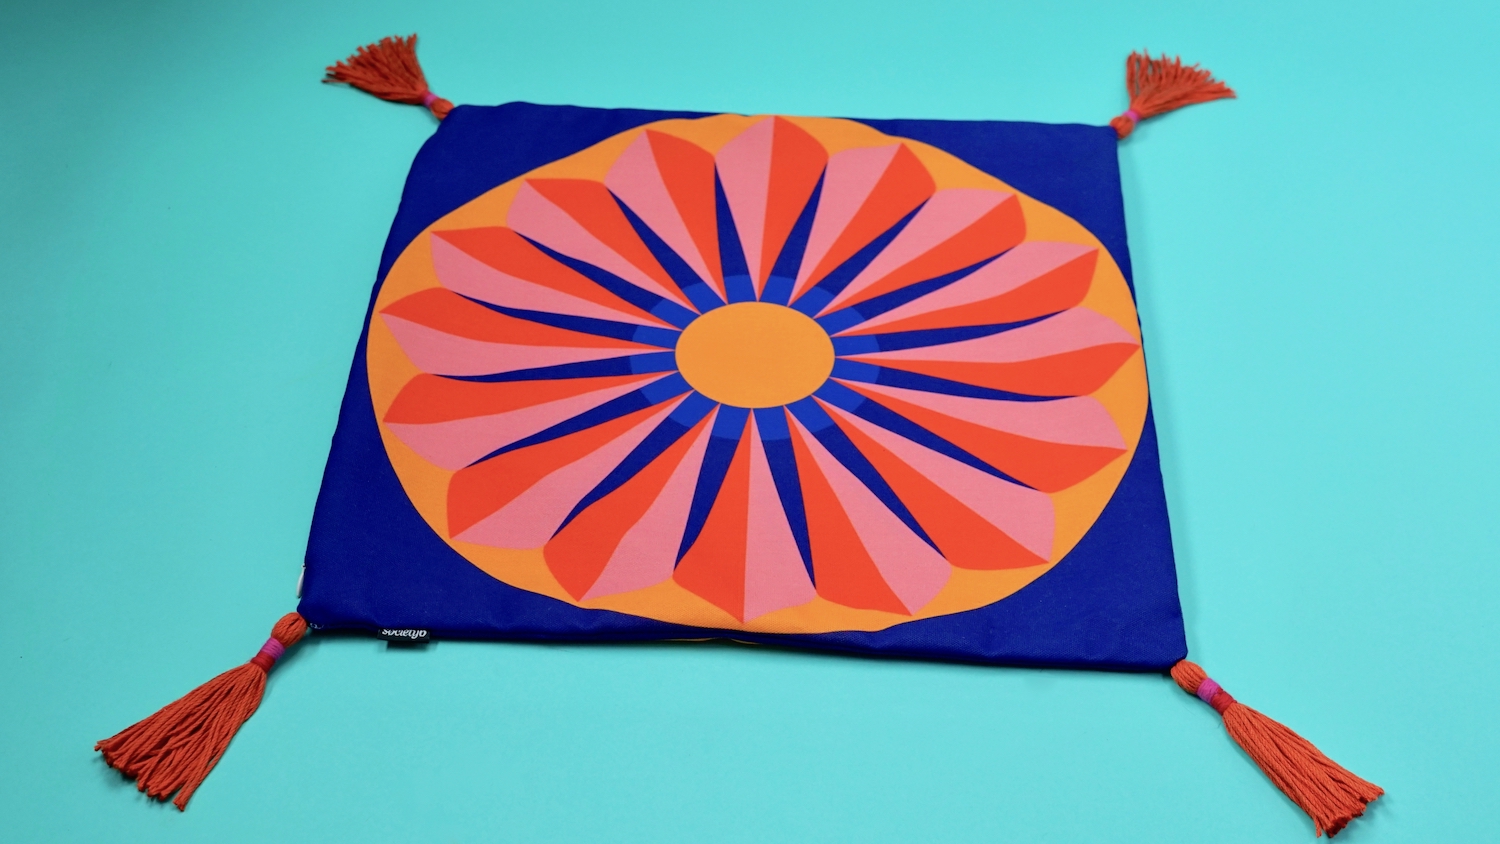
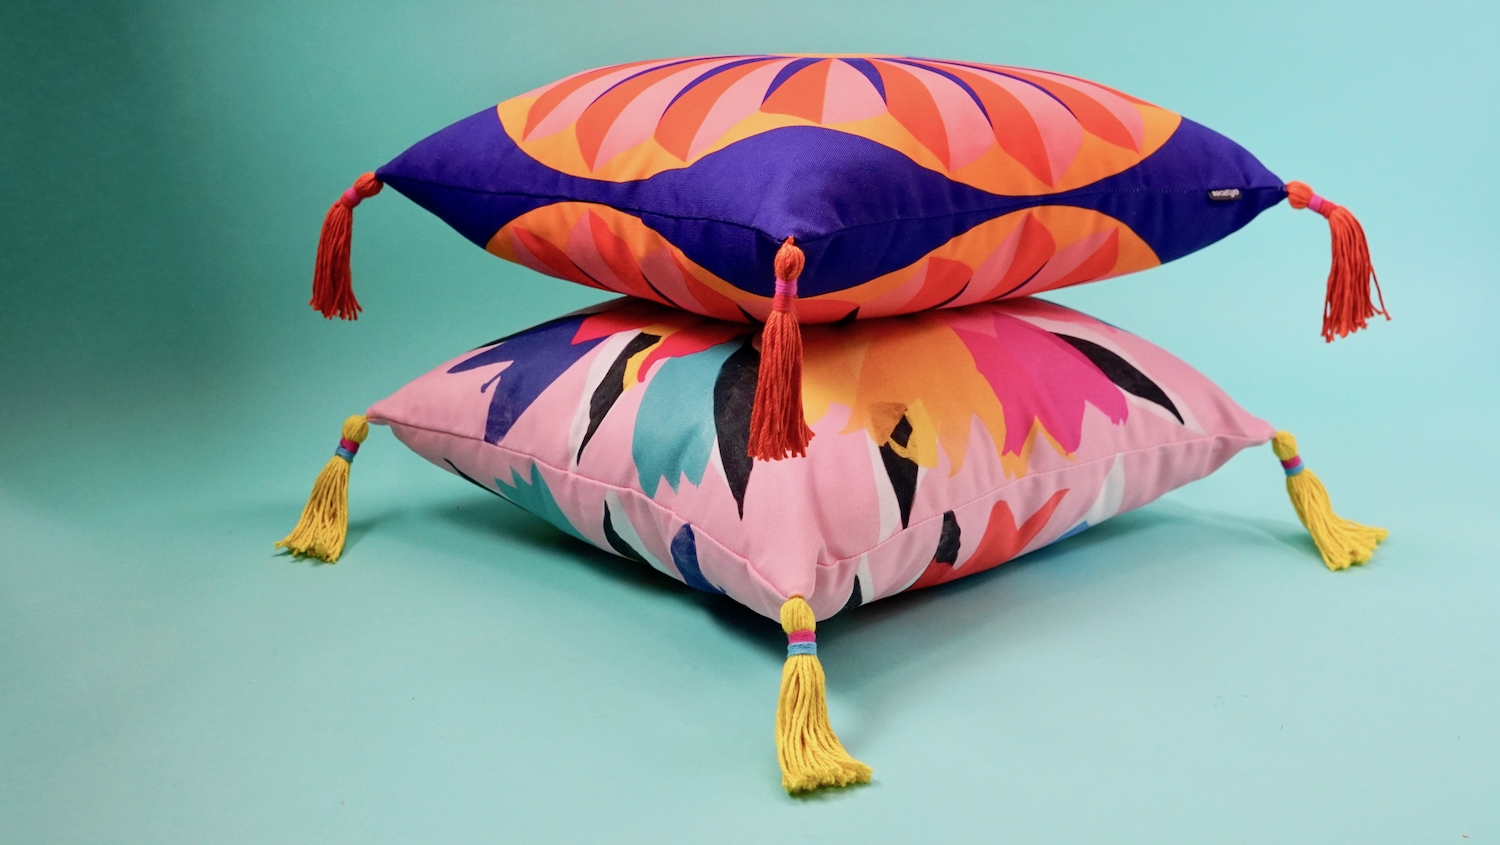
Insert a cushy pillow insert and your stylish AF tasseled throw pillow is ready for…throwing…or whatever.
A quick note about machine washing these tasseled beauties. To preserve tassel integrity, use a hair elastic or another piece of yarn to bind the fringed ends together (to prevent tangling) and turn the case inside out. Then, wash according to the instructions on the pillow cover label.
Copy and photos by Maya Marin
Comments