It’s here! Our all-new Artist Studio {beta} is now live.
We are so grateful for all the feedback we have received on our previous uploader. You’ve responded to our surveys, sent us emails, left comments in our Facebook group, and some of you even visited our headquarters to let us know what we could do to make your life easier. We wouldn’t be here without you!
What does “beta” mean?
We’re so excited to launch the new artist studio, but we’re still optimizing the experience and testing to make sure everything works perfectly for you. A beta period also gives us the opportunity to collect your feedback and make necessary updates. For now, you’ll still see the old studio as the default until we officially launch in early January 2020. You’ll find a link to the new studio in the header of the old studio so it’s always easy to find.
Check out the video below or read more to learn about what’s new. Questions or feedback? We want to hear from you! Get in touch here.
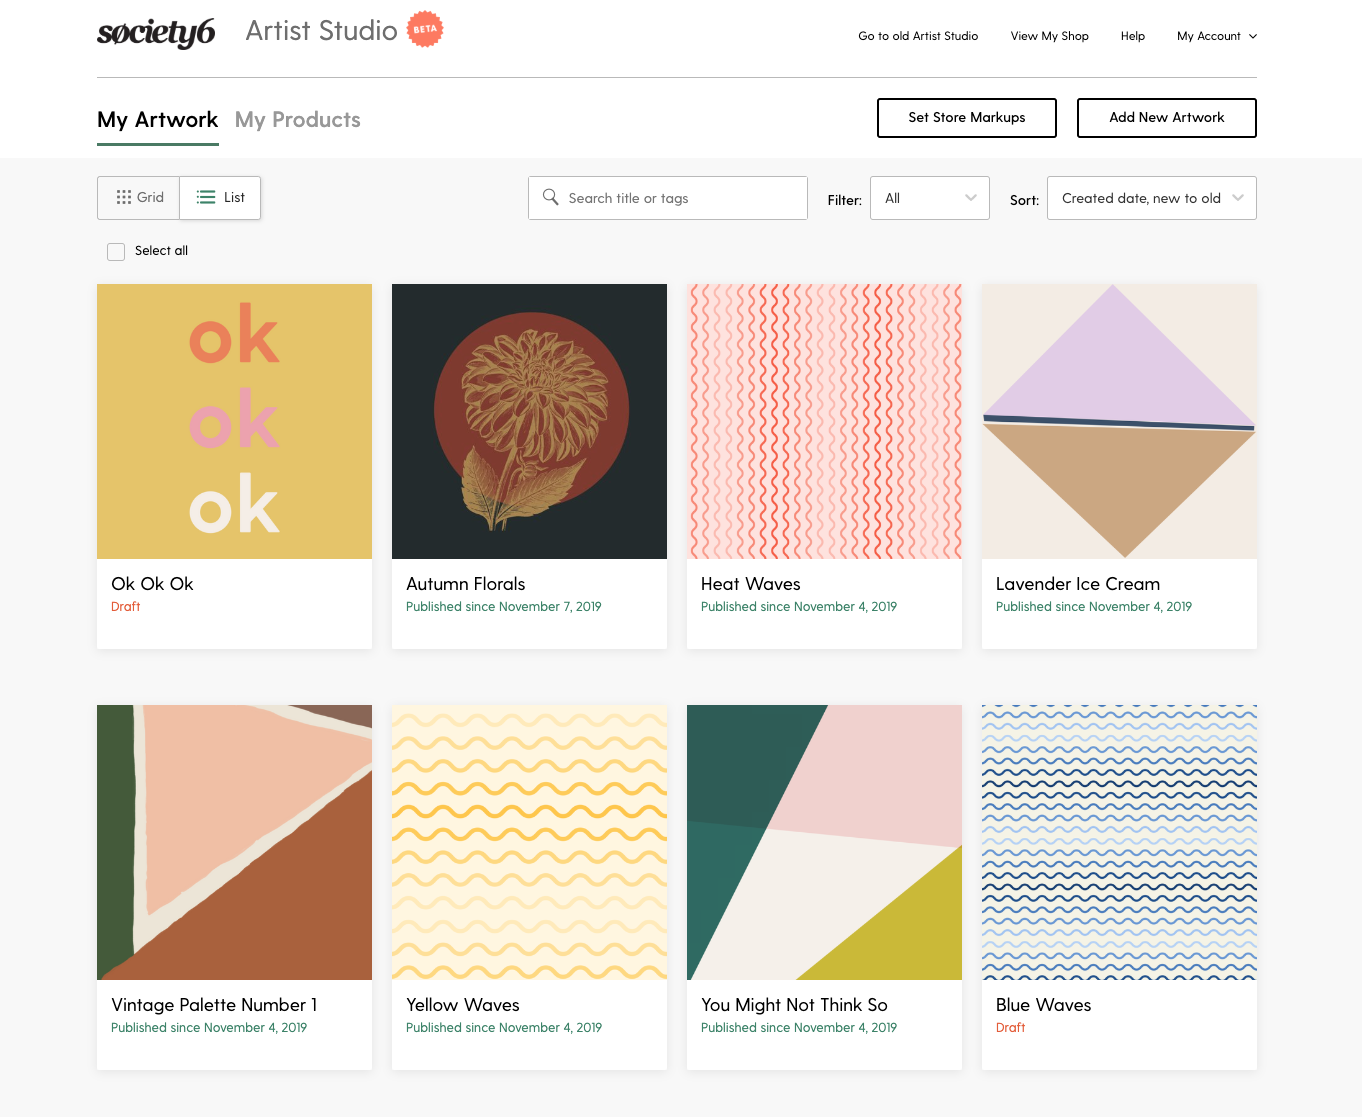
My Artwork Page
On the “My Artwork” page we’ve introduced a new Grid view with larger images that make it easier to scan your artwork – especially when your works are visually similar and harder to distinguish with a smaller image size.
We also created a List view if you prefer this style of layout.
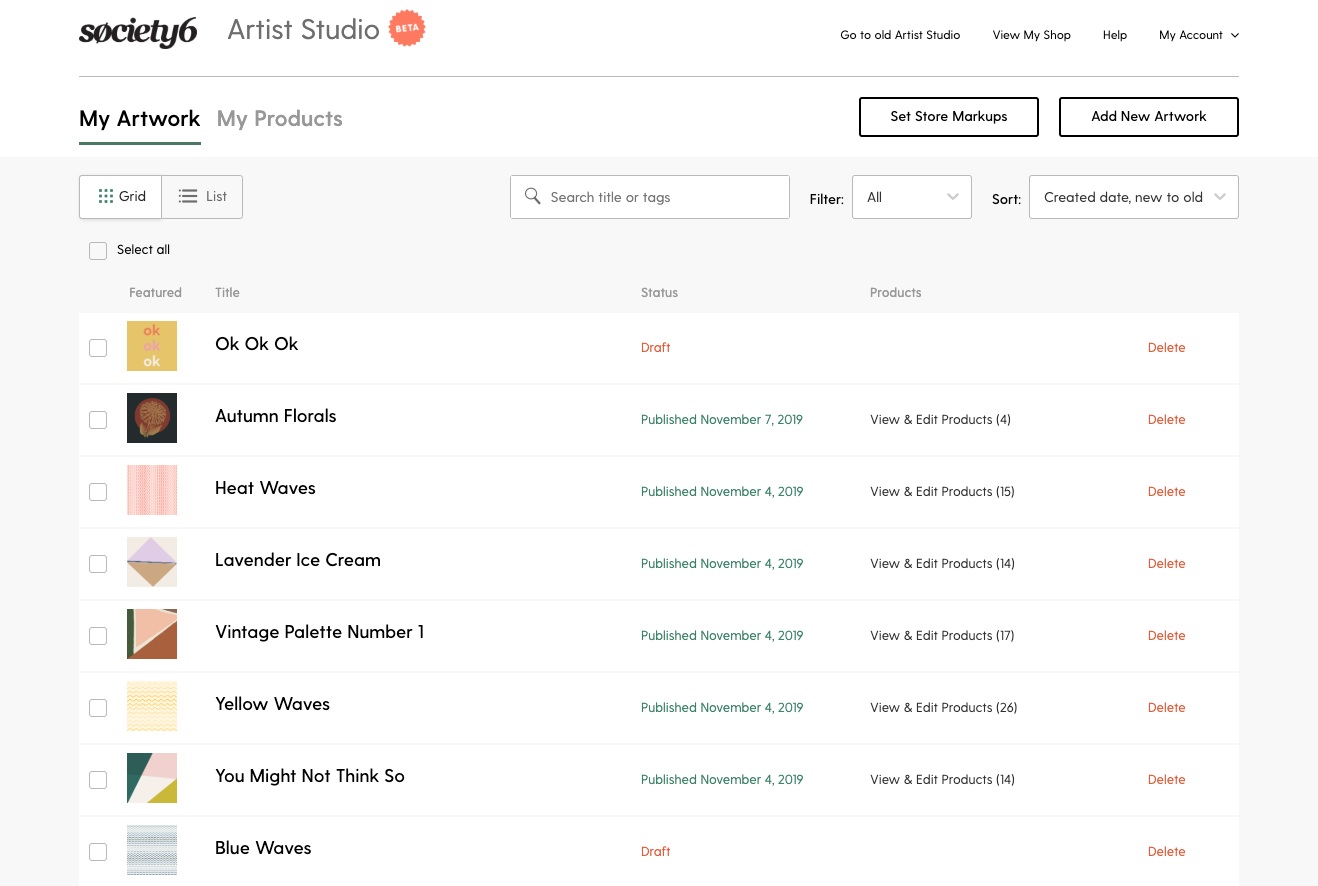
From both the Grid and List view, you can filter your artwork by draft, published, or suspended, sort by created date, published date, or alphabetically, and search by title or tags.
We’ve also introduced the ability to select multiple – or all – artworks and publish, unpublish or delete them.
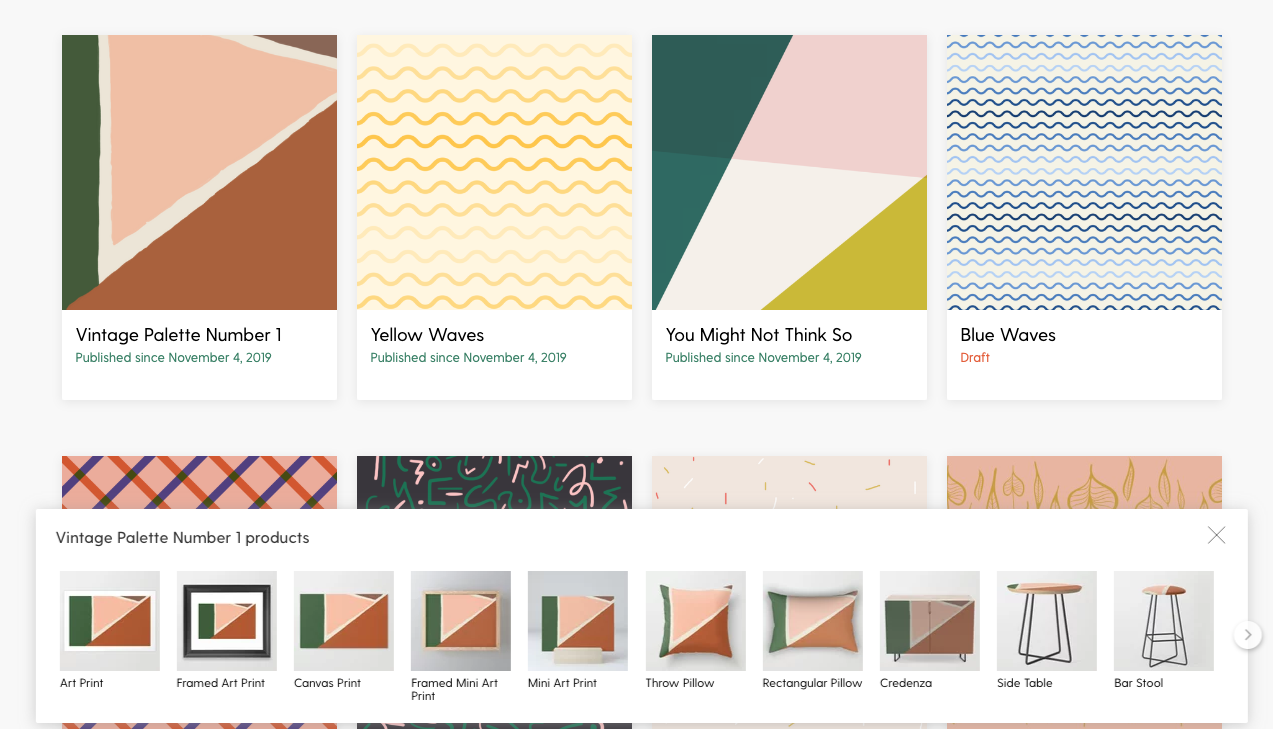
When you hover on artwork, you can click to easily view all products that have been enabled. From each product you can select to edit or view the product detail page.
Set Store Markups
From the header you can click the “Set Store Markups” button to set your own prices on our “fine art” products by adjusting their markup. Our “fine art” products are: Art Prints, Framed Art Prints, and Canvas Prints. We introduced this feature earlier this summer and it now has a permanent home in the new Artist Studio.
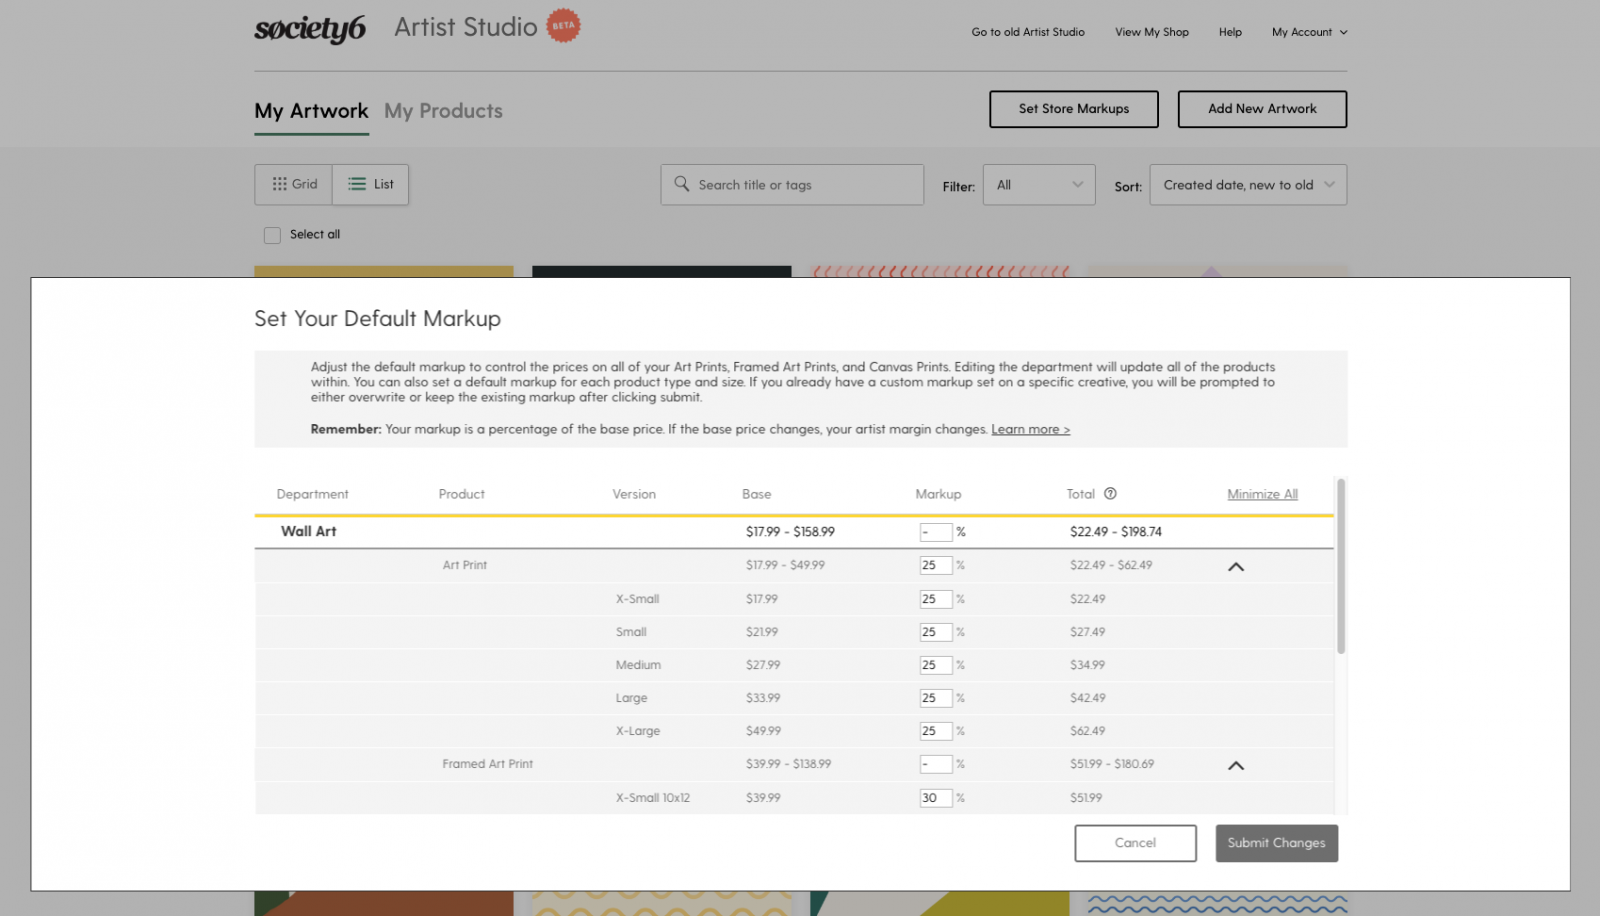
Using the markup tool, you can easily set a single markup for all of your fine art, or make updates on the product- or size-level.
As a reminder, the markup tool displays the resulting customer price with one caveat. We do round all prices up to the nearest 99 cents to offer our customers a more consistent site experience – those extra cents are added to your earnings.
In Artist Studio, you have the option to set markups on the store-level or on individual products (more on that later). If you save a store level markup and already have markups applied to individual products, you will be prompted to either overwrite or retain those unique markups.
Uploading Artwork
Next to “Set Store Markups” is the “Add New Artwork” button. Click to launch our new uploader. On the left, we’ve added a few helpful reminders about what file types we support as well as a quick link to an article with the asset requirements for every Society6 product.
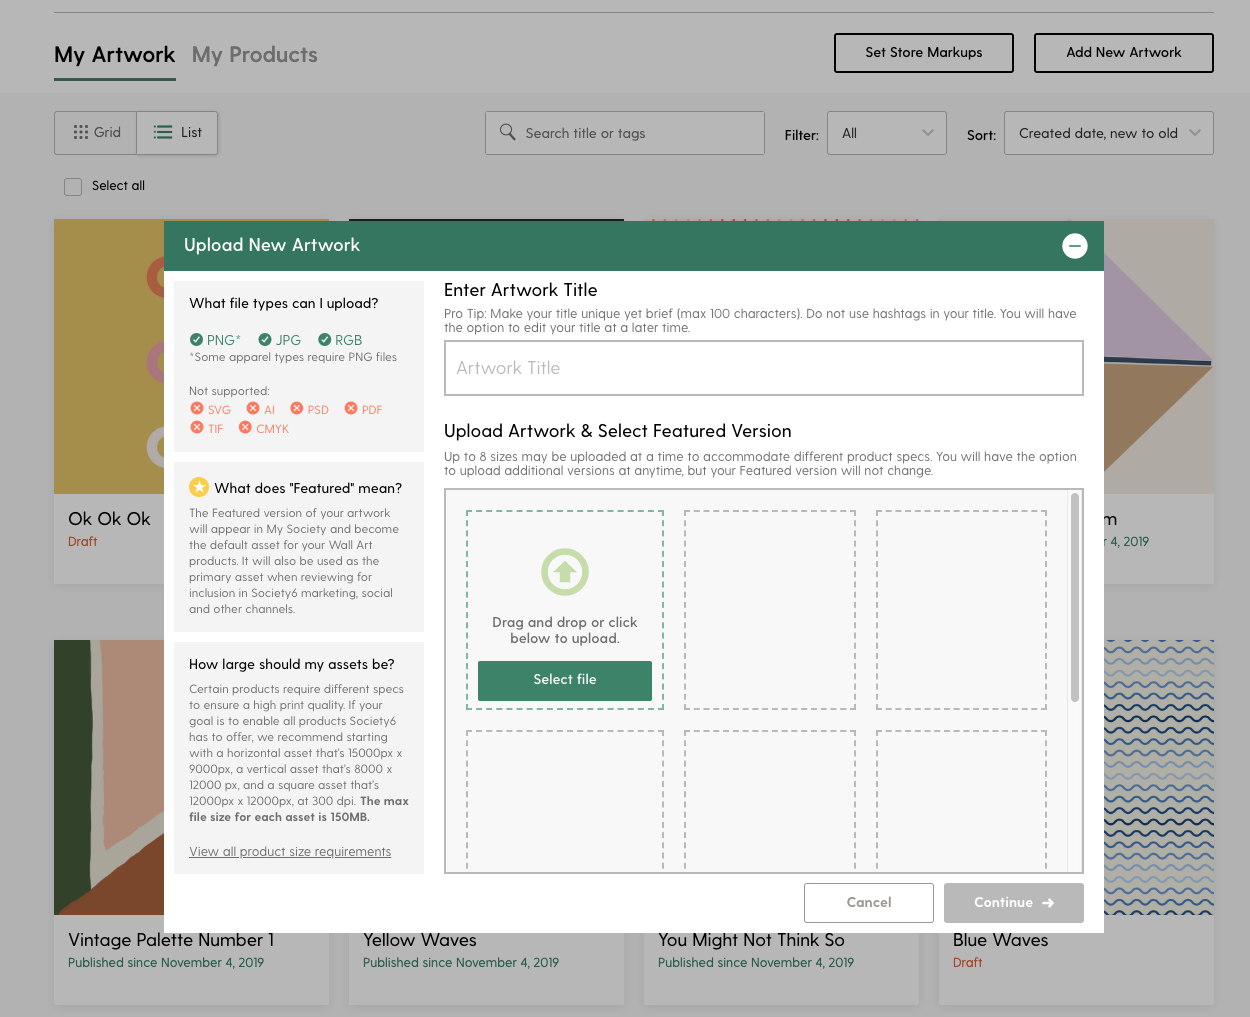
The first thing to enter is your artwork title. Make your title unique yet brief. The best titles are relevant to the content of the artwork.
Next, it’s time to upload. Due to the variety of products we offer, you may want to upload multiple versions of the same artwork. For example, while a single flower might make a great art print, cutting board, or throw pillow, a repeating version of the same design might make a better backpack, wallpaper, or all over graphic tee. You can find more information on our asset requirements here.
The new uploader allows you to upload multiple versions of the same artwork at a time. Based on each asset’s dimensions and orientation, we’ll match them to the products that they’re the best fit for. You can always go into an individual product and swap out the asset or upload a new one.
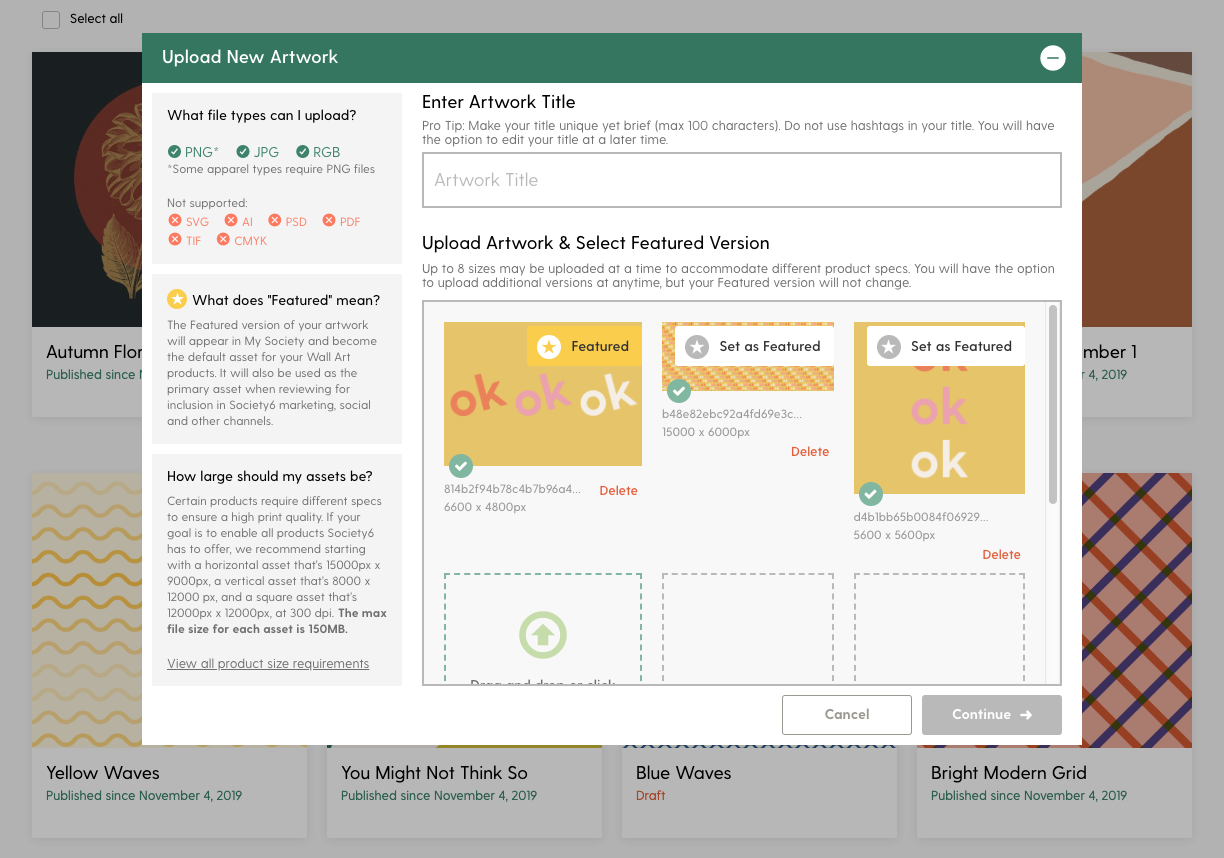
Once your assets have uploaded, you can select a Featured asset. The Featured asset is the version of your artwork that will appear in My Society and become the default asset for your Wall Art products. It’s also the primary asset our team uses when reviewing artwork to be included in Society6 marketing, social and other channels, so pick the one you think best represents the artwork overall. Once selected, you can’t update your featured asset but you can always edit the asset used on each product.
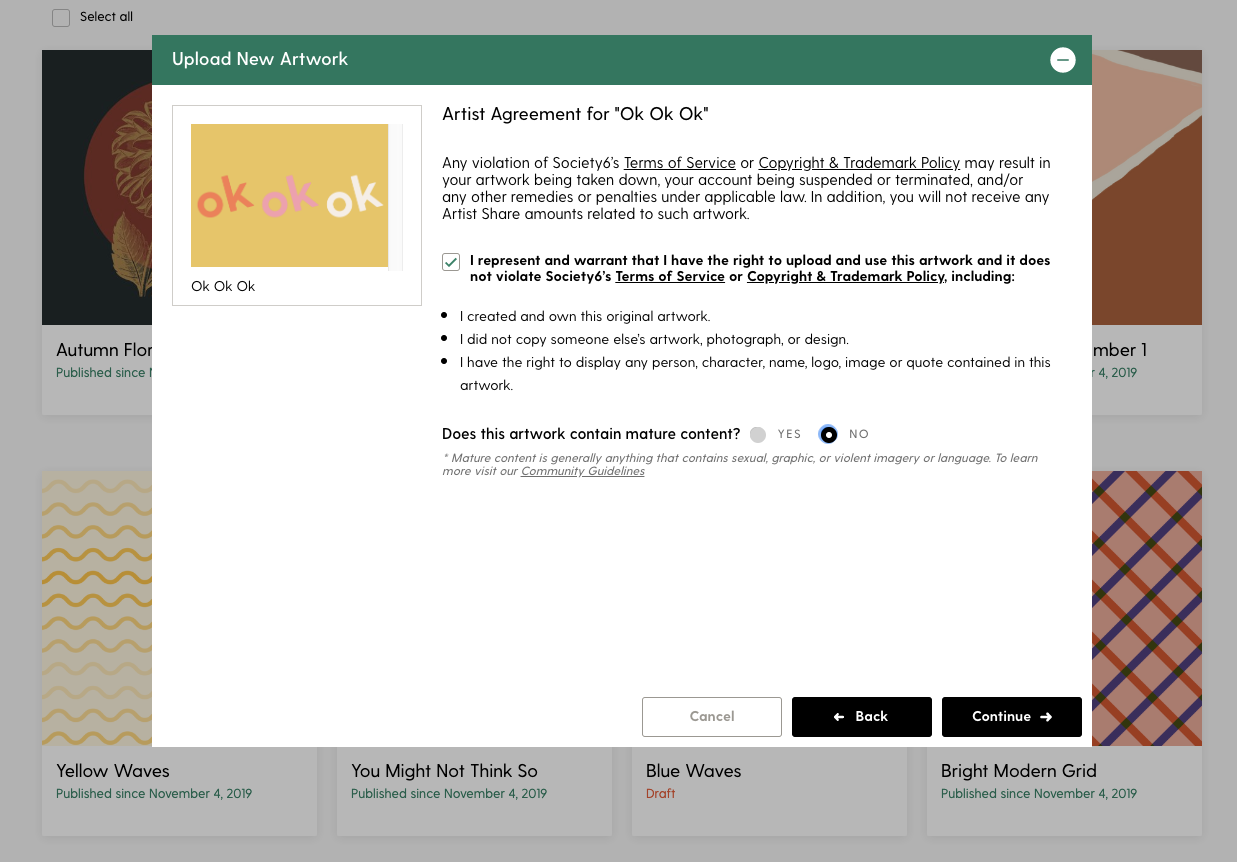
When you click continue, you’re taken to the Artist Agreement. Here you verify that what you’re uploading is original artwork, created by you, and that you have the right to display what’s contained in your artwork. You also need to identify whether or not your artwork contains mature content, which we define as sexual, graphic, or violent imagery or language.
Artwork Detail Page
Once you click continue, you’re taken to the Artwork Detail Page.
Here, you can start adding details about your artwork. Select the category and then apply descriptive tags to help your artwork appear in search. What tags should you use? We recommend thinking about what a customer would type if they were looking for this artwork. Think about the technique, style, and content of your Artwork.
Then, add a description. This is your opportunity to share more about your artwork and your inspiration.
Next, you have the option to set markups for this design specifically. The markup you set will only apply to Art Prints, Framed Art Prints, and Canvas Prints featuring this design. Your store-level markup will still apply to other artworks where you haven’t set a custom markup.
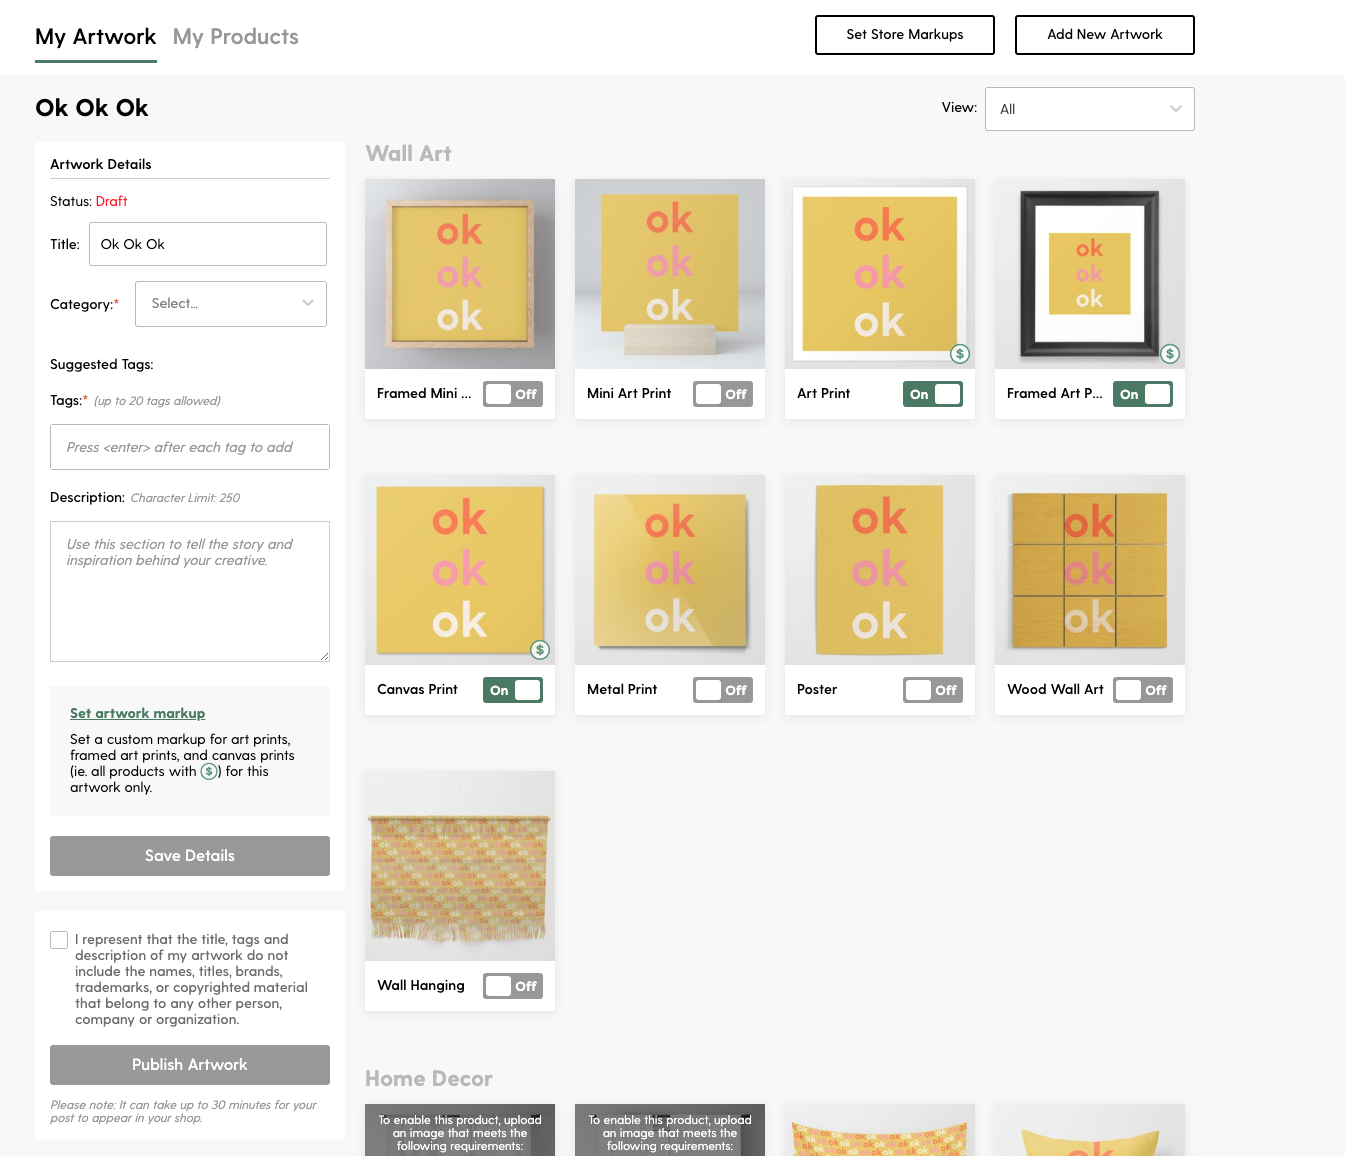
Once all of these details are saved, you can start reviewing your products. To make it easier to navigate around your products, you can filter by department. We match the assets you uploaded with the product that they’re the best match for based on their size and orientation. This is to help you save time, but do still recommend reviewing your products before enabling. You can also quickly identify which products are missing an asset.
Product Editor Page
On the Product Editor page, there is a quick reference section where you can view the asset and file requirements, as well as product-specific design tips. Below that you can see which asset was applied to this product, and if you want to make any edits you can do so. You can scale the asset up or down, move it around in the print template, and find the horizontal and vertical center. You can also click to see previews of how the asset will look once it’s rendered on a product.
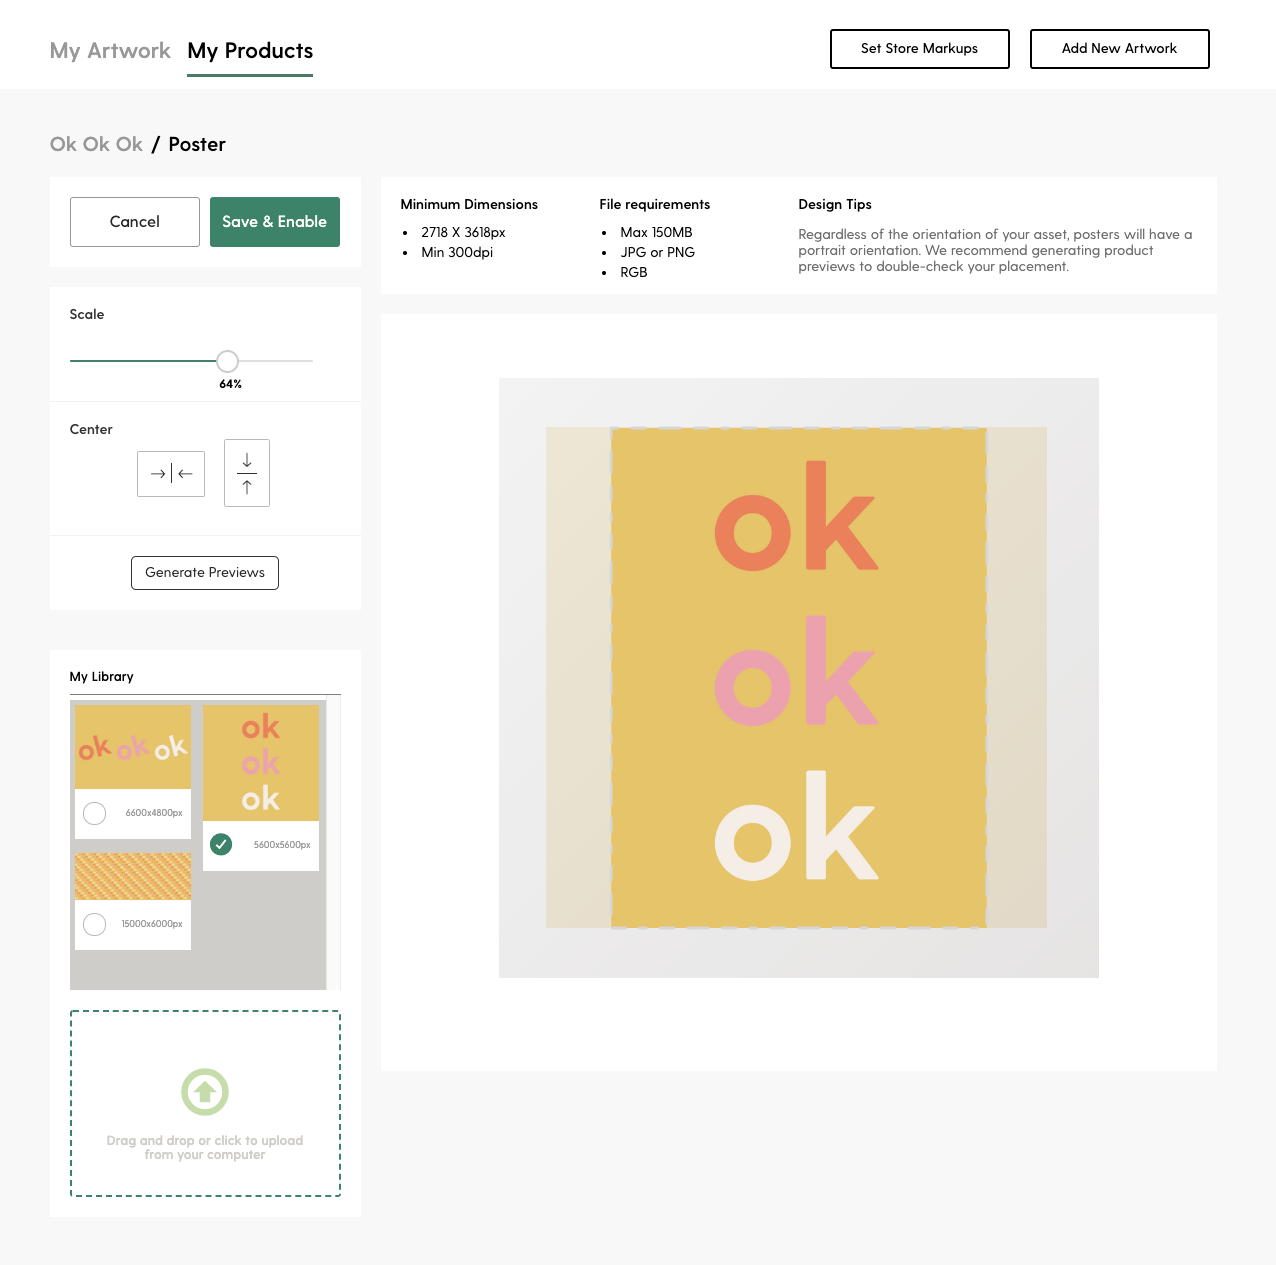
If you don’t like the asset that was applied to the product and want to see how some of my other uploaded assets for this artwork will look, you can select them from the Asset Library. The Asset Library contains all assets uploaded for a given artwork that meet the file requirements of the product you’re editing. Just click the checkbox and that asset will be swapped in.
Once you’re happy with the asset and the placement, click Save & Enable to save.
At this point, if the product you’re editing is the same or similar aspect ratio as other Society6 products, you may see the following prompt.
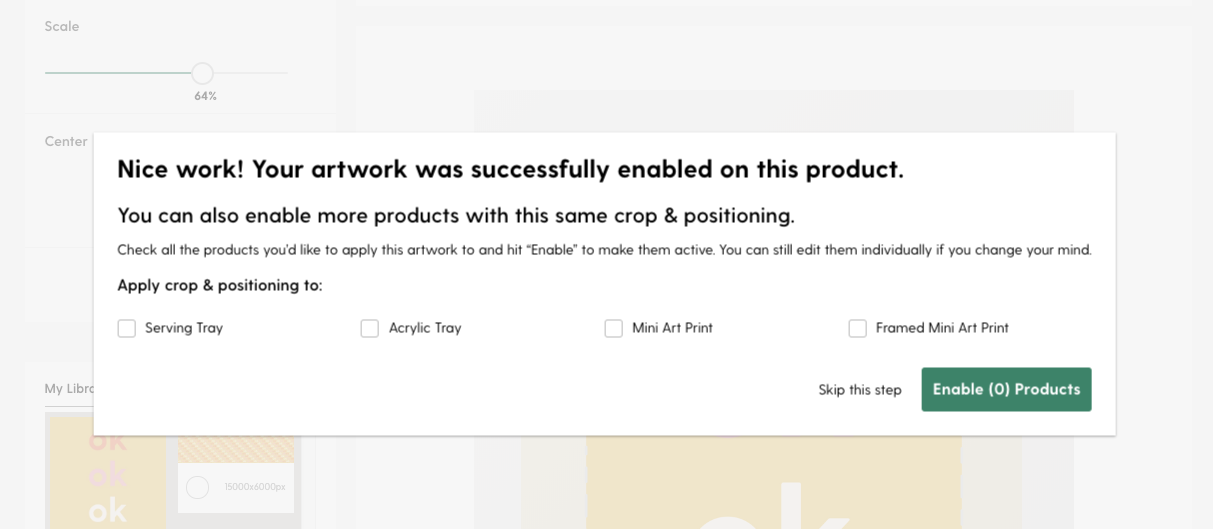
Depending on the size of the asset you’ve applied and how much you’ve cropped in, we can take the edits you’ve made on this product and apply them to other products. In other words, give or take a few pixels, the asset will be applied to the products you select exactly as you’ve applied it to the product you were just editing. This makes it easy to enable multiple products at a time – but don’t worry, you can still edit each product individually after the fact and edits you make to one product won’t be applied to another product unless you select for them to.
You can also simply skip this step if you only want to enable the product you were editing.
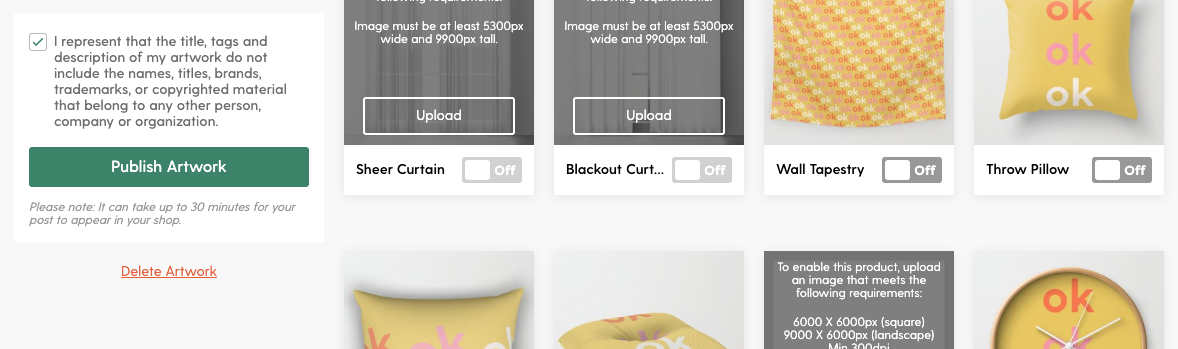
Publishing Your Artwork
Once you are happy with the products you’ve enabled and the markups you have set, the final step is to publish your work. This will set your product live in your artist shop.
My Products Page
The flow we just walked through focused on uploading artwork, enabling products, and publishing.
Once you have a few artworks published, you can use the “My Products” page to manage your artwork by product type.
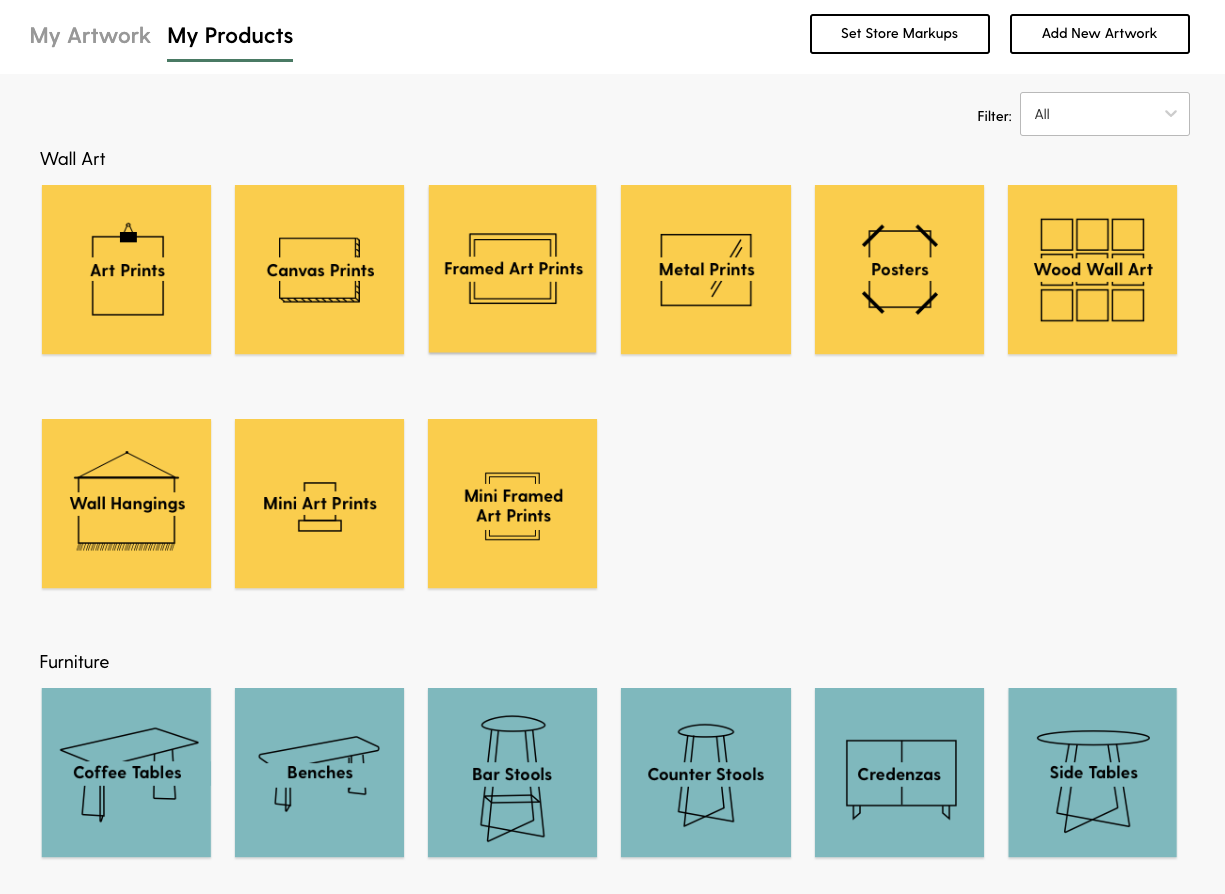
Once you select a product, this view shows you three things:
- The artwork currently live in your shop (ie. enabled) for that product
- The artwork that could be live in your shop if you turned them on (we call these disabled products)
- The artwork that currently does not have an asset uploaded that meets the minimum requirements of the product you’re viewing
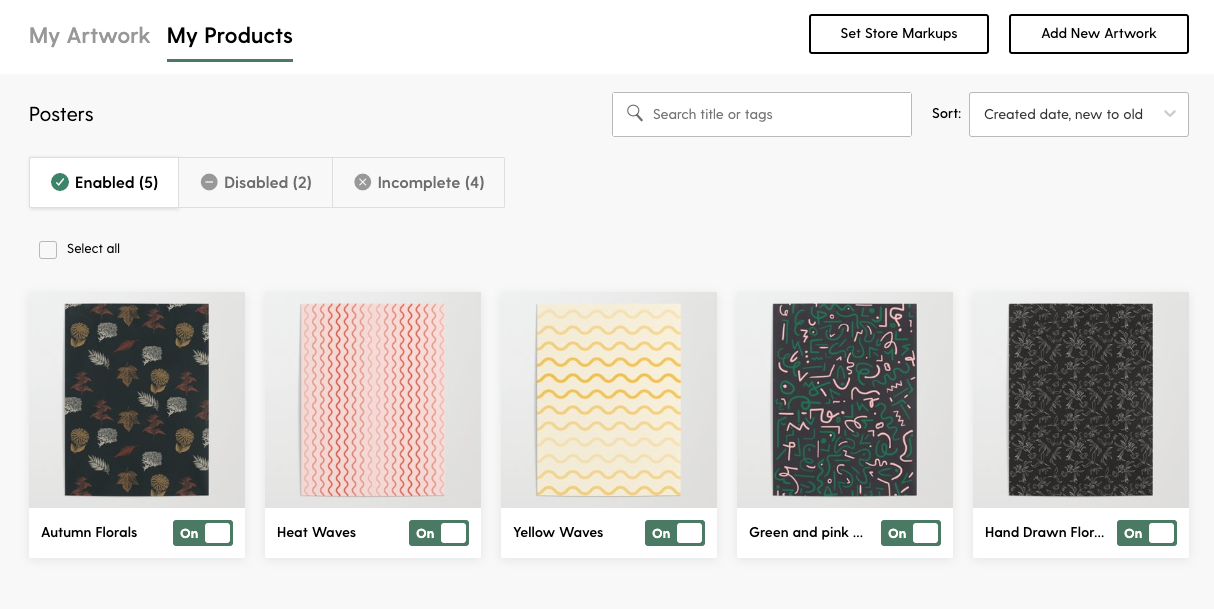
From the enabled tab, you can select one or many of your products to disable.
And from the disabled tab, you can select one or many of your products to enable, or make live in your shop.
And lastly, from the incomplete tab, you can see all of your published artworks that are missing an asset large enough to enable this product.
You also have the option to search by title and tags or sort your products.
When we launch a new product on Society6 – as we do a few times each year – this view will be really helpful. Rather than having to click into each and every artwork to find the new product and enable it, you can simply find the new product under My Products, and quickly see what’s ready to be enabled or what needs a new asset uploaded.
We’re so excited about the new features we’re offering in the artist studio and look forward to continuing to improve the artist experience. If you have any questions or want to share your thoughts, get in touch with us here.
Comments