We’ve got some good news—
We’ve redesigned our all over print tees (they’re now called all over graphic tees!) and they’ve got some serious upgrades. You will have to re-upload all of the designs that you would like to be available on this product, BUT you now have the ability to customize every aspect, sooo trust us, it’s def worth it.
Here’s what you need to know:
– Each shirt is cut-and-sew so you will be able to fully customize all five panels: front, back, left sleeve, right sleeve and the neck.
– Please pay close attention to the S vs. XXL area—be sure to fill the entire area so that your design will cover the largest size.
– Currently, there is not back preview available in the Artist Studio, but if you have correctly completed the template, the shirt will print correctly. We’re working on getting you this option ASAP!
– Pixel Requirements: 8700 (w) x 7050 (h)
– 150ppi minimum
All Over Graphic T-Shirt Template Walkthrough
We put together a nice how-to video to help you make the most out of your new, fully customizable all over graphic t-shirt. If you’re more of the reading type, feel free to read below. Once you understand the template, it’s actually pretty easy to navigate. Here’s a few tips to help you create a great all over graphic t-shirt:
Understanding the template
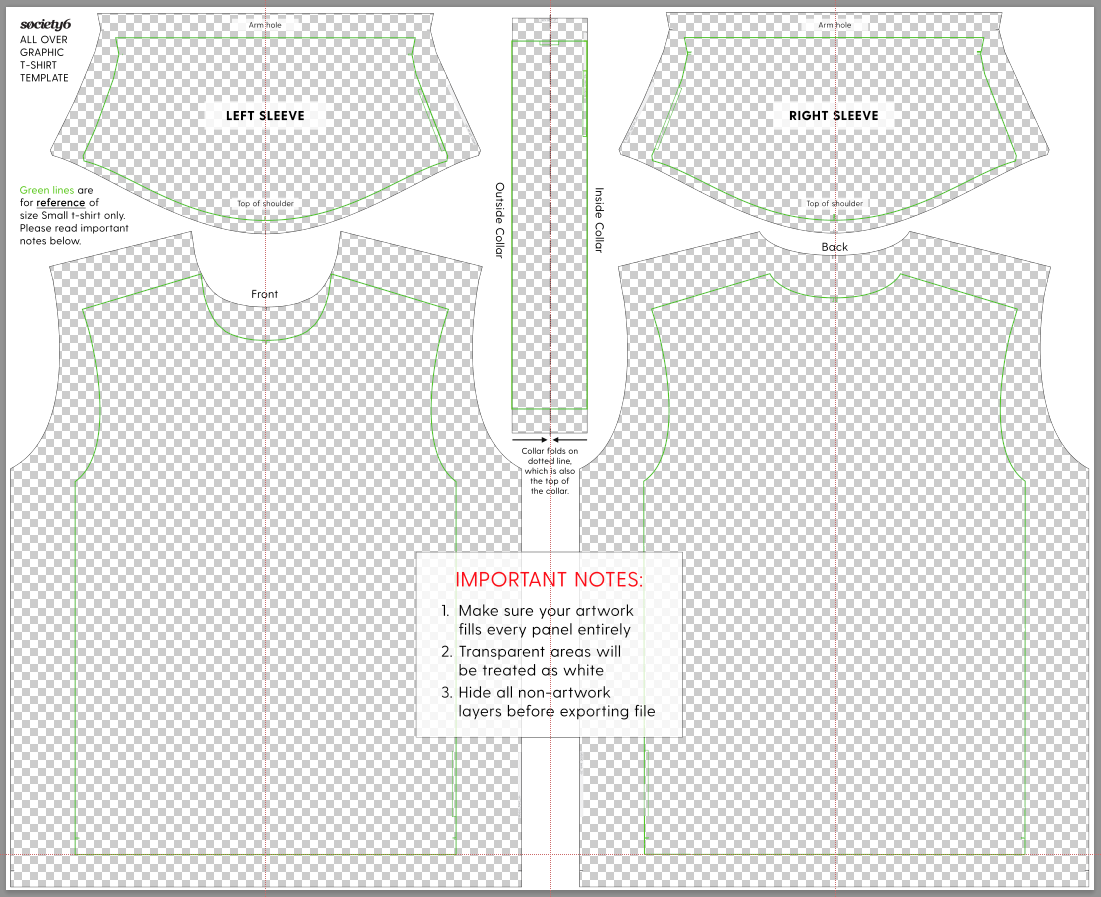
The first thing to know about the all over graphic t-shirt template is that the orientation varies from body to sleeve to collar.
-The front and back body panels are right side up. That means up is up and down is down.
-The sleeves are noted with “Arm Hole” and “Top of Shoulder.” Depending on your design, you may want to rotate the design on your sleeves. See below for further explanation.
-The collar is sideways and noted with “Outside Collar” and “Inside Collar.” Depending on your design, you may want to rotate your design on the collar.
-Your design needs to fill out each panel entirely.
-The green lines are for reference of size Small t-shirts only.
Using the template
If you plan on getting creative with your all over graphic t-shirt, we recommend a unique layer for each panel. Let’s walk through how to make best use of your template.
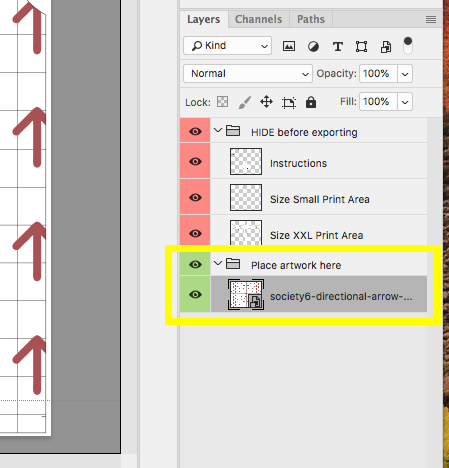
Bringing your artwork into the template
Once you’ve brought your artwork into the template, move that layer into the “Place artwork here” layer group. It’s highlighted in green. This layer group is where all your working artwork layers should live.
Changing the color of your sleeves or collar
This is as easy as creating a layer of color that fills the panel. The world is your oyster.

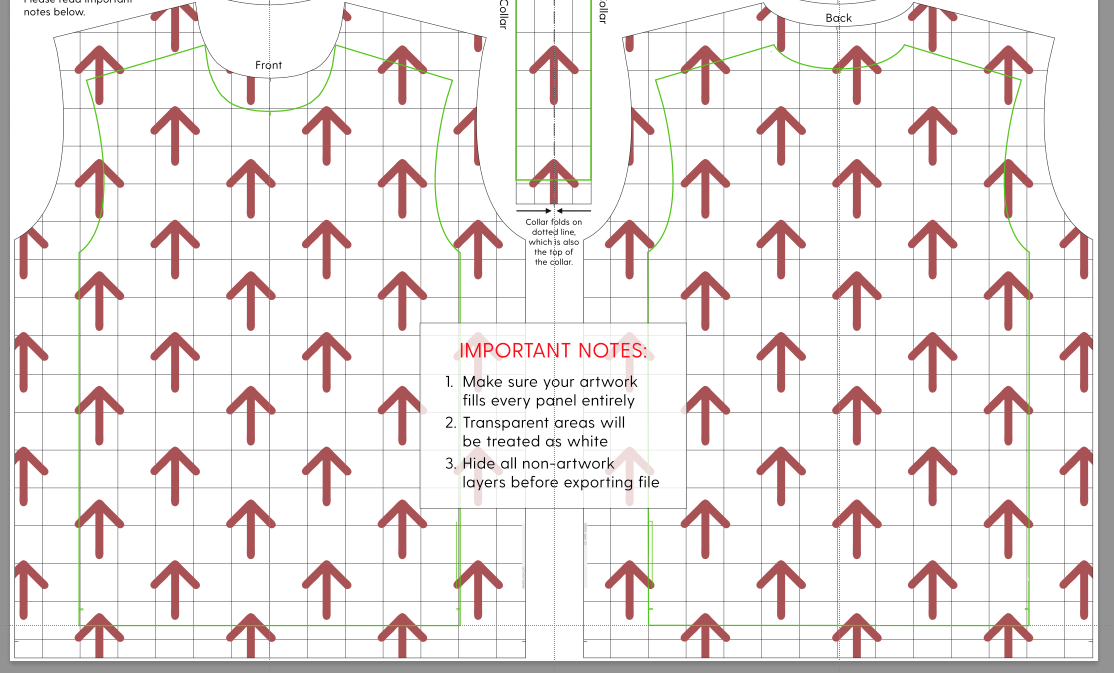
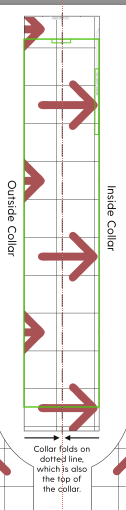
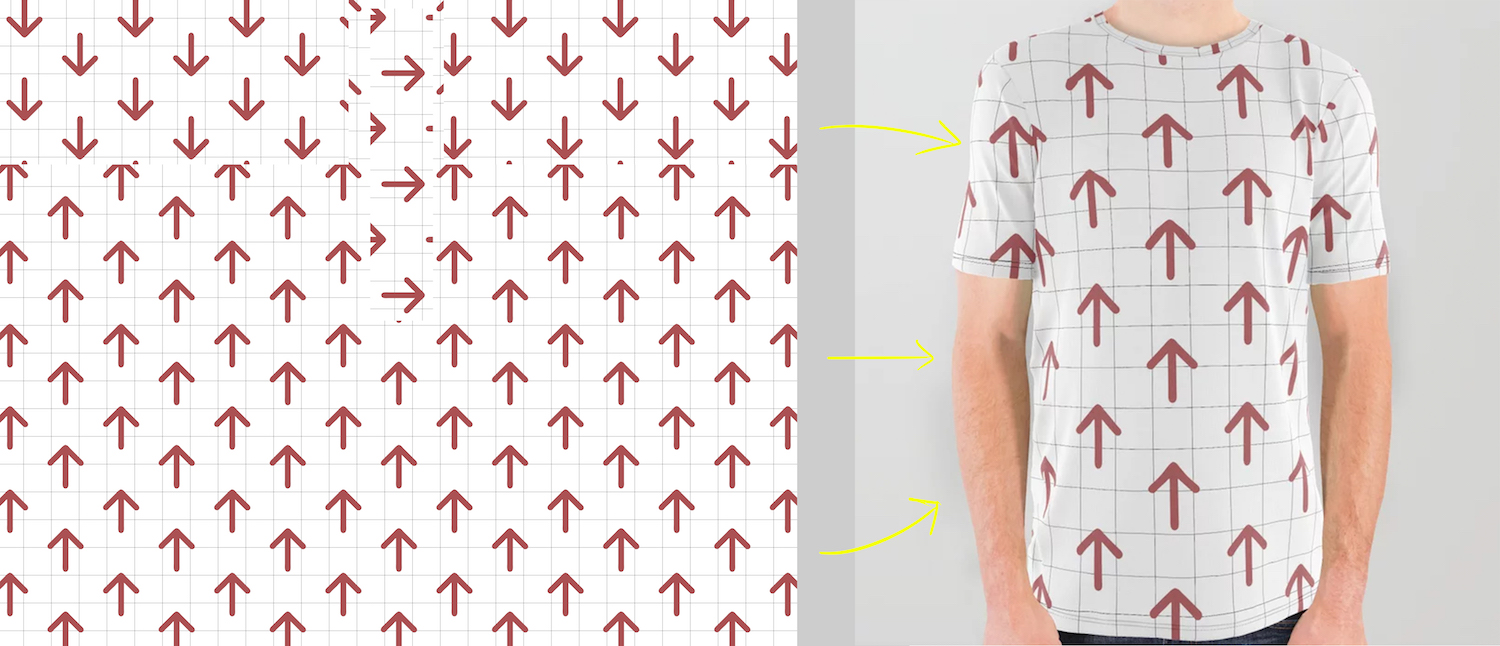
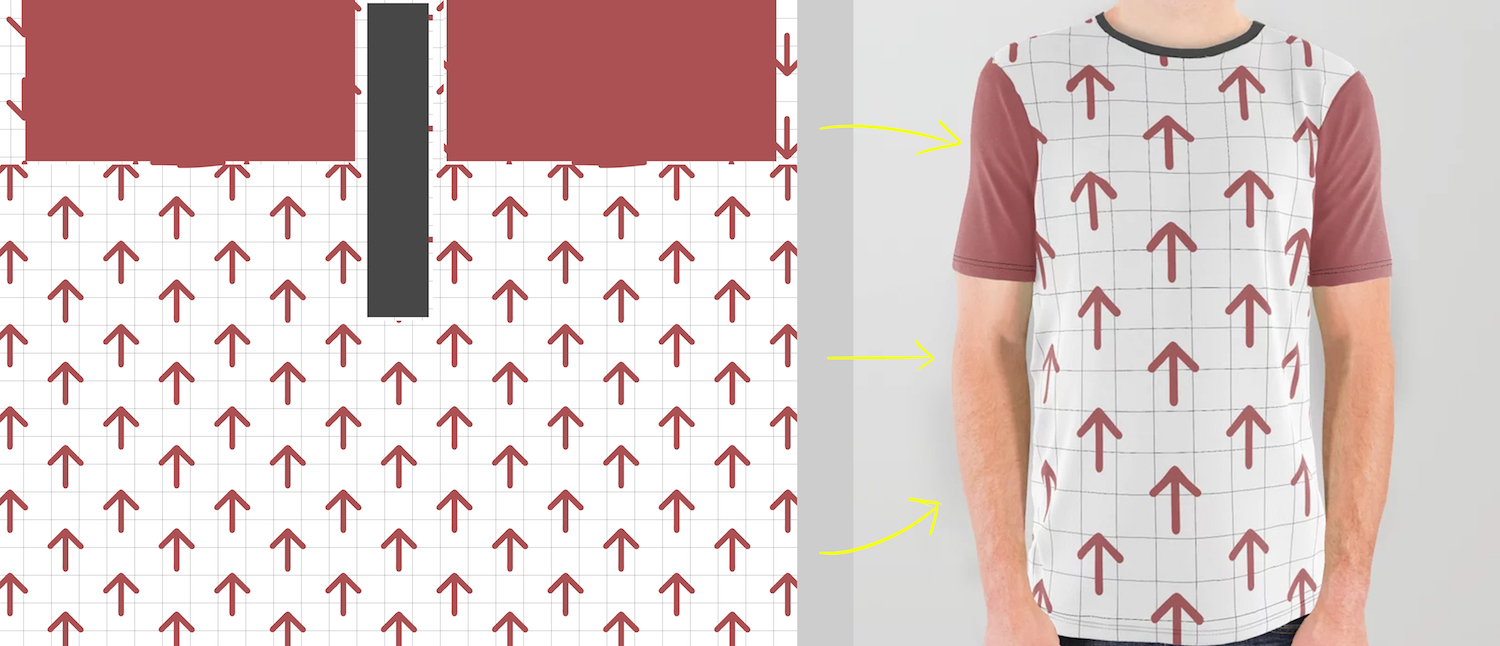
If your design has a clear “up” or “down”, here’s how to work with the template so everything prints in the correct orientation.
For starters, we’re using a custom made design with arrows and grid to help you understand how your products will print for customers.
FRONT & BACK PANELS
This is the easiest part. Simply position your artwork so it fills the entire front and back panels.
SLEEVES
If not using solid color sleeves, rotate the design 180 degrees.

COLLAR
If not using a solid color collar, rotate the design 90 degrees clockwise.
Preparing your file to upload
Deactivate your “HIDE before exporting” layer group.
Save as a full resolution JPG. Your final, uploadable file should be 8700(w) x 7050(h) pixels.
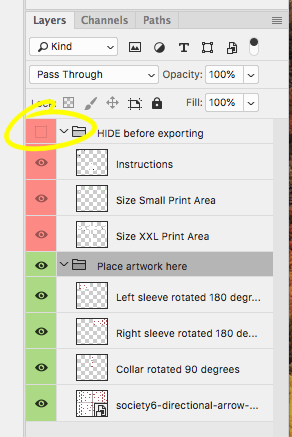
Disable "HIDE before exporting"
Upload!
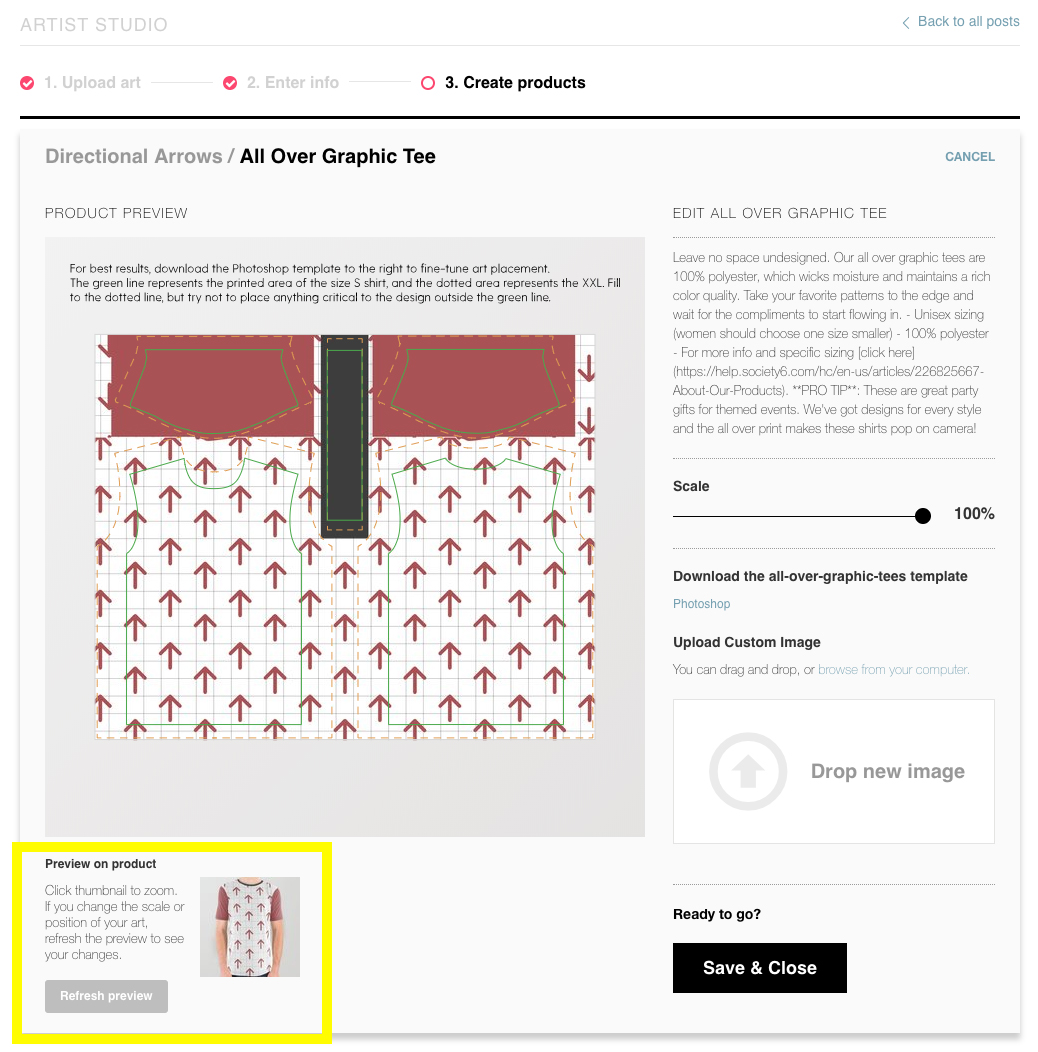
PRO TIP: Click “Refresh Preview” to see what your new tee looks like before activating.
Example #1
Example #2
With five fully customizable panels, we’re excited to see how creative everyone gets! If you have questions or comments, please join us in our Facebook Group where we’ll be discussing and answering questions!
Comments