Learn from Leah because she does this…a lot.
If you’re like me you might have notebooks, napkins, and stray pieces of paper covered in your own handwriting and doodles. I am constantly sketching out ideas for phrases to use in my next art print! This tutorial will show you step by step how to turn your hand lettering into a vectorized image that can be resized without losing quality which is a must for adding your art to the varying products on Society6!
For this project you will need paper, your writing tools (marker, brush, ink, etc), a camera or scanner, and Adobe Photoshop and Illustrator.
Leah Flores is a popular Society6 artist and photographer. Her specialty is fresh adventure photography paired with fun and playful typography. She’s grown her brand into a team of artists that now work with global brands to create unique, commercially viable artwork.
Use a pencil to sketch out your design
Once I decide on a phrase I like, I use a pencil to sketch out how I want the words to be positioned. For me, this is just a very basic, loose guide for where I want each letter to be. When I get to the next step, the brush is a little unpredictable and I like it to feel very organic!
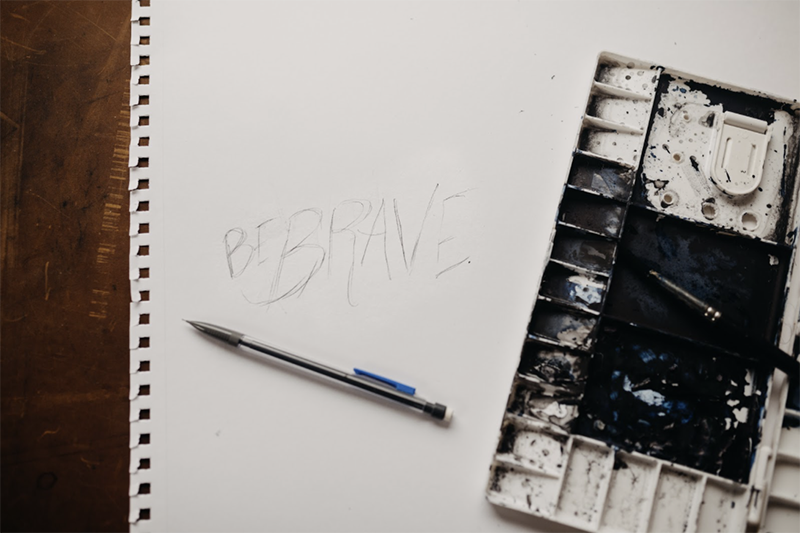
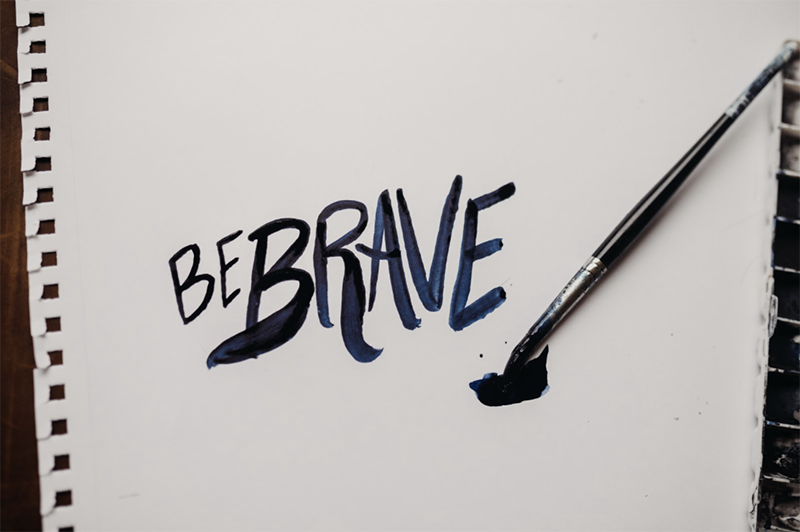
Ink your design
Depending on the style I am going for, I will use either a pen, marker, or paint brush. For this tutorial, I used a paint brush with a dark blue watercolor paint. I recommend using black or a dark ink with the tool you use, as it provides the most contrast from the paper which will come in handy!
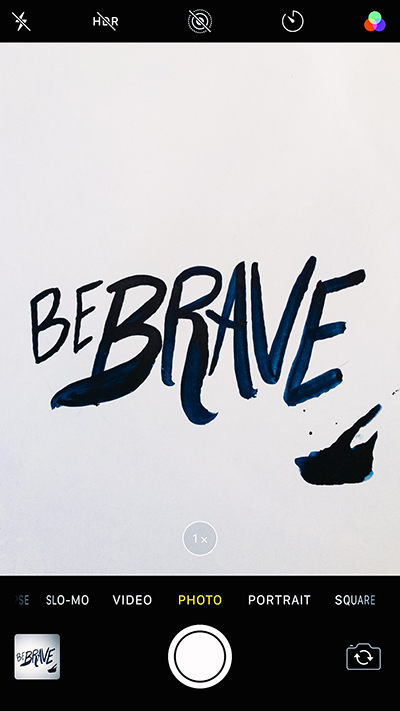
Take a picture or scan your design
You can use a scanner to import your design, or I have found that just snapping a picture with my phone has done the job! Make sure that your image is in a well-lit area and that you keep your camera as steady as possible. Once I snap the picture, I zoom in to see if everything looks sharp and send the image to my computer.
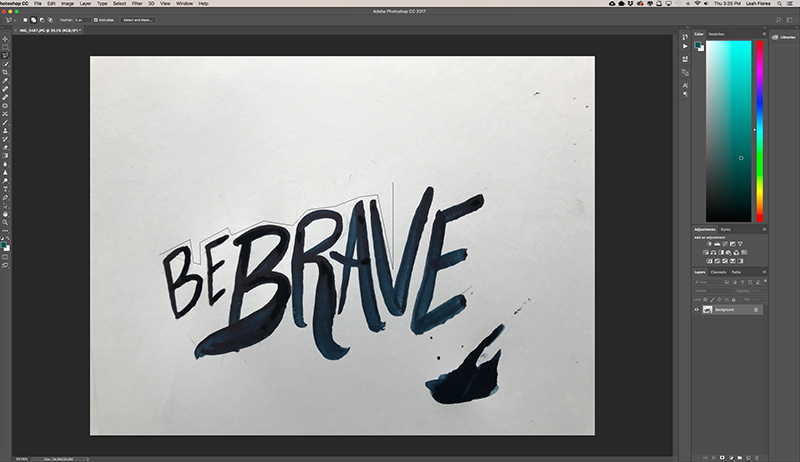
Lasso Crop in Photoshop
Open your image in Photoshop and use the lasso tool to trace around your image. Once you have made your selection, copy it!
Open image in Illustrator
Create a new file in Illustrator. Once you have your artboard open, paste the image selection you made in Photoshop.
Bonus Tip: After I paste the image, I hold down Command + Shift + H to hide the artboard which I find to be helpful!
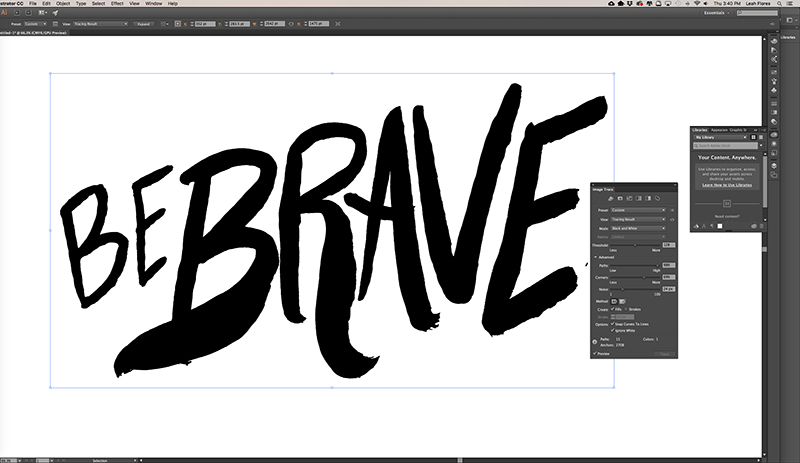
Use Image Trace to trace your image
In your Illustrator menu, click Window > Image Trace. When the Image Trace panel appears, click the drop down for ‘Advanced’ so you can have access to all of the tools you need!
First, make sure your mode is ‘Black and White’ and that you have checked ‘Preview’ at the bottom of the window. As you play with the sliders you can see how smooth or rough the handwriting appears. I like to maintain the organic, messy quality of the paint so I usually keep my Path slider in the high 90’s. If you want your lettering to be smoother, pull the Path slider down to a lower number.
In my screenshot, you can see the settings I used for my artwork. Also, make sure that you have checked the box ‘Ignore White’ in the window as you only want to be selecting your lettering. Once you have your preferred settings, uncheck ‘Preview’ and hit ‘Trace.’
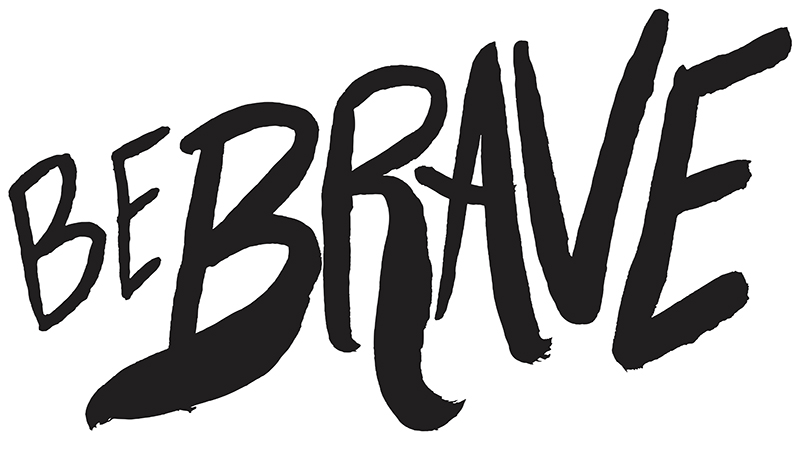
Expand and Ungroup your image
After you’ve traced your image, at the top of the Illustrator window you want to click ‘Expand’ which will make each letter or feature separately traced. After you’ve clicked ‘Expand’ you need to ‘Ungroup’ the image. You can hold down Command Shift G on your Mac or Control Shift G on your PC. You may have to ungroup a few times to get it all, fully ungrouped.
Finalize your design
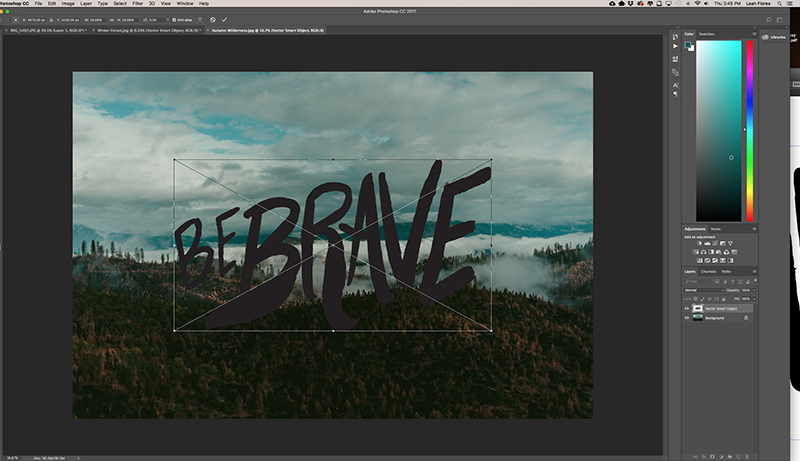
Now that you have your image traced and ungrouped you can move and adjust each element individually to finalize your design! Once I have the design how I like it, I simply drag and drop the selection back into Photoshop over a photograph to start working on my art piece.
Create and finish your artwork in Photoshop
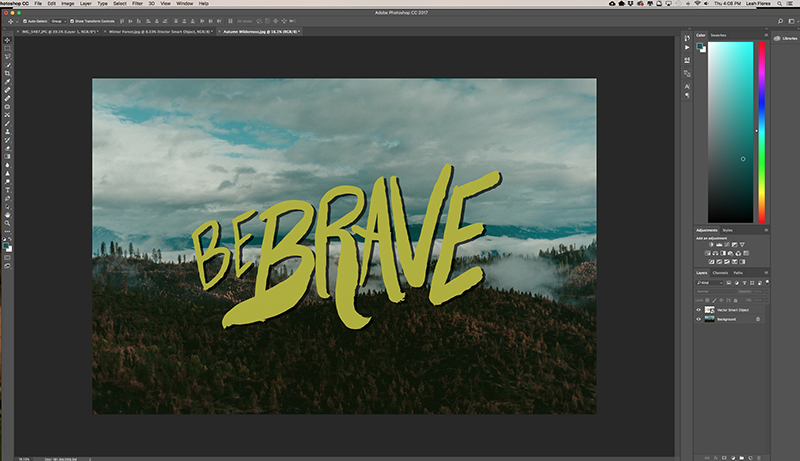
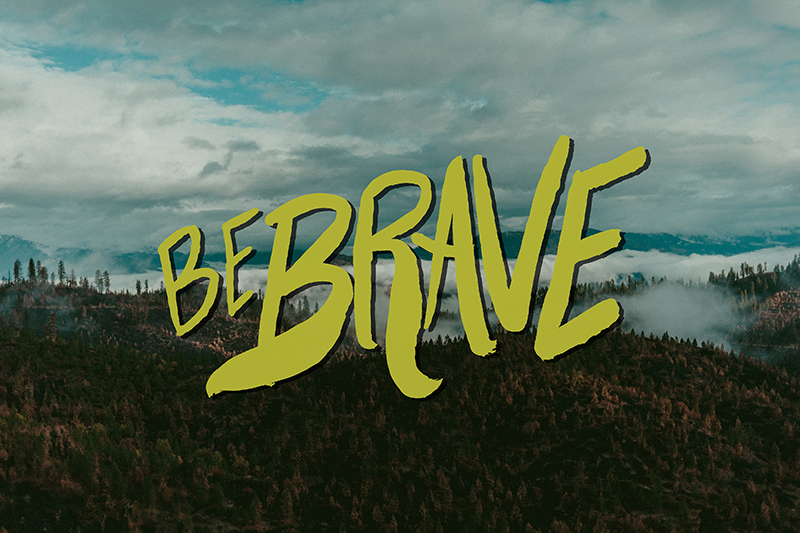
Once I drop the vectorized image into Photoshop I can resize and adjust my lettering without losing any quality! Being able to maintain the integrity of your design is important when you are scaling your art for various products such as a curtain or duvet cover on Society6 which have a high number of pixels! While my lettering is in Photoshop and I have positioned it where I would like on my photograph, I then play with adding color and texture until I have my final piece ready to upload to Society6. Remember to save your layers in a Photoshop or TIFF file so that you can go in and re-edit your design for all of the various products!
Having a vectorized version of your design is so valuable to keep on file! I often find that my old designs will work well on a new product or project and I am able to drop the file into any project as it can be resized without losing quality!
With this tutorial, you can now add this tool to your toolbox and start creating work in this customer-loved style. Plus, having vectorized typography gives you a lot of freedom to mix it up with all different types of mediums. Get out there, experiment, and see what happens!
Comments