How you photograph your artwork matters. Especially large format.
If you are an artist using a traditional medium, and especially if you are working with larger formats, you may have been a bit stumped on how to properly digitize your artworks for Society6 art prints and products. While there are professional options available in many cities, this is not always an option for everyone as it can be costly. Learning to do this at home or in a studio can save both time and money while still producing extremely accurate results. Let’s learn how to do it right!
Written by Marc Allante, a self taught artist, based in Hong Kong. He merges traditional Chinese inks with European painting techniques in a contemporary style that reflects the fusion of his Chinese-French ancestry and brings it into a modern context. Marc utilizes a variety of techniques, subject matter, and themes to expand the repertoire of his artworks.
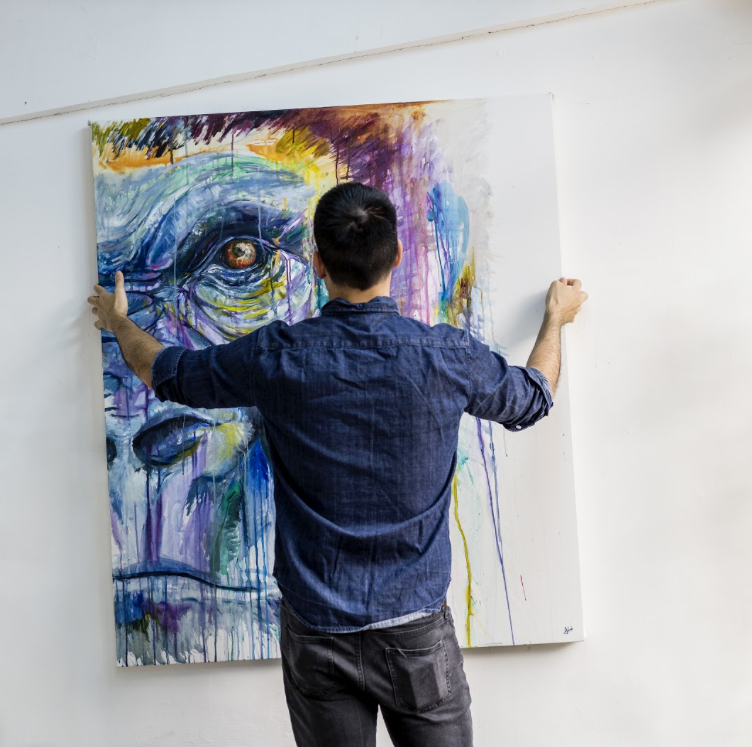
Photo Credit: Mike Pickles
Why photograph your artwork rather than scan it?
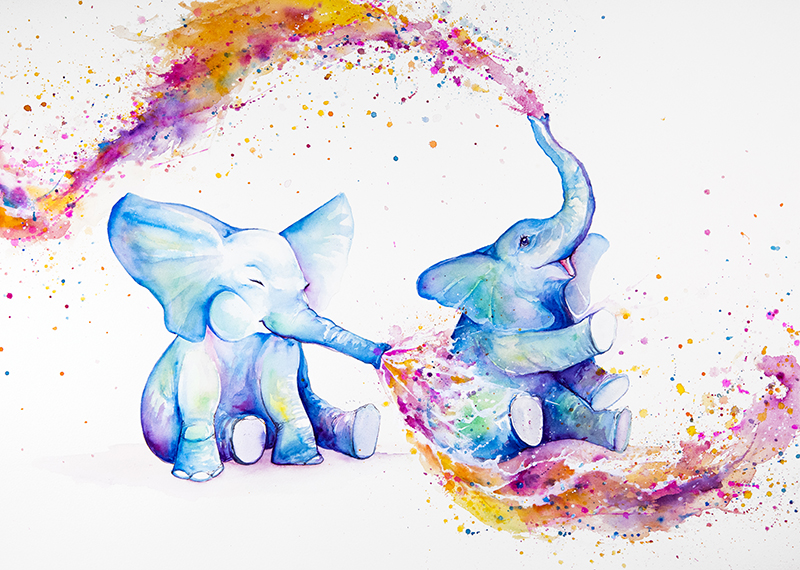
Size: Like the example above, some artworks are simply too large to scan. While scanning and stitching artworks digitally is an option, this can be quite a time-consuming process. It’s both rare and expensive to find scanners that go well beyond A2 or even A3 formats.
Medium: If you are working with heavy oils, acrylics or a medium that has a great deal of texture, or it’s stretched on canvas, it may not be possible to scan it accurately.
Accuracy: In some cases (like those mentioned above), and especially if you don’t have access to high end scanners, a photograph can produce more accurate results when done correctly.
The setup and process of shooting
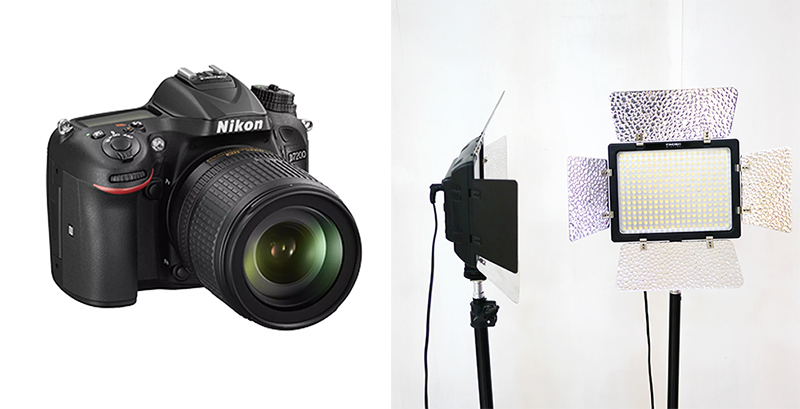
Equipment You Need
- 2 strong, diffused light sources
- A decent 12MP+ camera
- A tripod
- Photography Editing Software (i.e. Photoshop)
I know not everyone has access to the best camera, lighting equipment, or space. So, I’ll provide “best”, “better” and “budget” ways to photograph your artwork, but try your best to have most of these elements before getting started. When I first started painting and producing prints, I didn’t have the budget for high end equipment, so I had to MacGyver my own setup. However, the basic principles behind taking photographs of artwork remains the same.
Setting up your workspace
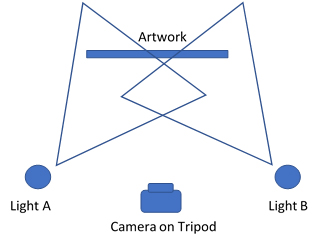
This is probably the most vital part of the process and also the most time consuming! But getting it right will give you accurate results. Here’s a top down diagram of how things should be set up:
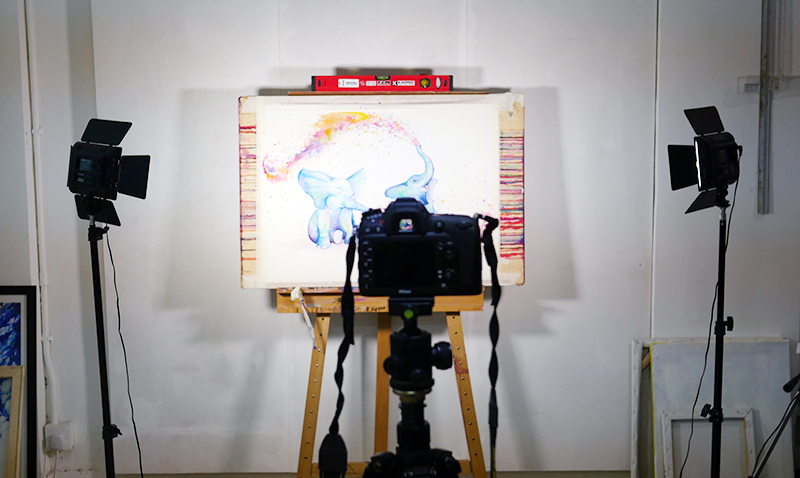
It should look something like this:
The artwork should be on a completely flat surface
If your work is stretched on canvas this is not a problem but if it’s on paper, make sure it’s tightly secured to a flat surface. If it isn’t flat, it will cause shadows to appear on the surface and distort your image. If you are using an easel, make sure the artwork is as perpendicular to the ground as possible. You can use a level if you want to make sure that everything is lined up perfectly.
The light angle is important for balanced light
You want to have two strong, large diffused lights set up on either side of the camera pointed towards the artwork at a 45 degree angle as shown in the diagram above, labeled Light A and Light B. The lights are set up in this way so that no light reflects back towards the camera–as it will create a glare. This also provides balanced lighting across the entire piece of artwork.
What do I mean by diffused light? There should be some kind of softening filter between the light and artwork to stop reflection or glare. It can also be called dispersed light or soft light. If you don’t have access to two big diffused lights, the most important thing is to have a great deal of balanced light across the whole artwork. Find a room with bright natural window-light, or if there is no space, go outside and use daylight!
Bonus Tip: For very large artworks, I prefer to take photos outside on cloudy day because it’s the best and biggest diffused light source you are going to find!
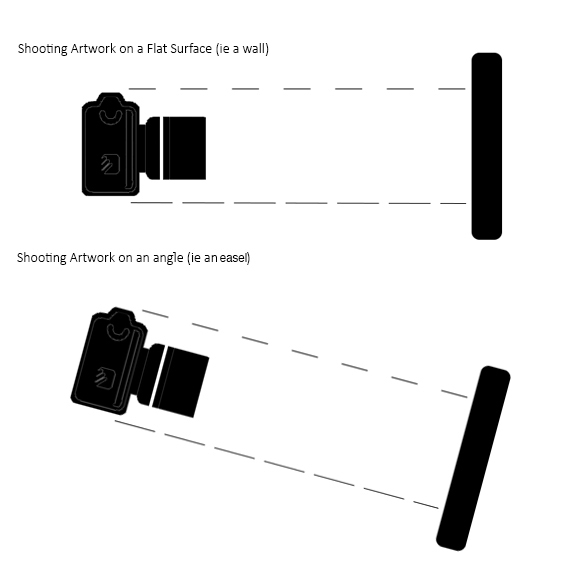
The camera is parallel to the artwork
Your camera should be set up at the center of your working space, on a tripod, pointed directly at the center of the painting, and always parallel to the artwork. If you have to take the photograph at an angle due to space constraints or working outside, just make sure the artwork and camera are angled at the same position.
Why use a tripod? Aside from making it easier to take stable and perfectly-angled shots, it ensures accuracy. You can hand hold the camera, but there may be a subtle blur on certain parts of the artwork that will print poorly. And that blur may be too difficult to see with the naked eye on the small viewing screen. In my early days of doing this, I had to take photos over and over again because I made this lazy mistake, so trust me!
Bonus tip: If you don’t have a tripod, use a table, stack some books, or use anything that can act as a stable surface to rest the camera on.
When deciding what camera to use, there are 2 important factors to consider:
- At the very minimum you should use a 12-megapixel camera to make sure you have a very high resolution file to upload for the various products on Society6. (The minimum file size needed is 6500px on the short side @ 72dpi)
- The ideal setting for your lens is 50mm but should be no wider than 24mm. Avoid wide angle lenses under 24mm because they create a minor curve in the image and distort it slightly.
Sorella by Marc Allante
Things to keep in mind when taking the photo
- Don’t just photograph the artwork itself. Capture an inch outside the canvas/painting as well. You will crop it out later. This gives you some room for error.
- Adjust the “White Balance” setting on your camera. Your camera reacts to light sources differently. Using daylight, fluorescent lights (or otherwise), may change the color of the artwork slightly. To be safe, I often take several photos with different white balance settings.
- Batch photograph your artwork! Since the setup is the most time-consuming part of this whole process, plan ahead and have several works ready to photograph. You can very easily switch out the artworks without much hassle.
- Take multiple shots of each piece and making sure to refocus the lens each time! This will give you some security so you have some back up photos of your artwork to choose from.
Bonus Tip: If your camera has the option, shoot in RAW + (Large) JPEG Format. Capturing your artwork in RAW allows you to capture tons of color information. That abundance of color information is necessary to get the best edit, and ultimately, the best printed product possible. This is especially important when it comes to color matching what colors you see on your screen to the true color of your artwork!
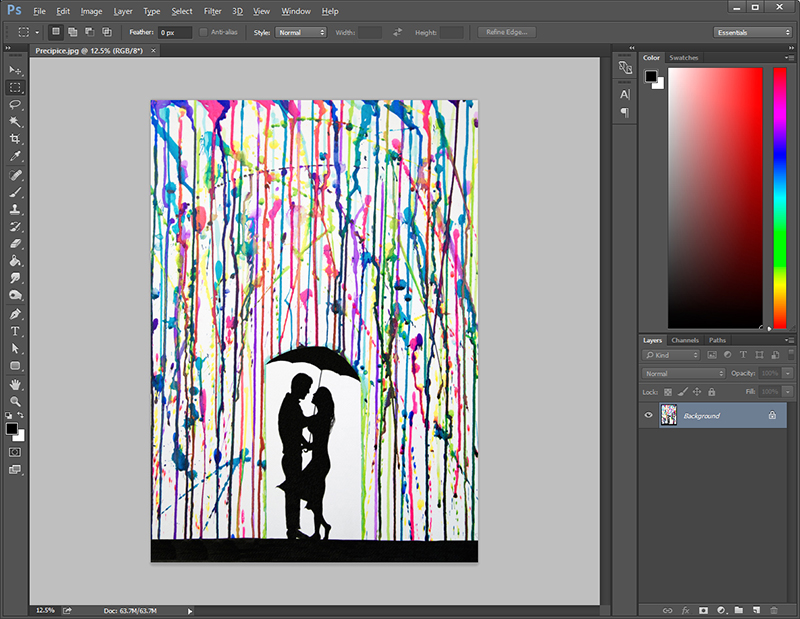
Editing your photographed artwork
Best case scenario is that the only editing required is to crop the image. However, sometimes the lighting is a little off or colors don’t quite match the original artwork, in which case doing a bit of editing can help. I use Adobe Photoshop and Lightroom for this, but there are many different photo editors (even free ones online) that will give you basic editing controls. I won’t go too in depth, but here are some basics that you will want to consider:
- Make sure the image is cropped correctly and look out for shadows, tape, or anything that shouldn’t be in the image.
- Adjust the brightness, contrast, and vibrancy to accurately match the original
- Shooting in RAW format gives you greater editing options
- Print a sample before uploading it to Society6 to check resolution and color
It can be tempting to pump up the vibrancy and saturation, but remember, you are trying to create the most accurate reproduction of your art. Also, computer monitor settings differ for everyone and are sometimes extremely bright and often set to high contrast values. So, what you see on your screen is not exactly what will be printed.
Bonus Tip: This is why printing a sample can be an excellent way to ensure everything has gone to plan!
Best, Better, and Budget Options
We have gone through the fundamentals of photographing your artwork, but all this will be slightly influenced by the equipment you use. That’s not to say you can’t get great results on a tight budget. Here are some options for various budgets:
Best:
If you are consistently creating and selling a number of artworks digitally, I would highly recommend buying at least some basic studio equipment and the most important elements are the camera with the right lens and the lights. It can be an expensive upfront investment, but the quality of your photographic reproductions will show. I use a 24.2 megapixel Nikon 7200 with a macro lens to ensure I get every detail and it allows me to print smaller artwork in larger sizes. The macro lens is specifically made for detail-oriented artwork. For lights, I invested in a pair of studio lights with stands with their own diffusion filters.
Better:
The camera is still something that you should invest in and avoid using a lower end model or your phone. Look for a high resolution camera (16MP+ is recommended) so that you can get a great amount of detail, and a 50mm lens to avoid any distortion. For lighting, if you are doing it indoors and don’t have lights, try to take photos in a room with the brightest natural light possible. However, often the best and cheapest option is to photograph outdoors in the shade or on an overcast day. For large artworks, sometimes photographing outside is actually the best option.
Budget:
As mentioned, don’t go under a 12MP camera, and do not use your phone. For lighting, outdoors is the way to go when you are on a budget but try to take photos when it is overcast or cloudy as this provides the best soft light. Avoid midday when the sun blaring, because the light will reflect off your artwork and not be accurate. Even if you are working on a budget, as long as you are following the basic principles of setting up the artwork and photography area, you can still get great reproductions done!
No matter your budget, accurately photographing your artwork yourself will allow you to keep that process in-house and save you tons in the long run. I hope this step-by-step guide helps you get more of your finished work digitized and available for sale on your Society6 shop!
Comments