With your excellent artwork and our excellent products, there’s no reason why every single one of the items in your shop shouldn’t look super professional. Print-On-Demand pro and collage artist Eugenia Loli is here to chime in on some practical ways to help you make your all over print tees look their best.
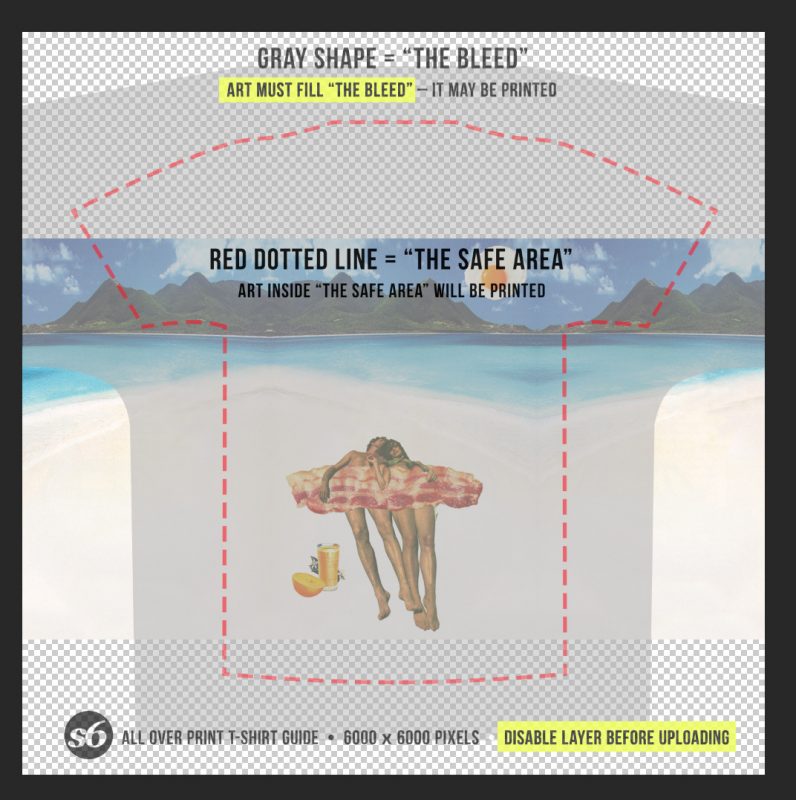
One of my favorite products here at Society6 are the all-over-print t-shirts. I do collage and the surreal imagery looks really convincing and spectacular on an all-over print t-shirt. However, exporting for all-over-prints (also known as “full-bleed” t-shirts) can be quite challenging. A lot of artists simply resize their artwork to fill up the PSD template and this results in a t-shirt thumbnail that doesn’t show clearly the main object of the artwork (because it was resized too much). That can often translate to fewer sales. Here are two ways to go around that problem! I used Photoshop, but the same work can be done with the free GIMP application.
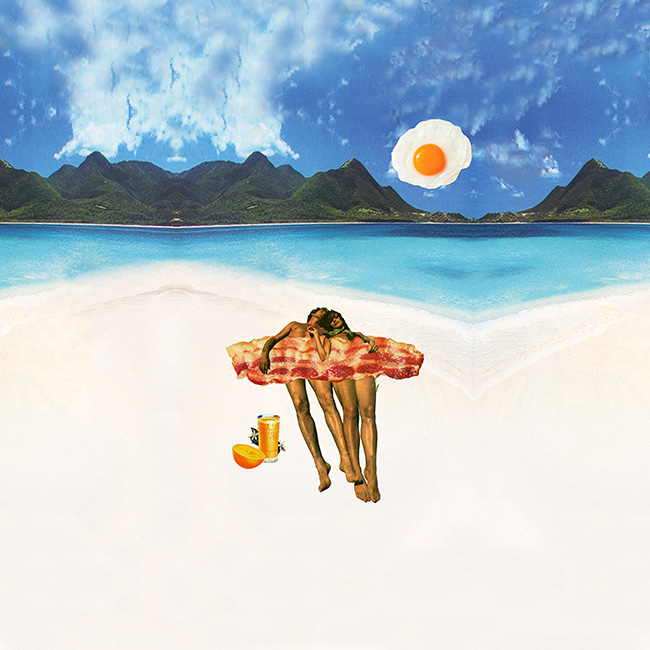
Case 1: Artworks with consistent, simple background
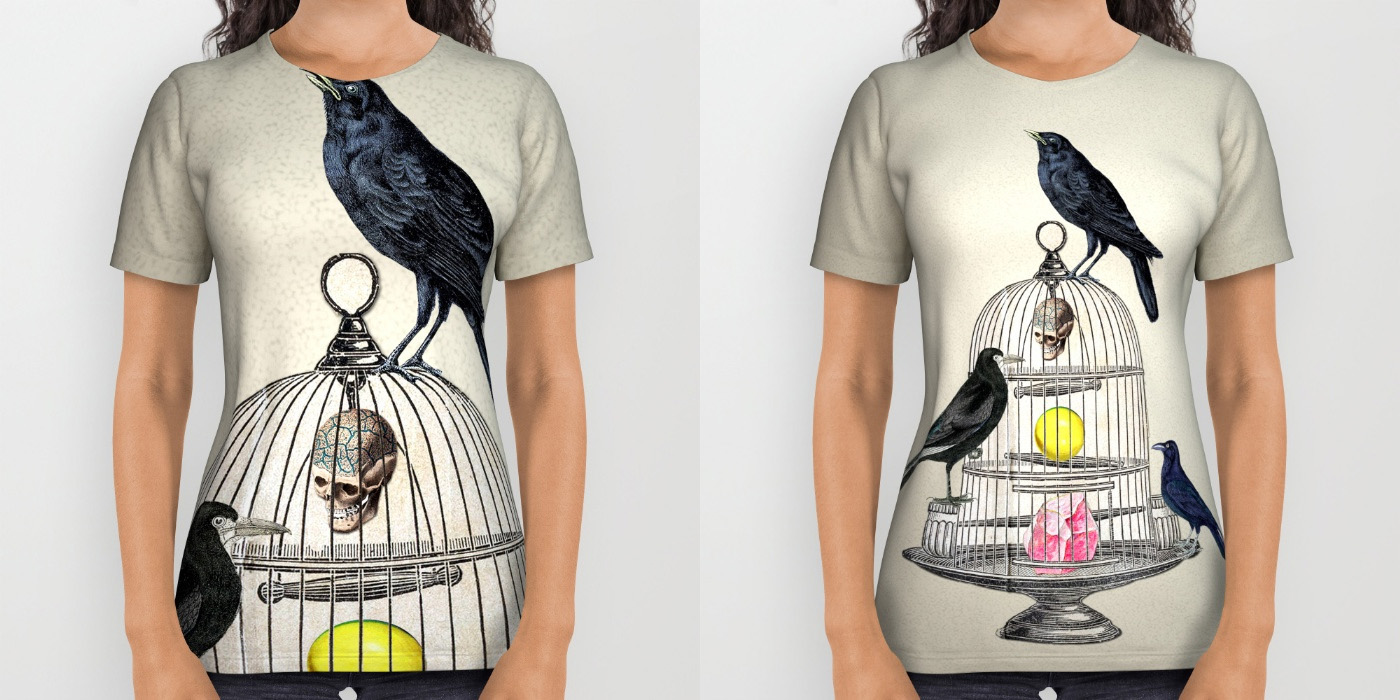
Before (default resizing) and after.
For artworks that contain a middle main object(s), and have a patterned or simple background, do the following:
1. Copy the main object(s) of the artwork as a layer in the PSD file, under the existing layer.
2. Copy the background separately, as its own layer, last in the stack of layers.
3. Resize background to fill the template, or if it’s a single color with a pattern, fill up the background layer with that color, and enable the pattern.
4. Center, and resize the main object layer just enough using SHIFT key (to keep the right aspect ratio). Sometimes, we might want to ever so slightly resize with the wrong aspect ratio to fit things better, as long as it’s not too visibly distorted to the human eye.
5. Disable the original template layer, save and export as JPEG with quality 10.
The default view on Society6 is the female view on these t-shirts. The female t-shirt thumbnails are for SMALL size t-shirts, while the men’s thumbnails are for MEDIUM size t-shirts. You need to optimize for the default view, that is the SMALL size.
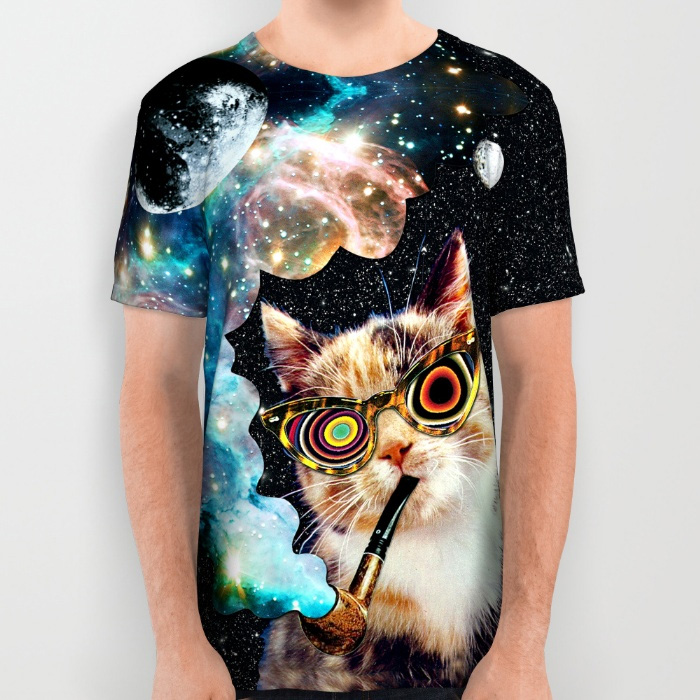
Case 2: Artworks with semi-complex or complex background
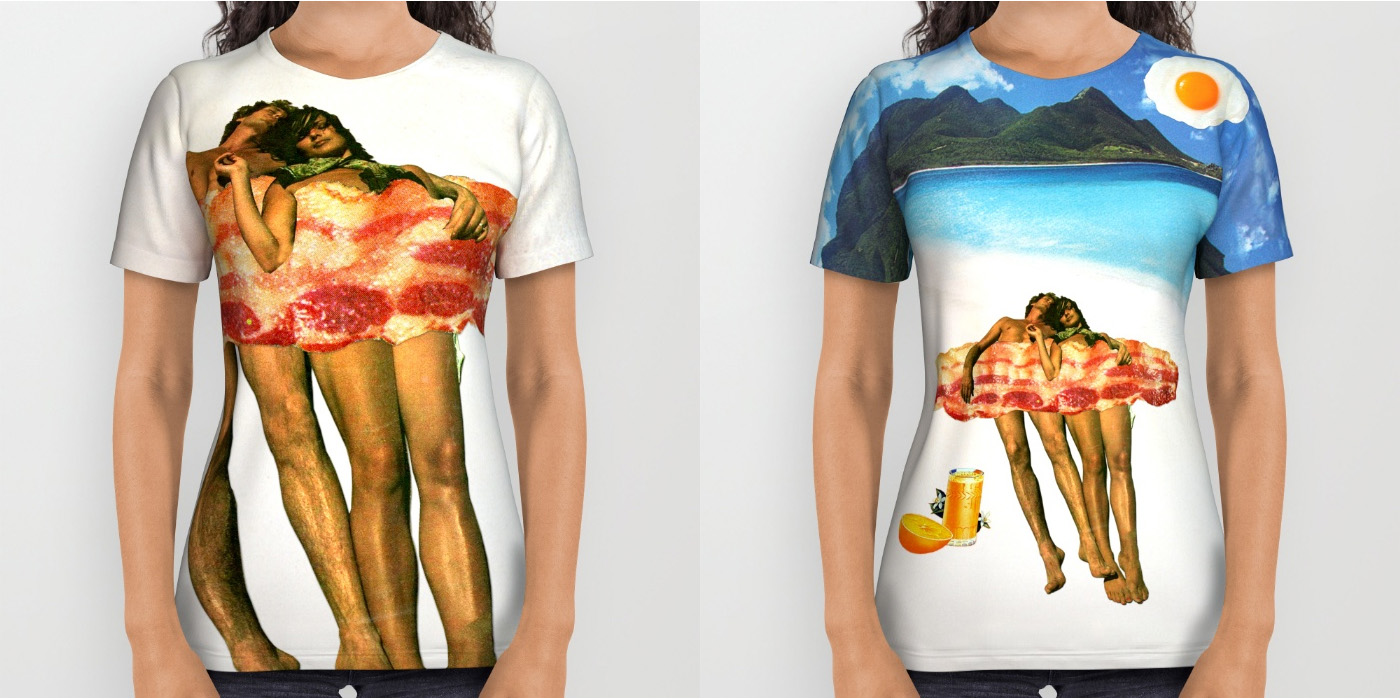
Before (default resizing) and after.
1. Copy the artwork as a new layer in the PSD template.
2. On the original artwork, disable the layers of the main artwork and mostly keep the parts that would be considered a background (even if the background might be more than 1 layer).
3. Copy and paste the semi-bare artwork on the PSD template too.
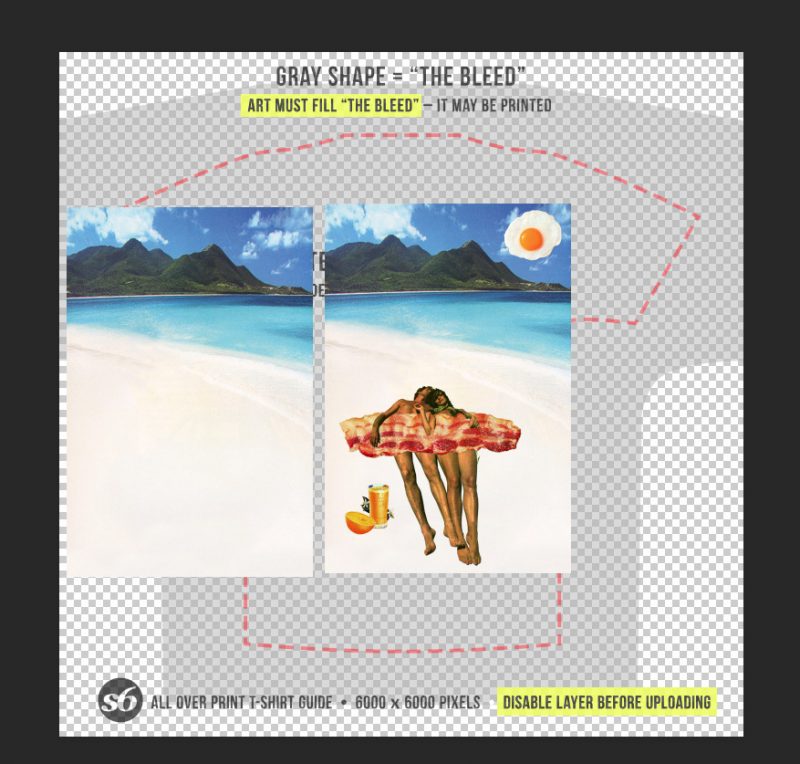
4. Reverse horizontally the bare layer, and create a copy of it.
5. Place one on the left and one on the right of the main pasted artwork.
6. Make the three layers, as one (flatten). Make sure you do not flatten the template layer with it.
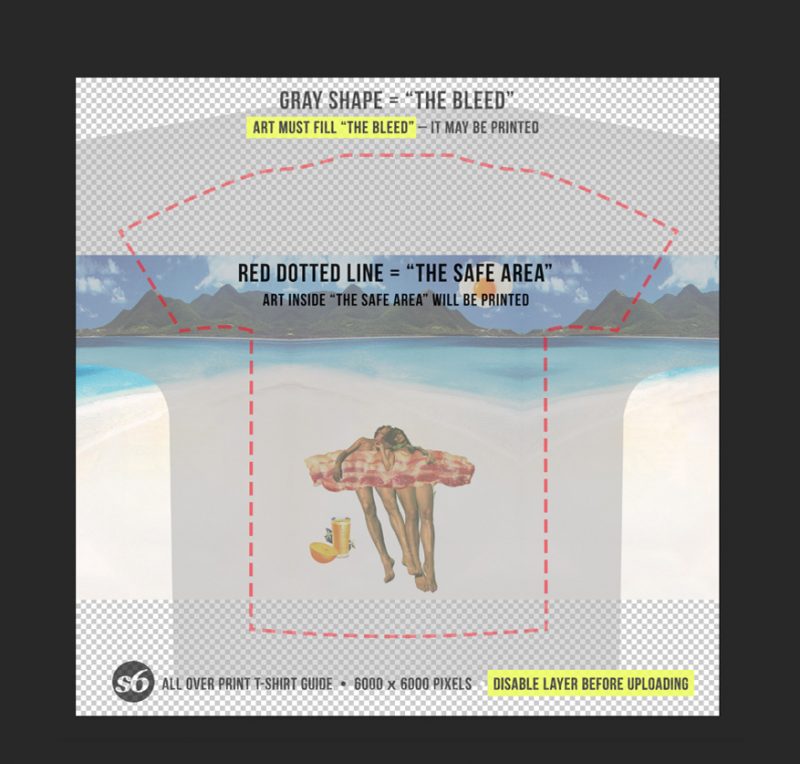
7. Resize using SHIFT key (to keep the right aspect ratio) that big layer just enough so the main artwork is at the right size to look good on the t-shirt. Sometimes, we might want to ever so slightly resize with the wrong aspect ratio to fit things better, as long as it’s not too visibly distorted to the human eye.
8. Select & Copy part of the top, and paste it as a new layer.
9. Reverse it, vertically. Merge below.
10. Do the same for the bottom of the t-shirt.

11. For artworks with even more complex background, it’s similar to above, but you might not be able to remove many elements from the background to create that “bare” version. In that case, you copy/paste and reverse the same full artwork, resize it, and then you airbrush out (using the healing brush) as much as possible out of the visibly duplicated parts of the t-shirt (usually, that would be the sleeves, and the top and bottoms).
12. Disable the original template layer, save and export as JPEG with quality 10.
With my most popular t-shirt, I had to use pretty much every trick on the book to look good! Good luck!
Comments