This is a mobile workflow made easy!
Whether you call it a timelapse or speed painting, they typically get a lot of love on social media. Plus, they give fans (i.e. potential customers) the chance to feel invested in your artwork before you even release it. In this article, we’re going to focus on an entirely mobile workflow so you can start your first time-lapse ASAP. We’ll cover what keeps people engaged in a timelapse, what apps to use, how to mount your phone and what kind of lighting you should use. We also called in a few timelapse wizards, Tanya Shatseva and Kerby Rosanes, to share their secrets to a successful timelapse. So, whether you’re painting your favorite animal or drawing your least favorite politician, these tips will put you in the right direction.
If you’re looking to timelapse your digital artwork, check out Camtasia (paid, Windows/Mac OS) or Quicktime (free w/ Mac OS). If you’re on a tablet, the digital painting app, ProCreate ($6), has a great timelapse function built right into it.
1. Here’s what viewers like seeing in a timelapse
Feel free to add your learnings in the comments below, but according to Tanya, your artwork should be in a “neutral and nice surrounding/background”. Whether in a timelapse or not, she says fans love seeing when she “adds highlights”.
A really good, specific example of adding highlights is this Wendy Ortiz’s timelapse:
Kerby says his fans love seeing “the random doodling I do as a warm up exercise. Most people find it cool to just spontaneously draw something out of nowhere without planning.”
2. Know what social platform you’re shooting for
Are you shooting for an Instagram post (square or horizontal) or an Instagram story (vertical)? How long does your final video need to be? Here’s a quick tip from Kerby on that….
Get familiar with the platform you are planning to publish your videos on. Be aware of the limitations, especially on uploading videos to various platforms. On Instagram, for example, you can only upload a one minute max video, so I tend to publish timelapses of smaller drawings that I know would fit within the limit.
Tanya on the other hand publishes longer, editing intensive timelapses to her YouTube channel, but pulls snippets from that into Instagram.
GETTING SETUP
3. Pick a spot to shoot based on good lighting
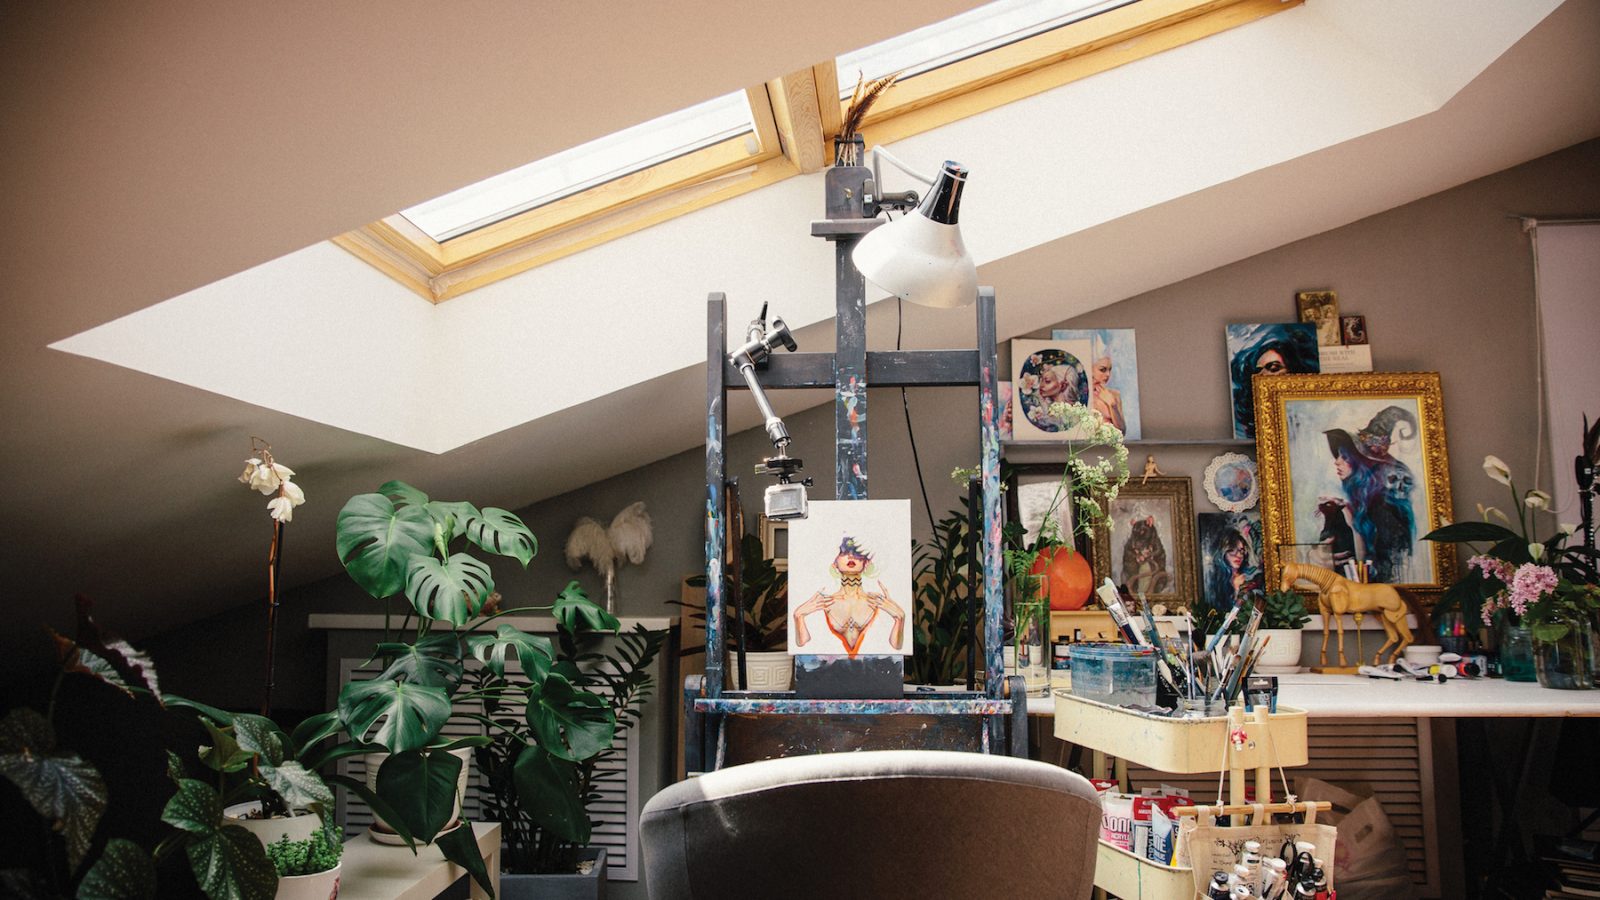
Lighting is everything and your position should be contingent upon it. Ideally, you want consistent light throughout the entire timelapse so the viewer can focus on the creation of your artwork rather than the environment. Based on how long you think you’ll need to finish your artwork, Tanya says to “Use day light (natural) or artificial light shining directly on the painting–ideally from different sides to provide a smooth, balanced picture.”
Here’s her natural light setup. You can also see the one lamp over the top of her canvas when needing some help from artificial light.
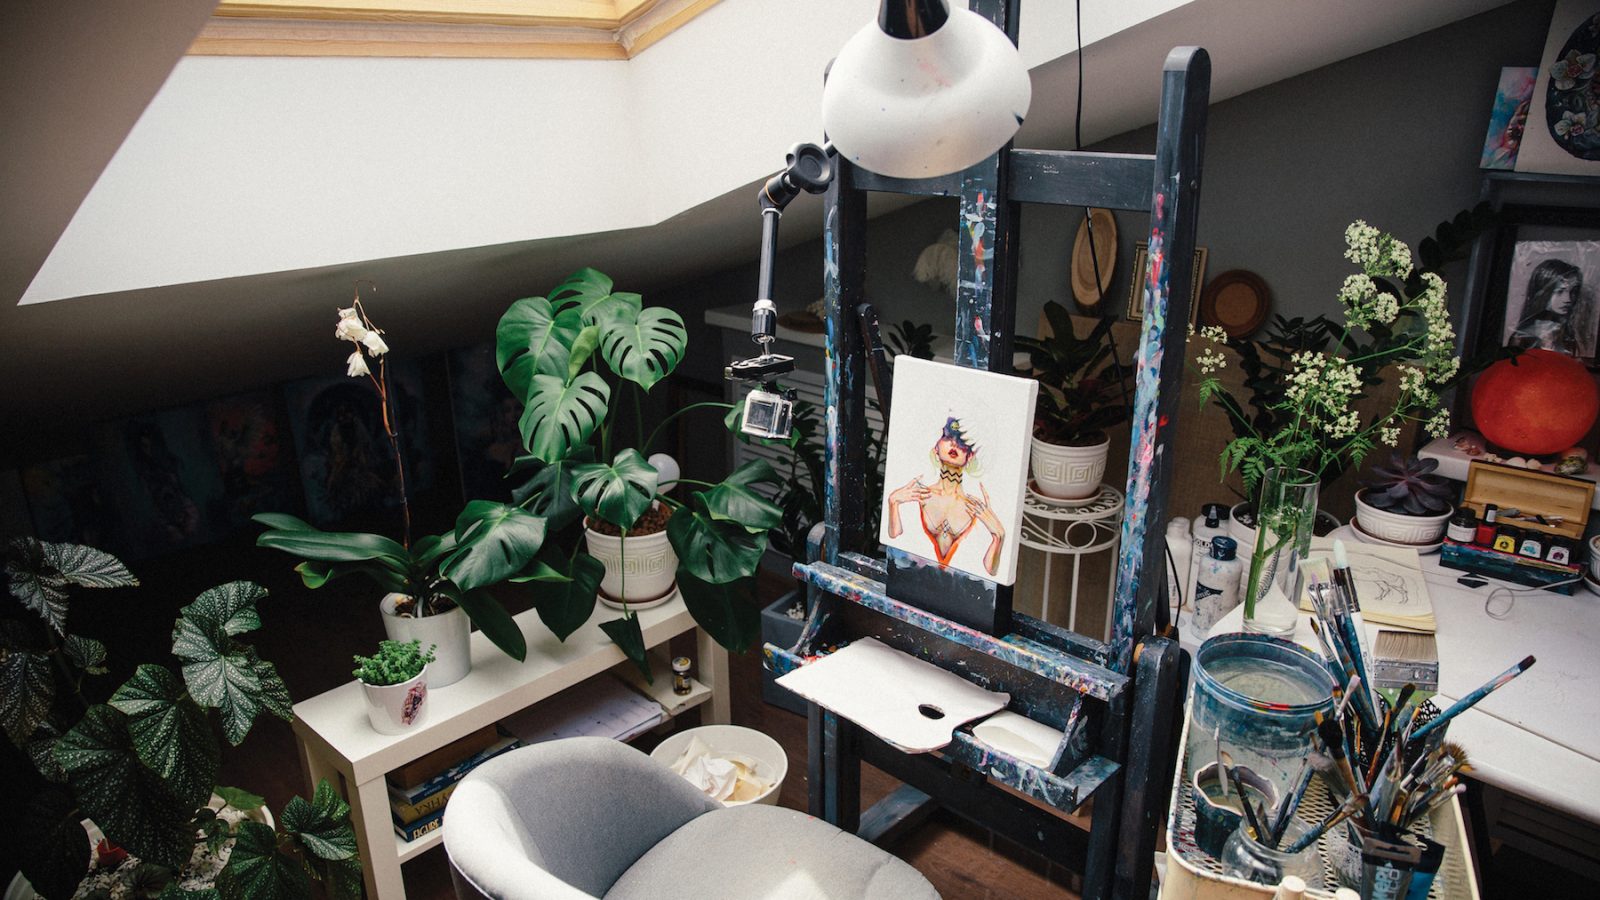
You can also see she’s using a GoPro in this setup, but the GoPro mount can be easily replaced with a mount for your smartphone.
4. Pick a time-lapse recording app to shoot with
#1: iPhone’s native TIME-LAPSE function (iOS)
According to 9to5Mac.com, assuming you shoot 10 minutes or more, your final video should be somewhere between 20-40 seconds regardless of how long you record. So even if you shoot a timelapse for 24 hours, the final video, in theory, shouldn’t be more than 40s. It’s Apple’s clever response to social media attention spans.
#2: Lapse It (iOS, Android)
This would be my next “easy” recommendation and works for Android and iOS users alike. It’s built for timelapses. Options are very straight forward. Records in high quality. May require basic editing depending on the length of your timelapse video file, but that can be easily handled.
#3: ProCam 4 (iOS)
This is my personal favorite, but it’s also made for photographers–so it can be intimidating if you’re just dipping your toes into timelapses. If you’re comfortable with manual shooting on a DSLR, though, this is a gem. Also, there’s some editing required because this doesn’t export a file at a specified length. If you’re on the fence, here’s a great review of ProCam 4.
This is another easy one if Instagram is your final output. It’s limited in control and orientation because it’s intentionally minimal, but it does a good job. It also has built-in stabilization which is nice
5. Buy mounts & power cords based on your setup
You don’t want to attach your mount to anything that will shake significantly. What makes a timelapse so captivating is that the viewer can focus on the impressive evolution of your artwork as you create it. If you affect the environment, you’re giving them something else to focus on.
Below are a few items I’ve had success with…
#1: Adjustable SmartPhone Gooseneck w/ Clamp for Desk ($10)
I recommend the black gooseneck to avoid any potential reflections that could be distracting. This is film production best practice.
#2: Joby GripTight Gorillapod ($20)
The legs on this move independently (like a snake) so you can position on virtually anything you want. You can use this a mini tripod for close-ups. You can easily attach this to the stem of a lamp, door handle or maybe a tall chair.
PRO TIP: Make sure to get the right size grip (XL v. Small) depending on the size of your phone.
#3: Tripod w/ SmartPhone Tripod Adaptor (~$30)
These items are particularly valuable for anyone using an easel, wall or floor. You can also buy these at virtually any store that sells electronics. This will allow you the freedom of sharing an angle that is un-obstructed.
Err on the side of a taller tripod (60in/152cm is pretty standard). You’ll also need to get a tripod smartphone adaptor based on the size of your smartphone. For example, if you’re an iPhone Plus user, make sure you get an adaptor that is big enough the first time around.
PRO TIP: A tripod can help you achieve a great “top-down” shot when used in conjunction with a gooseneck or Joby Gorillapod. You’ll this in Kerby’s setup below.
#4: Power chords
Based on how long you anticipate to be creating, it’d be a good idea to plug in to a power source. Video & photo apps tend to suck a lot of juice out of your phone. Not only because it’s running with the screen on the entire time (most apps let you control brightness to minimize battery drain), but you’re still using the phone’s processor pretty heavily for hours at a time. It’d be a big disappointment to learn you only recorded half of your 8 hour creative process!
Tanya Shatseva’s gear:
- Manfrotto 244RC Variable Friction Magic Arm ($170)
- Manfrotto 035 Super Clamp ($27)
- GoPro Tripod Mount Adapter With Screw For GoPro (under $10)
- You can replace the GoPro tripod mount w/ a Smartphone mount adaptor.
And here’s Kerby’s time-lapse setup…
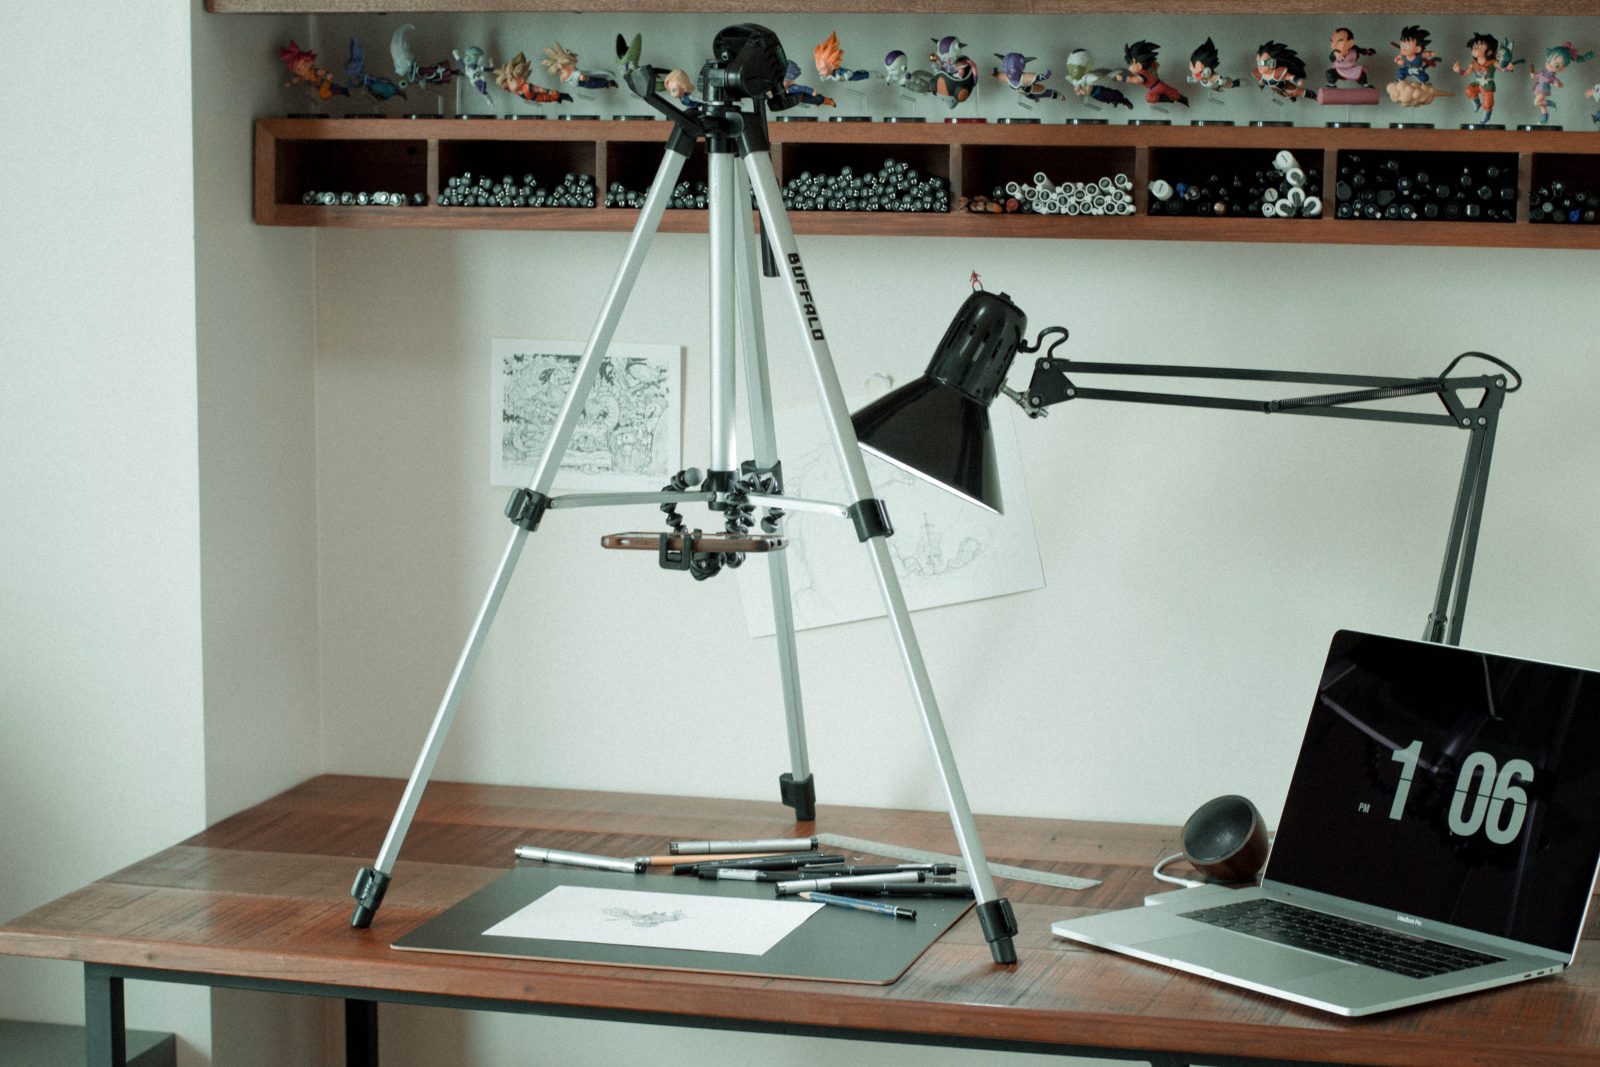
Kerby Rosanes gear:
- Generic tripod (under $30)
- Joby GripTight Gorillapod ($20)
JUST BEFORE SHOOTING
6. Position your canvas or sketchbook and don’t rotate it
In fact, you don’t want your canvas moving very much at all. Keep your artwork in the same orientation the entire time. A little shift here and there is not a big deal. But if you start rotating your canvas, it’s too difficult for a viewer to comprehend the progress you’re making if you’re simultaneously tasking them with keeping up with constant repositioning.
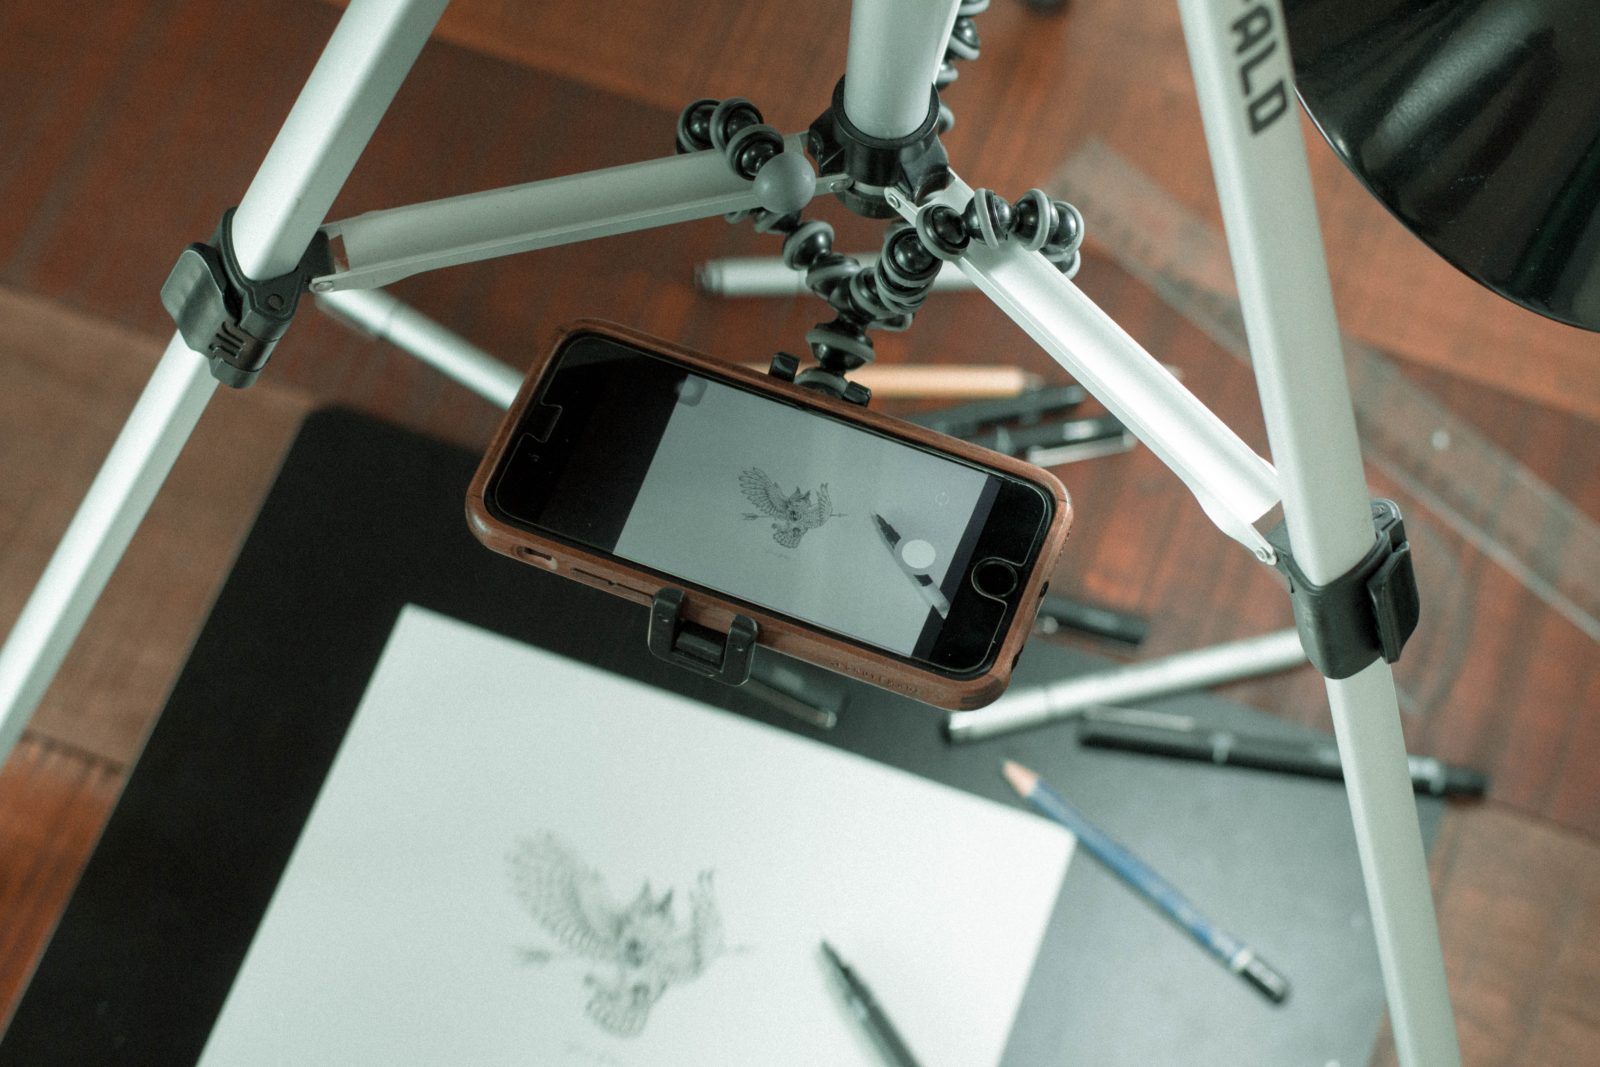
7. Position your phone where the artwork can clearly be seen
You’ll see Tanya’s artwork is much larger format and has a camera positioned over her left shoulder. Kerby’s camera is positioned directly above. As long as you can clearly see the artwork, that’s important.
DURING SHOOTING
8. Use your smartphone’s main camera, not the selfie cam
The difference in quality is significant, plus your main camera seems to give you a wider frame. You can always zoom in.
9. Don’t cover the artwork with your head or body
The best part about a time-lapse is the evolution of it. Make sure your fans have a clear view of your artwork. Pretty obvious, but be aware of this as much as you can. It’s a good idea to do a quick test if this is your first timelapse.
10. Work through your painting/illustration in sections
Timelapses are inherently hypnotic. BUT, what gives you an edge is if you can guide someone’s eyes from one section of your painting/illustration to the next. This is done by keeping the viewer’s attention on the evolution of an area in a natural flow. If you start on the left, naturally work your way right. Don’t jump from left to right and then top to bottom. It’s confusing and difficult for fans to follow and can be a turn-off. You want people watching through the end.
Here’s another time-lapse master, Agnes-Cecile (aka Sylvia Pelissero):
Over time, you’ll learn to polish these up. Video content is incredibly important to your fans. It’s how social media is being digested these days and your iPhone or Android is the best possible tool you could have as an artist. So get out there, share your creative process. Get fans engaged. Post as many as you can. It’ll helps boost sales. It’ll improve engagement with your other content. Facebook and Instagram love to show video content to your fans. Share your timelapses below!
Need some inspiration? Check out all of our timelapses on YouTube.
Images courtesy of Tanya Shatseva and Kerby Rosanes
Comments