Introducing: Framed Canvas Prints!
The latest addition to our wall art category, framed canvas prints add an extra touch of refinement to our gallery-quality canvases. Plus, you can set your own price by adjusting the markup in Artist Studio!
In this article, we’ll cover all the technical details required to start selling framed canvas prints in your artist shop.
Enable framed canvas prints now>
Activating Framed Canvas Prints
To make your experience easier, some designs will be automatically enabled on your behalf. If you have metal prints enabled, we’ve automatically applied those designs to framed canvas prints due to their similar aspect ratios and product details. Visit your Artist Studio to review or adjust design placements and to enable any additional artwork that you want to offer on this product.
Reminder: We launch new products to artists before making them available to customers in order to allow for merchandising and time for artists to update their shops. At first, framed canvas prints will not be included in the “Wall Art” dropdown in the main navigation on our site. Once it launches to customers, you’ll be able to find it there.
Creative Asset Details:
- Pixel Dimensions: 9000 x 9000 pixels @ 300 dpi for square files and 7200 x 10800 pixels or 10800 x 7200 pixels @ 300 dpi for rectangular files
- DPI: 300dpi
- Supported File Types: JPG or PNG
Brief Product Overview:
- Product Name: Framed Canvas
- Product Category: Wall Art
- Material:
- Printed with gallery-quality inks using finest giclée print technology
- Hand-stretched canvas over pine stretcher bars
Activating framed canvas prints is easier than ever, especially if you already have metal prints enabled. If you have artwork enabled on metal prints, those designs will be automatically enabled on our all-new framed canvas prints. To review or adjust the positioning of the creative on framed canvas, visit your Artist Studio and click on “My Products.” Then, click on “Framed Canvas” under “New Products” at the top of the page. Any creatives that have been automatically enabled will appear under “Enabled.” To adjust the positioning of any enabled product, hover your mouse over the thumbnail and click on “Edit.”
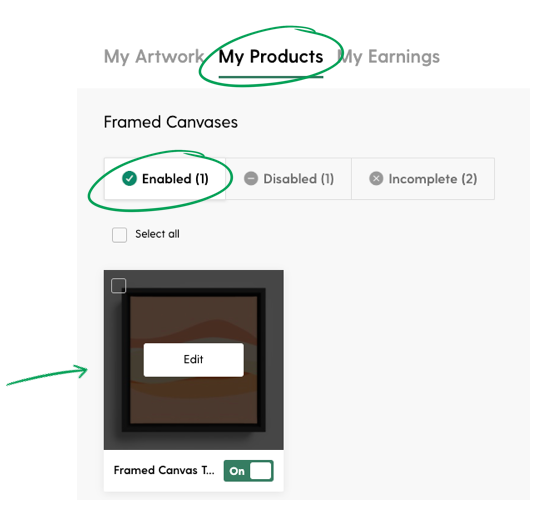
Any creatives that have been automatically enabled will be under "Enabled." To adjust the positioning of an enabled product, hover your mouse over the thumbnail and click on "Edit."
If you have assets that fit the requirements for framed canvas but weren’t automatically enabled, they will appear under “Disabled.” To view and enable those creatives, navigate to the “My Products” section of your Artist Studio and select “Framed Canvas” under “New Products.” If the previews look good, you can “Select All” and then click “Enable” to activate all of the designs that meet the asset requirements at once. For the best quality products, be sure to carefully review the positioning of the creative on framed canvas prints prior to activating.

Navigate to "My Products," locate framed canvas, and then select "Disabled" to view all existing creatives that are ready to be enabled on framed canvas. To quickly enable all designs that meet the asset requirements, choose "Select All" and then click "Enable."
Any creatives that are missing assets that meet the framed canvas requirements will appear under “Incomplete.” You can quickly upload a new asset by hovering over the design and clicking “Upload.”
Special Considerations for Editing Framed Canvas Prints
The orientation of your uploaded asset will determine the orientation of the product. In other words, uploading a vertical asset will result in a vertically-oriented product and uploading a horizontal asset will result in a horizontally-oriented product. While editing, select “Generate Previews” to double check your work and view the placement of the final product.
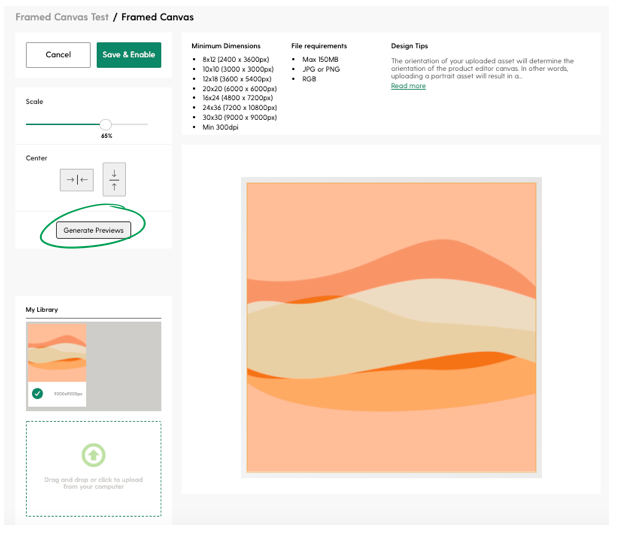
Select "Generate Previews" to double check your work and view the the placement of your asset.
Framed canvas prints will default to a 10% markup but you can easily adjust it at any time. To change your markup on all recessed prints, navigate to your Artist Studio and click on the “My Artwork” section. Then, click on “Set Store Markups” in the upper right corner. A pop up will then appear where you can adjust the markups on all markup-able products, including framed canvas.
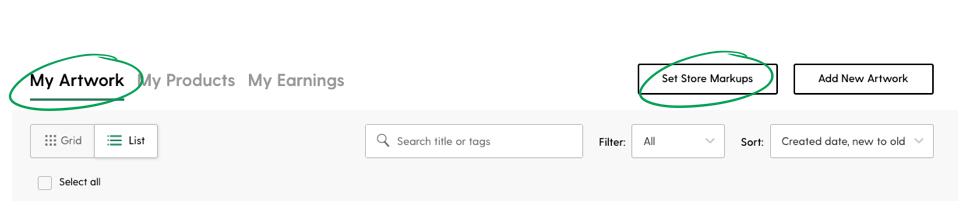
To adjust your markup on all framed canvas prints, navigate to "My Products" in Artist Studio and click on "Set Store Markups."
If you would like to adjust the markup on a specific artwork, navigate to the “My Artwork” section of your Artist Studio and click on the artwork you’d like to adjust. Scroll down and select “Set artwork markup,” which is located on the left hand side. A pop up will appear that allows you to adjust all markup-able products for the artwork you’ve selected.
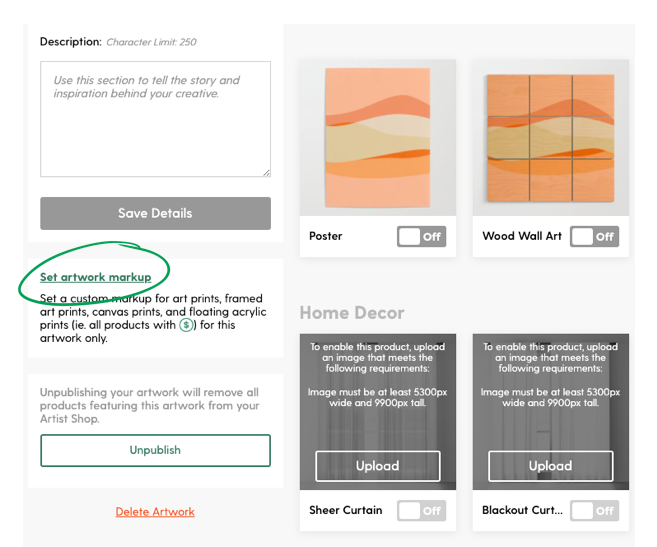
To adjust the markup for a specific artwork, navigate to the "My Artwork" section of your Artist Studio, select the artwork you'd like to adjust, and scroll down to select "Set artwork markup."
Official Framed Canvas Description
Our Framed Canvas Prints add an extra touch of refinement to our gallery-quality canvases. Select from four different frame colors: black, white, maple or walnut to suit your decor taste and show off your favorite artists’ designs. Framed canvases are available in seven different sizes.
- Four frame colors available
- Printed with gallery-quality inks using finest giclée print technology
- Hand-stretched canvas over pine stretcher bars
- Hanging hardware included
- To dust, use a soft, lint-free cloth or feather duster
- Every order is made just for you
- Product Note: Color variations between on-site previews, your screen and printed artwork may occur
- Sizes Available:
- 8″ x 12″ // 20cm x 30cm
- 10″ x 10″ // 25cm x 25cm
- 12 x 18″ // 30cm x 46cm
- 20″ x 20″ // 51cm x 51cm
- 16″ x 24″ // 41cm x 61cm
- 24″ x 36″ // 61cm x 91cm
- 30″ x 30″ // 76cm x 76cm
Comments