Guess what? It’s not as hard as you think.
Grow your follower counts and increase conversions by making content every customer, fan and follower can appreciate–an animation of your artwork. Society6 Artist and GIF-maker, Cassidy Rae Marietta, shed some light on her animation process so you can do the same. You’ll get a step-by-step guide on how she takes her illustrations to the next level with animation, while stirring up new life on your social platforms.
Animated GIFs are “stacked” files that allow you to feature a sequence of illustrations or photos to give the impression of motion. For this tutorial, plan on creating an eight-frame animation. That’s how she created the spiral eyes in the skull below, so it will be easier to follow along. As you learn more, you’ll realize you can create animations ranging from one second to one hour.
1. Create a square canvas in Photoshop
Setting the dimensions of your canvas from the beginning is important. You’ll be sharing this GIF in a lot of different places so you don’t want a big file (10mb) or too small a file (100kb and very pixelated). I recommend image dimensions of 1500 x 1500. If you need to go smaller, I don’t go smaller than 700 x 700.
Square format is my preference and probably the easiest size for a beginner. Also, compared to the size of landscape videos, a square takes up more vertical space in an Instagram or Facebook feed. Take advantage of your real estate to get more eyes on your work!
2. Pick a good piece of artwork to animate and drop it into your square canvas
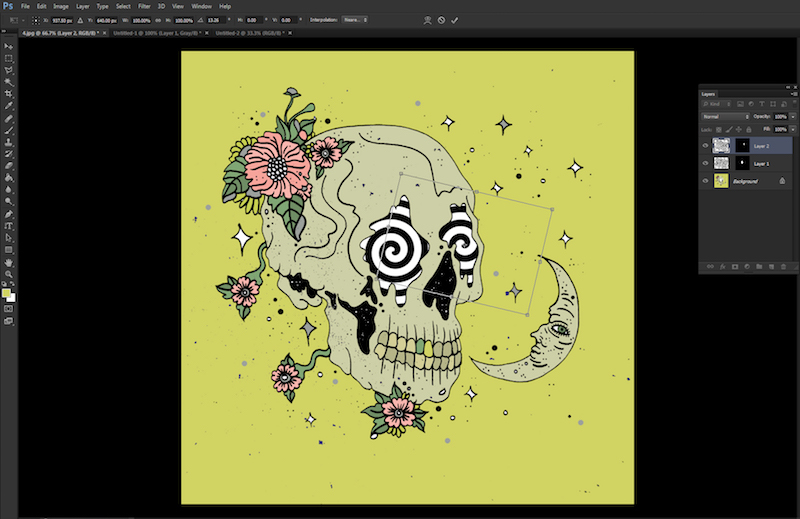
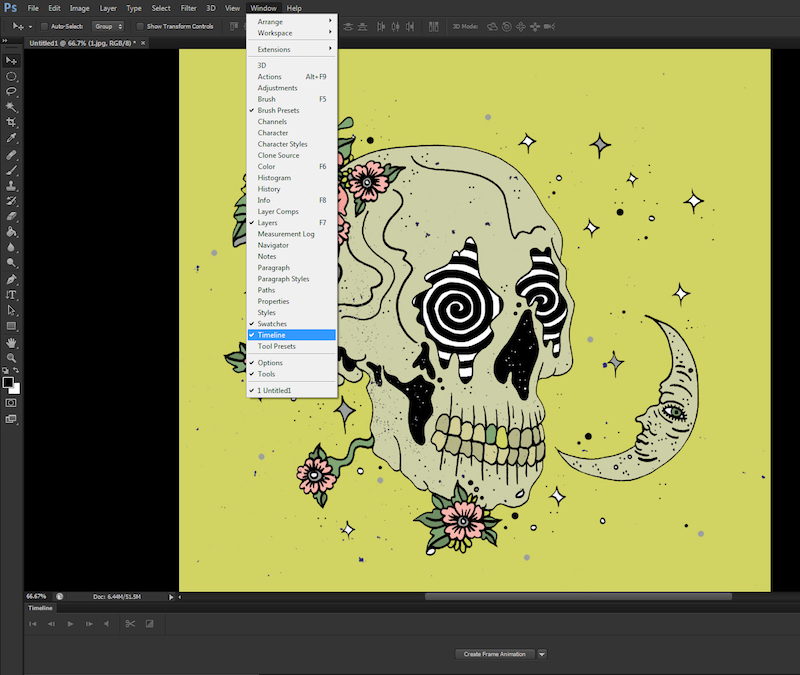
You can animate virtually anything, but I recommend picking something simple to start with. If you have complex artwork, choose one element you think you could animate well. I’ve chosen this skull design and I’m going to focus on animating the eyes.
The spirals I’ll be animating were created separately, so I’ll pull them into this canvas on the next step.

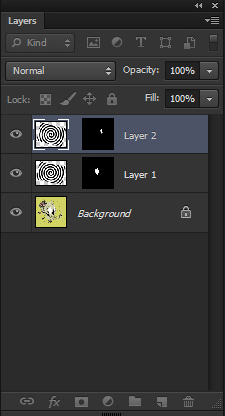
3. Keep the elements you want to animate on separate layers
This is important so you only affect the elements you wish to animate. In the case of my spiral eyes, I need to be able to rotate the spirals without rotating the entire image.
Building from the same image, I will rotate each spiral layer turning slightly until I make a full rotation.
4. Create a folder to save each frame you create
As we begin animating, you’ll want to save and organize each frame individually. Create a folder for all of your individually created frames to live. Every time I (slightly) change the rotation of the spiral eyes, I’m going to save the image as a new JPG.
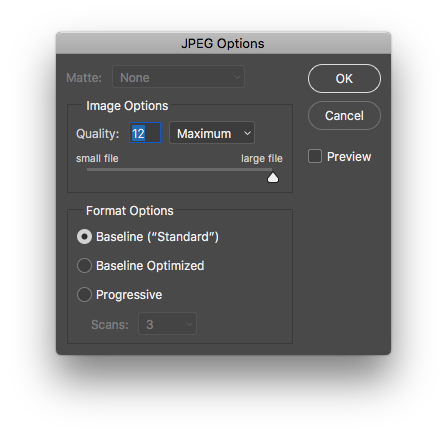
5. Save your first frame as a “Maximum” quality JPG
This first image will be your base image. Save it as a JPG with “Maximum” quality. Everything you create from here on out will need to be saved the same way, and with the same pixel dimensions. For me, that’s 1500 x 1500 pixels. Every image you save from here on out needs to be the same size as your base image.
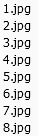
TIP: Save and name your images in sequence. For example, 1.jpg, 2.jpg, 3.jpg, etc.
6. Start animating! Reposition, rotate or resize any elements you wish to put in motion
You’re now going to create motion by slightly repositioning, resizing, or rotating elements of your artwork, frame by frame. Repeat this process as many times as necessary. By the end of this step, you should have eight JPG files saved into the folder we created in step four. If you flip through all the images you’ve created in this step, it should feel like a fluid animation.
For this example, I’m going to slightly rotate the spirals about 1/8th of the way around and save my image. Then I’m going to repeat this process seven more times. Each time, rotating the spirals a little more.
We want the 8th frame to animate fluidly into the 1st frame. So, my last frame needs to be one rotation away from the position of my spirals in the first frame.
7. Create and edit your GIF Timeline
Now that you have your sequence of images saved, we can compile them. This part gets a little meaty, but we’re almost done!
7a. Load your layers:
After you have all your individual images saved, you are ready to load each image as it’s own layer in Photoshop.
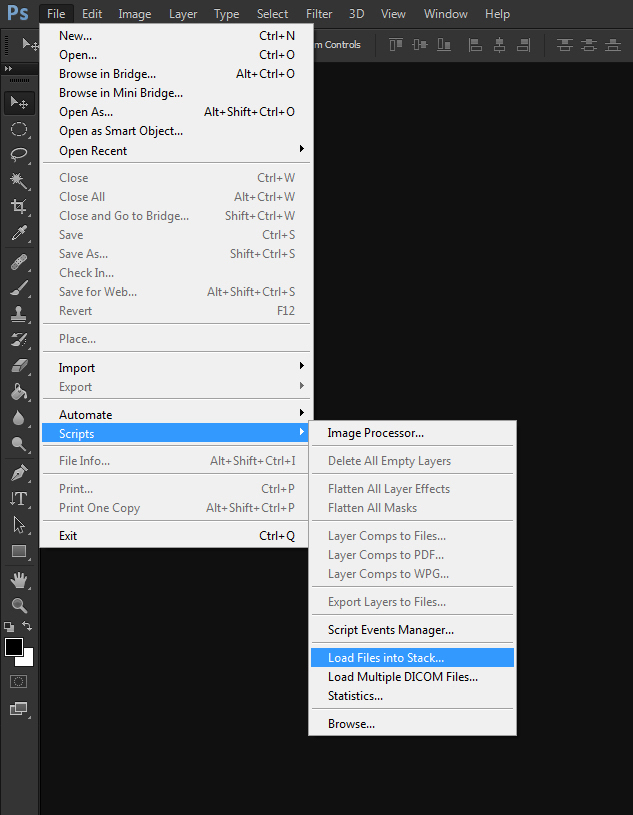
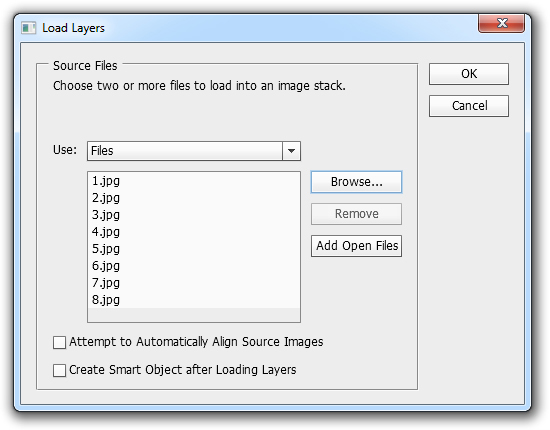
Click FILE > SCRIPTS > LOAD FILES INTO STACK. Then select > BROWSE and choose the images you’ve created for your GIF. Click > OK.
7b. Create each frame of your GIF:
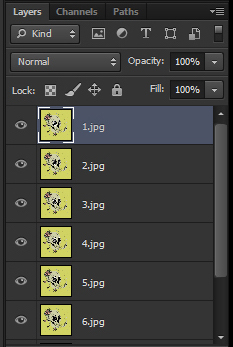
Each image in your stacked file will be a different layer. To add a new layer, go to the navigation menu up top and select LAYER > NEW > LAYER. Your individual files should automatically populate as layers.
7c. Open a Timeline:
Go up to the navigation menu on top and choose WINDOW > TIMELINE
The timeline window should appear at the bottom of your screen.
When that pops up, in the Timeline window, click on > CREATE FRAME ANIMATION.

click on > CREATE FRAME ANIMATION
7d. Create New Layer for each frame
Select all your layers by going to the navigation menu up top and choosing > SELECT > ALL LAYERS. Click on the menu that appears and choose > CREATE NEW LAYER FOR EACH NEW FRAME.
The menu button is easy to miss. It’s in the upper right corner of your Timeline. The little icon that looks like notebook paper.

See menu button in upper right corner of your Timeline window.
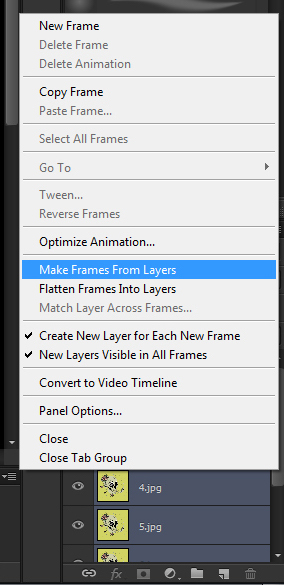
7e. Make Frames from Layers:
Open the same menu icon under your layers tab and choose > MAKE FRAMES FROM LAYERS. This will make each layer a frame in your Timeline.
7f. Adjust length of individual frames:
Under each of your frames, you can adjust the length of time each frame will appear. If you click the little down arrow, you’ll have several options. For this GIF I made the length of each frame 0.1 sec.

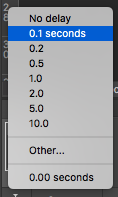
Selecting length of time you wish an individual frame to play.
7g. Adjust the number of times the GIF should loop.
At the bottom of the toolbar, you can select how many times you want the GIF to repeat. It’s most common for artists to choose “Forever”.

How many times should the GIF automatically play?

Most artists choose "Forever".
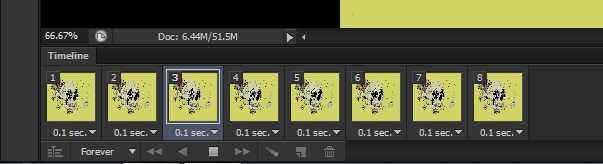
0.1 seconds for each frame, repeating forever
7h. Press > PLAY icon to preview!
8. Export your animation as a GIF, then MP4 (in that order)
Your .GIF file can be used in most places except Instagram. So, once you have a working GIF file, we’ll export an .MP4 video file. It’s important to export in that order. You’ll see why shortly.
8a. Save animated GIF to use it online:
Go to navigation menu at top. Click > FILE > EXPORT > SAVE FOR WEB (LEGACY)…
If you have an image with a lot of color gradients, make sure your “Dither” is set to 100% (it prevents banding). I used primarily solid colors in this design, so I’m going set my Dither to 0%.
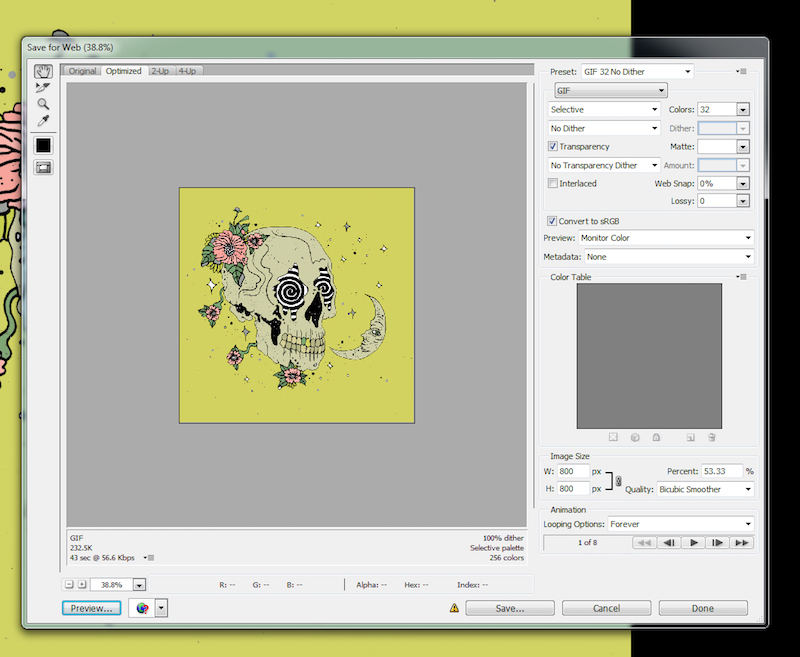
Any variety of changes to your export settings will impact the quality of your GIF. If you need a smaller file size, start scaling back the size of your final image or number of colors.
As you discover restrictions on file size for your GIF, depending on where you’re uploading, you’ll experiment with settings until you achieve the highest quality possible with the lowest file size.
When you’re happy with your settings, click > Save.
8b. Save as MP4 (required for Instagram):
!! IMPORTANT !!
If you export your eight frames as a video, you will only create a video that is .8 seconds long. Instagram videos require at least 3 seconds in length on a video for it to be uploaded. You can add length to your video from Photoshop by highlighting the eight frames of animation and duplicating them several times. In my case, I would duplicate at least 4 times.
To duplicate frames to your timeline, click on the first frame, hold down Shift on the keyboard and then click last frame. After all the frames are highlighted click the “Duplicate selected frames” button. Click this as many times as needed.


Here’s the math. If each frame is .1 seconds, you’ll need 10 frames for 1 second of video. If you want 3 seconds of video (which is what we need), you’ll need at least 30 frames at .1 seconds in length. I’m duplicating eight frames four times. That gives me 32 frames at .1 seconds long. My exported video will be 3.2 seconds long. Perfect for Instagram.
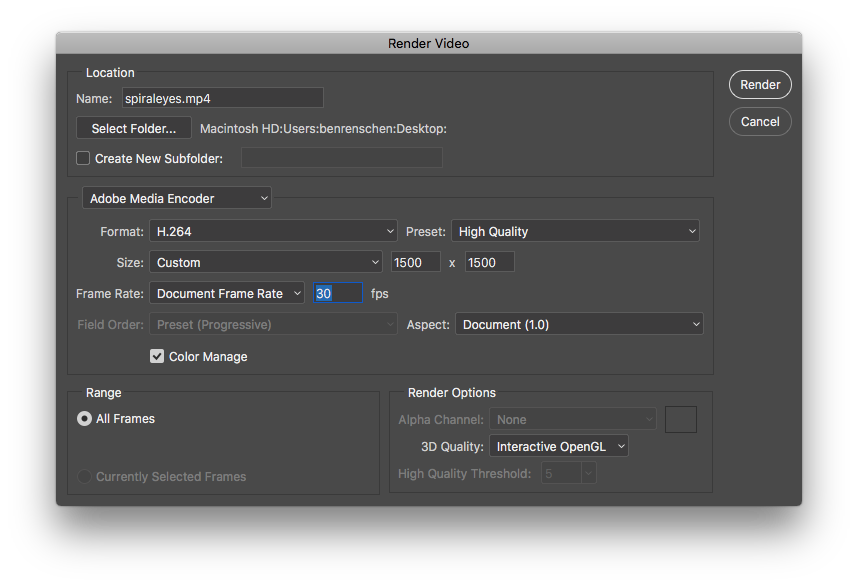
Once you’ve duplicated your frames for an MP4 export, use the navigation menu and go to > File > Export > Render Video…
Make sure the video size is square and save. Once it’s saved, you can text or email yourself the video file and save to your camera roll (so you can upload to Instagram).
There you have it! Upload your animated GIF online and it should play out seamlessly. Now that you’re an expert, you can explore countless other tools and applications to animate something as unique as you and your work.
The GIF train is an endless platform for creative locomotion.
Get on board, be you, and watch your traffic grow.
Now get moving!
Comments