Update alert! Our new Artist Studio is live and ready for you to explore.
We’ve heard your feedback and are thrilled to announce a revamped version of Artist Studio! Our new tools now make uploading, editing, and managing your business on Society6 easier. The completely redesigned interface features a modern, streamlined look and feel, making it easier than ever to find the resources you need. We’ve also transformed the uploading experience with clearer instructions and a more logical process, simplifying how you get your art online. Our enhanced design tools now include intuitive tagging features for better design categorization, helping your work reach the right audiences. We also improved earnings and analytics dashboards so you can track your sales through a more visual layout and gain deeper insights into your performance. Plus, there’s more to come! This release marks just the beginning – we have additional features planned in the coming months to make your experience even better.
Keep reading below to explore what’s new.
All-New Artist Studio Dashboard
When navigating to your Artist Studio, you’ll now land on a ‘Home’ dashboard called the Artist Studio Dashboard. Your new homepage shows highlights from your shop and key info including:
- Important announcements
- Our latest blog posts
- A section to complete your account set up if you haven’t already (we highly recommend you do this now!)
- A snapshot of your analytics from the past 30 days (for Pro Plan artists only)
- Information about the Affiliate Program (if you’re enrolled your link can be found and copied from here and if not, you can sign up by clicking “Apply to Join”)
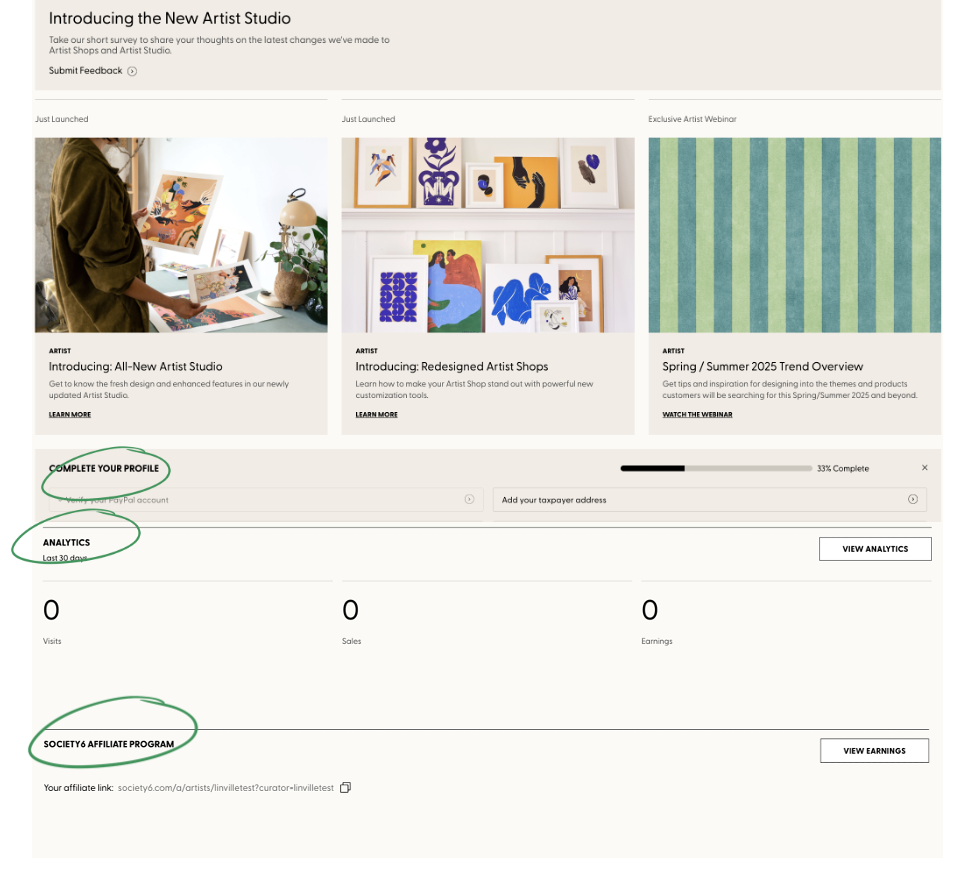
Example of some key sections featured in your all-new Artist Studio Dashboard.
Uploading
We’ve completely redesigned the upload flow with clearer instructions, better design categorization tags, and a more logical overall process. To upload, you can click the “Upload New Design” button located at the top right corner of your Artist Studio Dashboard or at the top right corner of your “Designs” tab. You’ll then be taken to a page where you can begin to upload artwork files. Here’s what’s new on this page:
- We combined the uploading flow onto one page instead of breaking it up into a pop-up and a secondary page, allowing you to view all of the details required to upload your design in one place
- Added informational text and tips & tricks to guide you through the uploading process
- Uploading limited to 3 files at a time
- Additional design detail sections that reflect the filters customers now have available to them as they shop – adding relevant details in this section will help customers find what they’re looking for
- Adding a description for your design is now required but limited to 1000 characters – the description is intended to provide customers with more details about your inspiration, artwork subject matter, or process but does not need to repeat the keywords you’ve already included in the design detail section
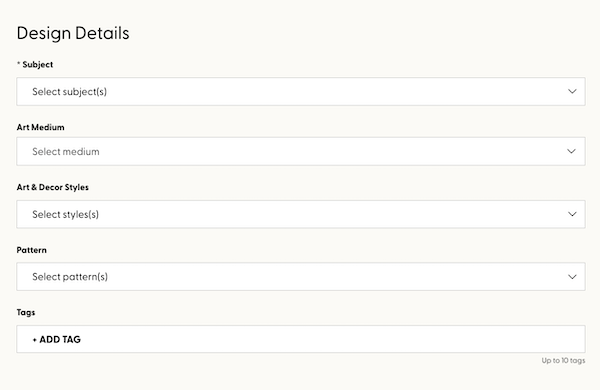
Additional design detail fields included in the new uploading process.
Once you’ve completed uploading your design, click on “Save and Add Products” at the bottom of the page. This will take you to the design detail page where you can then toggle over to “Products” to view and edit the products that are available on that particular design. In the new Artist Studio, this products tab within a design page is where you’ll be able to do all product editing as there is no longer a specific “Products” section within Artist Studio.
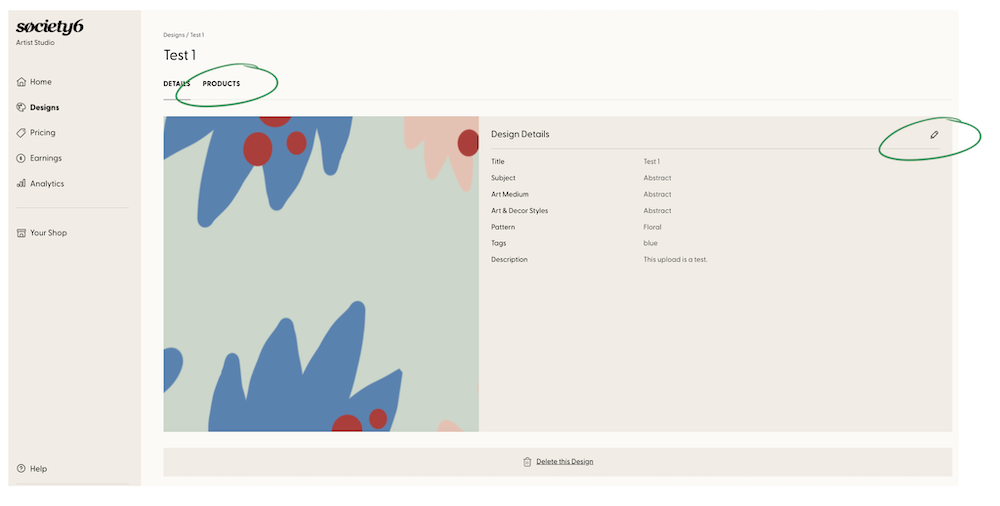
Example of the design detail page you'll be routed to after uploading. From this page, you can edit the information about the design using the pencil icon or navigate to the "Products" tab to view and edit products for the design.
Under the “Products” tab of a design detail page, you can also access the on-site link of an enabled product by clicking on the icon to the right of the pencil on an enabled product.
Icon used to navigate to the on-site product page of an enabled product.
We’ve also streamlined the product editing experience based on your feedback. This can be accessed by clicking on the “Products” tab within a design and then clicking on the pencil icon of any product you’d like to edit. Once you’re on the editing page, you’ll see that we’ve consolidated multiple pages into the editor. On the right hand column, you’re able to toggle through the following: “Tools” which allows you to adjust the scale and placement of your asset, “Files” which allows you to upload additional files and allows you to select from the files you already have uploaded for the design you’re editing, and “Preview” which displays product previews. As you use the editor, be sure to click the “Save” button at the top of the page whenever you make changes. On this same editing page, you’ll also see that there is a list of products on the left hand column as well as a drop down menu that allows you to select the category of products shown in the column. This new column allows you to go through the list of products available and enable or adjust them more easily, reducing the time and clicks required to set your products live in your shop.
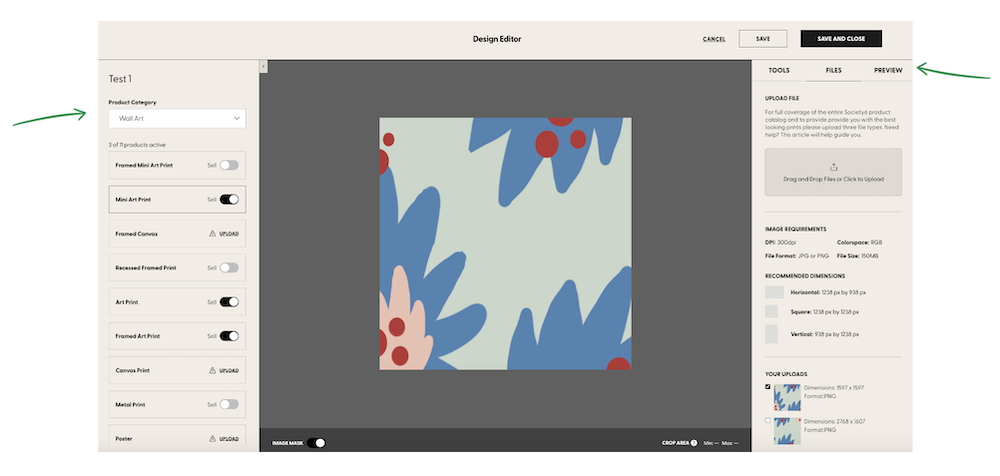
Important sections of the Design Editor page that allow you to easily edit and enable products.
Pricing
The pricing section of your Artist Studio remains fairly similar to the previous version with some minor adjustments. You are still able to adjust prices either by product or by design. Under the “Product Pricing” section, you can click on the “Change Markup” button at the top right to adjust your prices if you are enrolled in a Pro or Basic plan. On the “Design Pricing” tab, Pro and Basic artists can adjust their pricing by clicking “Change Pricing” in the right hand column next to each design.

Buttons to change markups in the "Product Pricing" and "Design Pricing" tabs of your pricing dashboard.
In the “Design Pricing” tab, you’ll also now be able to see if you have custom (design specific) markups or sitewide (product based) markups applied. This information is in the “markup” column.
Earnings
We’re especially excited about the updates to the earnings section as we’ve completely revamped it by providing a more visual layout and additional information. At the top of the page, you’ll now see a “Sales Summary” that provides a snapshot of your earnings. This section defaults to showing “all time” data but you can also use the dropdown menu to adjust the timeframe of information shown in the summary. In this section, you can also view a summary of all of your sales, or adjust to show just Society6, wholesale, or affiliate earnings.

Sections that can be used to filter the information shown in your Sale Summary.
Under the summary section, you’ll find another section that shows more in-depth sales information. Here’s what’s new in this section:
- Additional filtering options: You can filter by time frame, sale type (Society6, wholesale, or affiliate), and status (pending, cleared, or paid)
- New visual aids: At the top of this section you’ll see two graphs – one showing the breakdown of your sales channels and the other showing the status of your earnings. We’ve also added a thumbnail product image next to each sale.
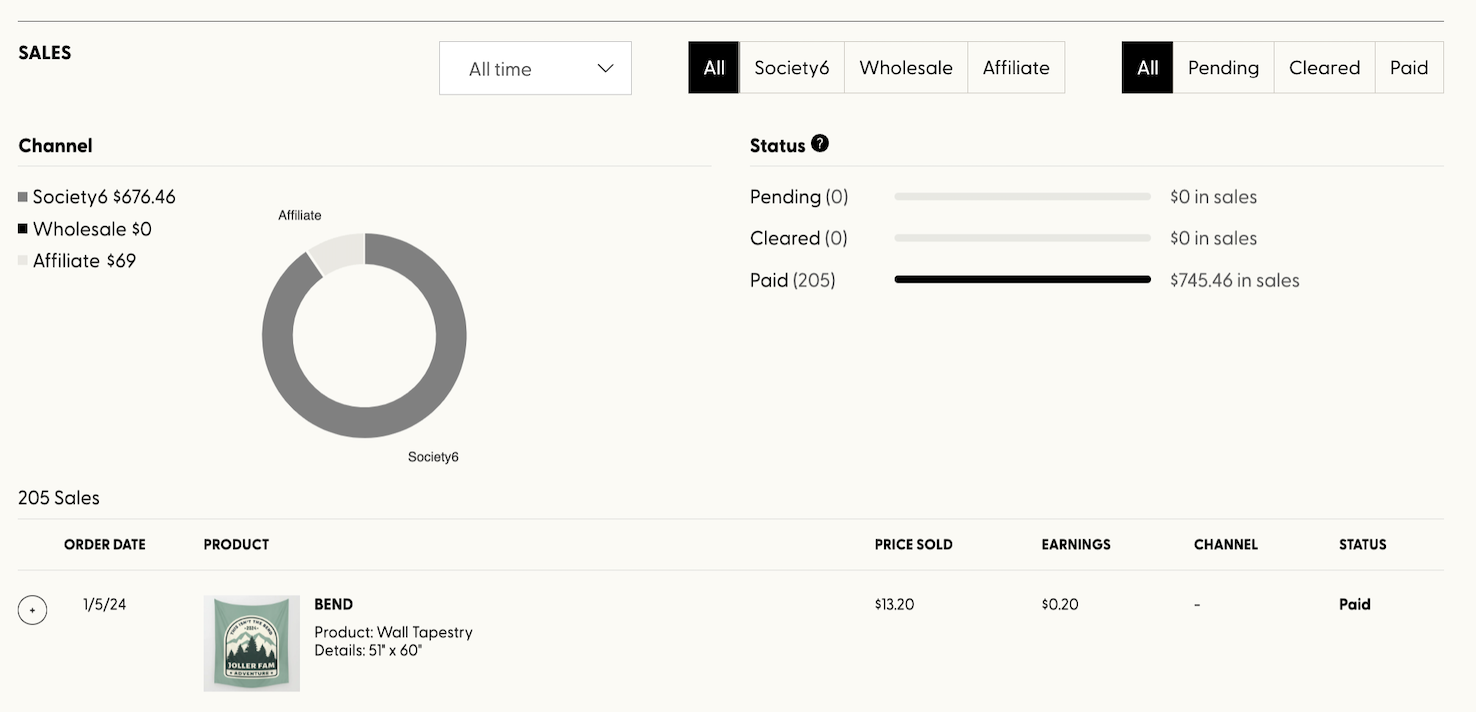
More detailed sales section showing visuals and new filtering options.
Analytics
If you are enrolled in the Pro Plan, you’ll be able to view the revamped analytics section. At the top of the page, you can view your “Shop Stats,” which shows your shop visits, sales, and earnings. Beneath the status section, you’ll also find three different tables – one displaying your top selling items (top product and design pairings), top selling designs, and top selling products. Each of these tables includes columns that show number of views, sales, and earnings. Your analytics data can be further filtered by time frame or channel, similar to your earnings section. If you’re not already enrolled in the Pro Plan and want to have access to your shop analytics, upgrade your plan here.