What is surface design and how do you do it? This guide will help you create products your customers can’t ignore.
There’s two main approaches to surface design. (1) Create art and figure out how to make it look good on a product’s surface. This is at the core of Society6. (2) Create designs for specific products, which is an evolution of #1. This is often the life of a pattern designer. Whichever is your approach, this article is relevant to you.
In this article, I’ll walk through everything artists and designers should consider before diving into surface design.
For starters, what is “surface design”?
Surface design is the creation or application of artwork specifically for printable product surfaces–often times for products that don’t physically exist. Via a creative marketplace like Society6, artists can generate mockups (images) of these products and promote the sale of products (featuring their designs) with zero inventory. When customers purchase, the product is printed and shipped on the artist’s behalf, and every purchase pays an artist.
Artwork: White Stone by Elisabeth Fredriksson
To create some context, artists and surface designers hold a lot of power. They’re in control of product surfaces that customers expect a lot from. That expectation comes with responsibility in the design process. Our goal is to help you optimize the product surface you’re designing for. We don’t take for granted that this process can take time, but your best shot at earning sales is to consider customers long before they ever see one of your products. So…
How do you design the perfect product?
The answer is easy: design with intent. You’re better off enabling five well-designed products in your artist shop than 50 poor ones. “Quality over quantity” is the single mantra that you will benefit from the most, and it starts with the pixel dimensions and resolution of the first digital file you work in. This list below is a look at practical advice to help you create products your customers will proud to buy.
1. Design with a few products in mind
The better, funnier or more thoughtful you are on a product level, the more likely a customer is to purchase. While you can enable as many products as you want, your top priority should be to have a great selection of specific products that really stand out. You’ll build trust with your customer as a reputable shop this way. Even better, you’re known for having great [insert product]. What you want to avoid is forcing your customers to get lost in your shop with mixed quality. Help them focus on the best of the best. It all starts with the products you choose to design and enable.
Here’s some good questions to answer before you start designing and enabling products:
- Where does it get used?
- How does it get used?
- How big is the product?
- Why do people buy this product?
- Is it for a home, office or outdoors?
- Are other people beyond the owner who will interact with this product?
- Is it something people are going to brag about?
2. Just say no to upsampling (a.k.a. scaling up)
Start every project with a digital canvas that has the pixel dimensions and a PPI you intend to be your final output. You want to work towards creating a “master” file–a digital version of your artwork worthy of archiving. Everything after this file will inevitably be smaller. The idea is that you can always downsize, but you can’t up-sample without losing quality. Loss of quality leads to customer returns. In fact, you never want to up-sample artwork to fit a larger product. The larger the product, the more visible pixelation and design flaws are.
For example, a design that looks great on a small throw pillow (13in x 13in) might not look good on a comforter (79in x 79in) or a large wall tapestry (88in x 104in).
PRO TIP: Make the shortest side of any master file you’re working in 10,000px. Set your pixels per inch to 300ppi. This is a great place to start. On Society6, as you work through products you wish to sell, you’ll quickly iron out your needs from there. Here’s our list of required pixel dimensions for all products.
Guides to digitizing your physical mediums:
- How to Photograph Your Artwork for Printing on Society6 Products
- How to Scan Your Artwork for Printing on Society6 Products
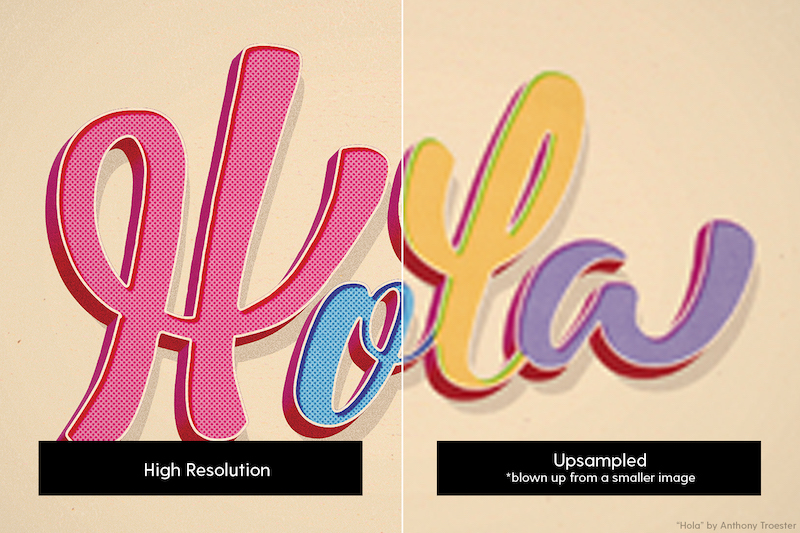
Left: High resolution artwork. Right: Incorrectly upsampled from a smaller or rasterized artwork.
3. Modify artwork for specific products
Just like a good photograph, composition matters. Identify creative ways to leverage your same creative across multiple product surfaces. You want your customer to see that your product was clearly created with intention. Even if you apply a floral pattern to a throw pillow, are the best flowers in that pattern visible? The point of this consideration is to make sure you don’t haphazardly apply artwork when enabling products–and miss the sale.
PRO TIP: If you can standardize how you approach specific products, you’ll create a consistent look across a product type in your artist shop. That consistency is eye candy for customers.
Some important considerations when composing artwork on products:
- Scale of design relative to size of product
- Give space around floating artwork or typography
- Rotate artwork relative to how a product gets used
- Critical elements of a design should be clearly visible
- Use templates when necessary
- Make sure your product looks good on it’s product page

"Explore" by Landon Sheely
4. Prepare file variations ahead of time
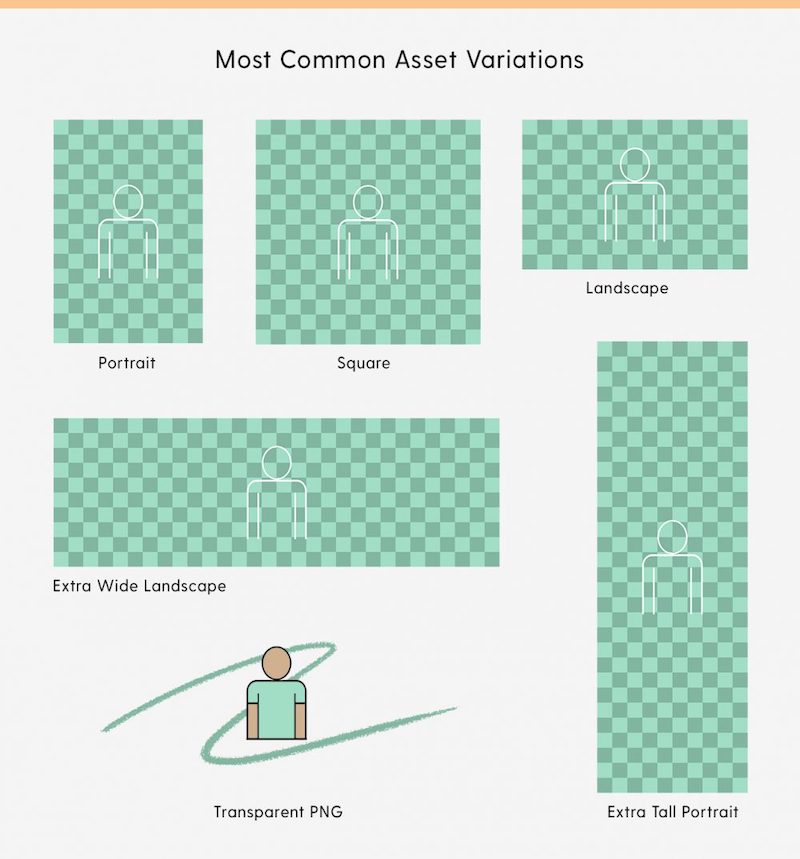
With a square, portrait and landscape version of your creative, you can activate over 80% of products on Society6. This tip goes beyond ratios though. The assets you create will be dictated by the products you wish to sell. Start by figuring out what products you want to sell, then you can make a habit out of preparing asset variations. Coffee mugs and beach towels, for example, require an extra wide landscape version of your creative. Further, these two products have very different uses, which means that although the ratio is similar, the creative may vary.
*This doesn’t apply to the more complex products requiring use of a template.
Common creative asset ratios:
- Square
- Portrait
- Landscape
- Extra Wide Landscape ~ 1:2.5
- Extra Tall Portrait ~ 2.85:1 *only applies to yoga mats
- Transparent PNG
5. Apply your most popular creative to new products
This one is for your own sanity. The idea here is to keep the workload of launching new products in your shop tolerable. On top of that, you want to double down on what is already working with customers. Start by retrofitting your most popular designs to the surfaces of new products. If you see customers really start to gravitate towards a given product within your shop, then you should start adding more of that product to your shop by expanding the designs you offer.
6. Review popular selling products
This is a pretty simple one and helps you draw your own conclusions beyond the recommendations in this article. We usually have a pretty good sense of what’s popular and why, but every now and again a trend will sneak up on us and become a runaway hit. With that being the case, we always recommend you to do a little bit of research on the product you’re designing for.
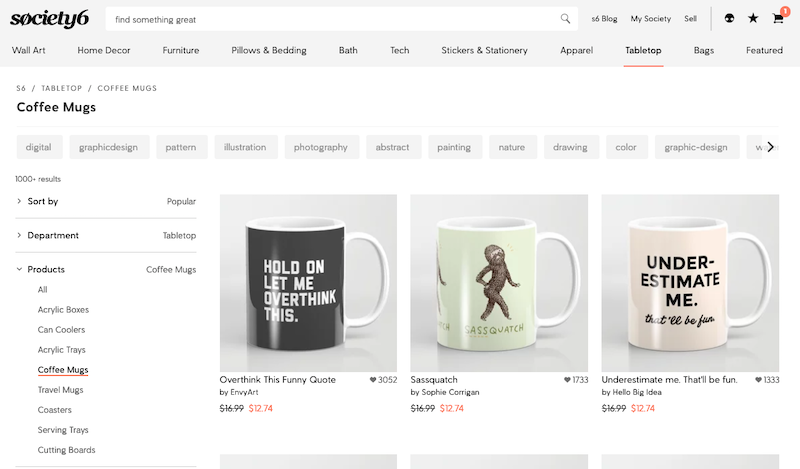
Review popular product pages to get a sense of what is working with other artists' customers.
7. Finally, break all the rules and just have fun
This probably needs no explanation, but the best stuff comes from the truest place of being an artist–creating for the sake of creating. Our whole team would acknowledge and support that. All of the advice above is intended to move you in the right direction, but certainly isn’t the end all, be all. Explore, create, fail and double down when something works well. We’re in a constant state of awe with this community we’ve been proud to grow.
We look forward to seeing what you create. Feel free to start a conversation in the comments below!
Comments