As an artist on Society6, paying attention to the little details while placing your artwork on our product preview images can be the difference between making or losing a sale. Something we get asked quite often is “Should I save my file as a JPG or PNG?”.
Our uploader will accept both JPG & PNG files and there are a few things to consider when deciding which to use for your products. In this article, we will break down the differences between the two file types and discuss best practices for choosing which one will work best for your needs.
What’s the difference?
JPG and PNG are the two most commonly used file formats on the web. To understand the important differences between them, let’s look at their individual attributes and how they apply to your images.
JPG: When you save a file in JPG format, it creates a compressed image in a small file size. JPG images were designed to make detailed photographic images as small as possible by removing information that the human eye won’t notice.
- JPG uses a “lossy” compression process to compress images for more convenient storage and sending. This makes JPEGs generally smaller than PNGs, but it does mean sacrificing some of the original image quality. The more times you edit and save your file, the more quality you will lose.
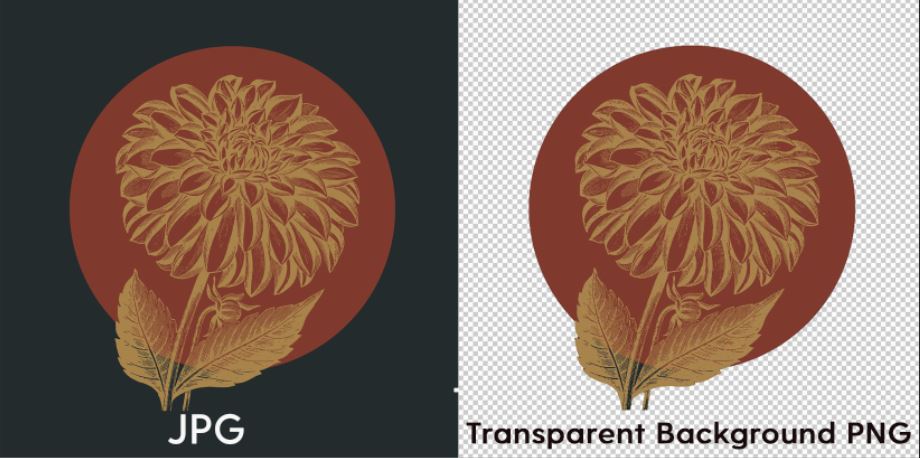
- JPG does not support transparency in images
- Because of their smaller size, jpegs tend to offer faster uploading
PNG: PNG is a good choice for storing line drawings, text, and iconic graphics at a small file size. Unlike JPGs, which create a heavily compressed file and may blur images at a certain point, a PNG file will always look at least as sharp as the original image because of its “lossless” compression process.
- PNG supports transparency in images.
- PNG files benefit from lossless compression. This means no data is lost when the image is compressed — the quality stays the same no matter how many times you edit and save the file.
- These files do not undergo heavy compression so they tend to be significantly bigger than JPGs
Which one should I choose?
When talking JPG vs PNG and comparing the two side by side, the truth is that you usually won’t be able to see much of a difference in the quality of your design. Since both JPG and PNG format have their pros and cons, you should get the most out of both of them and play to their strengths.
Using JPG:
Traditionally, it’s recommended to store your files as JPG for photographs or digital images that do not contain clean edges and lines as they will lose some of their sharpness in the compression. For the artist with hundreds of designs that do not need transparent backgrounds and aren’t made up of fine line artworks, JPG will be your best choice as the smaller file sizes will offer faster uploading and less storage space being used on your computer/cloud.
Note: As long as you are starting with a high resolution file, saving your image as a JPG should not cause a noticeable amount of quality loss. JPG should be your first choice for uploading simple designs.
Using PNG:
It’s a common practice for our advanced artists to use PNGs with transparent backgrounds for apparel items or any product where you’re using a cut-out of an image or a logo. The image background will instead take on the color of the item’s material.
For Apparel –
Use a PNG when uploading images for apparel items if you plan on offering both dark and light garments. Because we lay down a white ink underbase, any white in your design will print. Remove the background from your file and save with transparency as needed.
For Stickers –
If you want to offer stickers that take the shape of your design instead of being a square cutout by default, you can use a transparent PNG to achieve this.
For everything else –
Because of the lossless compression format we discussed earlier, if you’re designing line drawings, detailed graphics, illustrations or text, PNG will keep your detailed images looking sharp once printed on our products.
Pro tip: Be sure to check your previews after you upload a new artwork. While editing your products, click on the “Generate Preview” button to see what your customers will see while shopping your products.
Design with transparent background (PNG)
Artwork with background applied (JPG)
Summary
Ultimately, you want to be sure you’re using the best file format to display your assets on products. There will be instances where you’ll want to create a custom asset to optimize a product, but with a high resolution and clean digital version of your artwork to begin with, you’re setting yourself up for success…and sales.
Comments